Carving a pumpkin is one of the most fun ways to celebrate the fall season, but keeping it fresh can be a challenge. Knowing how to preserve a pumpkin carving ensures your jack-o’-lantern stays free from mold or decay for as long as possible.
With the right techniques, you can enjoy a carved pumpkin on your porch or entryway throughout Halloween without worrying about it softening or rotting too soon. Similar steps will also help you preserve whole pumpkins that you use for decorating.
Cleaning your pumpkin thoroughly before carving is the first step. Then, a bleach soak, a thin coat of petroleum jelly or vegetable oil, and proper storage are simple ways to slow down pumpkin rotting.
Keep reading for practical tips to make your pumpkin carving last longer.

Some of the links below are affiliate links. I earn a small commission, at no additional cost to you, if you purchase through an affiliate link.
Why do carved pumpkins rot?

Understanding why carved pumpkins rot is the first step to preserving carved pumpkins and minimizing mold, dehydration, and insect damage. Some of the main causes of pumpkin rot are these:
- Broken outer skin: Carving removes the pumpkin’s natural barrier, exposing the soft interior.
- Bacteria and fungi: Microorganisms enter through the pumpkin carving cuts, accelerating decay.
- Insects and wildlife: Squirrels, birds, and other animals are attracted to the smell of the exposed flesh.
- Oxygen, dust, and moisture: Openings allow air and particles inside the pumpkin, speeding decomposition.
- Heat and sunlight: Warm temperatures and direct sunlight promote mold growth.
- Dehydration from cold or air exposure: Pumpkins lose moisture, shrivel, and soften over time.
The image below shows how long carved pumpkins and whole pumpkins, including heirloom pumpkins and knuckehead varieties, typically last under normal conditions.
As you can see, even uncarved pumpkins will also rot if left in the sun or in extreme temperatures, but the process is much slower than with a carved pumpkin.

How to preserve a pumpkin carving
Knowing that a carved pumpkin only lasts up to a week in normal conditions is frustrating. Should you just discard the idea of carving and go for uncarved or painted pumpkin designs?
Fortunately for pumpkin carvers, there are several things that you can do when it comes to preserving carved pumpkins to delay the rotting process.
Choose a fresh pumpkin
Preventing rot in a carved pumpkin starts before you pick up a knife. Selecting a fresh, firm pumpkin gives you a head start in preventing decay.
- Firmness: Choose a pumpkin with hard skin and bright color.
- Buy locally or grow your own: Freshly harvested pumpkins last longer than those shipped long distances. Locally grown or homegrown pumpkins are often healthier and better suited for carving.
- Choose the shape wisely: A thick-skinned pumpkin with minimal nooks and crannies will resist rot better after carving.
Some telltale signs of a pumpkin that is older and may rot quickly:
- Smells or odors: This means that the pumpkin is rotten inside the skin.
- A dry, brittle stem: Choose one that is green and fresh and about 3-4 inches long (it’ll be easy to hold when carving).
- Soft spots or bruises: This may also mean that the pumpkin has already started rotting.
Starting with a healthy pumpkin reduces the risk of early decay and improves the effectiveness of cleaning, preservation, and storage methods.

Clean the pumpkin before carving
The first, and most important, step to slowing down decay is to clean your pumpkin before you carve it. By starting with a clean pumpin, you reduce the risk of premature rotting.
- Rinse off dirt: Use cool running water to remove soil and debris from the pumpkin’s surface.
- Scrub gently: Use a soft brush or cloth to clean areas around the stem and base. Avoid damaging the skin.
- Sterilize the exterior (optional but recommended): Wipe the pumpkin with a vinegar-water mix to kill surface bacteria and fungi.
- Dry thoroughly: Make sure the pumpkin is completely dry before you start to carve it. Moisture left on the surface can encourage mold growth.

How to preserve a pumpkin carving using bleach
Bleach is an antibacterial product that slows down decomposition in cut pumpkins.
Rub the inside of your design with bleach to deter the growth of mold. Leave it for 30 minutes and then rub the inside with a dry cloth.
Instead of a manual application of bleach, you can use a bleach water bath. To do this, rinse your carved pumpkin with water. Get a bucket large enough to hold your pumpkin and mix 1 tablespoon of bleach for each quart of water you use.
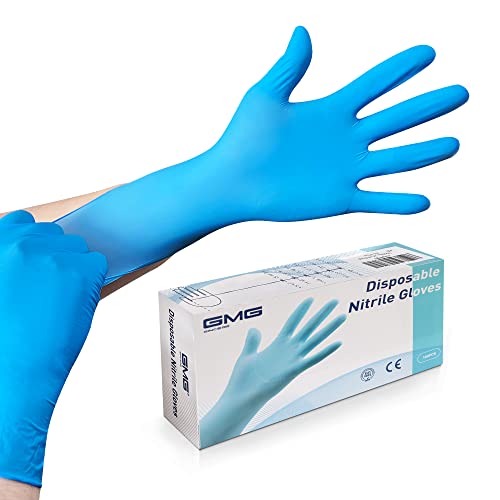
Use gloves to protect your hands. Hold the pumpkin under the surface of the water and let it soak for 2 minutes.
Remove it from the bucket and allow it to air dry.
The bleach method is best for keeping carved pumpkins from rotting indoors rather than outside to protect wildlife.

Use a pumpkin preserve spray
You can make a DIY pumpkin bleach and water spray by combining 2 tablespoons of bleach with 2 quarts of water in a spray bottle.
Mix well and add the product to a spray bottle (Be sure to label the bottle for safety since the liquid in it is clear.)
Spray your carved pumpkin every night to continue the antifungal and antibacterial effects of the bleach and water soak, and to help prolong your carved pumpkin’s life.

An alternative to a bleach soak to preserve jack-o’-lanterns
Some of the suggested tips for how to make carved pumpkins last longer involve products that can be harmful to wildlife, particularly birds and squirrels, who love to eat pumpkins. Since bleach is toxic to all animals, it should also not be used when you have curious pets who like the taste of pumpkin.
Since I am always interested in environmental issues, I like to have safer alternatives for harmful products at my fingertips when trying to preserve pumpkins.
An environmentally-friendly option is to use white vinegar and water as your soaking liquid. White vinegar is an antibacterial and antifungal agent, and a mold inhibitor. It won’t slow down the rotting as much as bleach, but it is safer for wildlife and pets.
Use 1 part vinegar to 10 parts water for a soak, and straight vinegar to wipe down the insides of the flesh. Don’t use highly concentrated vinegar. Use a vinegar with 10% acidity.
White vinegar can be used in so many ways around the house, from keeping flowers fresh longer to killing weeds in your garden. It’s great that we can also use it for keeping pumpkins from rotting so quickly.
Peppermint essential oil to preserve a carved pumpkin
Peppermint is also considered an anti-fungal product and will slow the rotting process and extend the life of your pumpkin.
Peppermint essential oil leaves a pleasant smell and slows down mold, too. Mix 40 drops of the oil with 4 gallons of water and use this to soak your pumpkins.

How to preserve a pumpkin carving with petroleum jelly
After disinfecting the pumpkin with bleach and water, rub all of the cut surfaces with petroleum jelly to slow down the aging process.
Petroleum jelly is water-repellent, so using it seals in the natural moisture of the pumpkin while keeping the outside moisture away. This will also help to keep the cut areas of your design from drying out or shriveling.
Note: Petroleum jelly can be harmful to squirrels, who like its taste. Olive oil and other cooking oils do a similar job in a more natural and less harmful way.

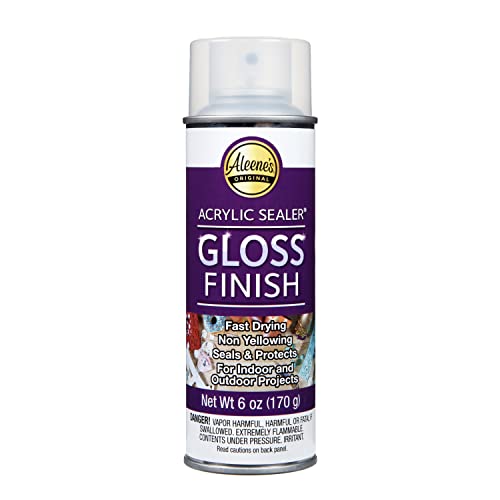
Clear acrylic spray
For an extra level of protection from bacteria and insects, you can spray your carved pumpkin with clear acrylic spray. This spray is available at craft stores, home improvement stores, and online.
Keep your carved pumpkin cool
Not all of us have room in a fridge to keep a carved pumpkin, but if you do, you’ll really add to the life of your design.
Remove the carved pumpkin when it is not on display and place it in the fridge, then take it out when you want to show it off. The cold temperatures will slow down the decay and allow you to enjoy your carving for many extra days.
If you don’t have room in the fridge, these are some other good storage locations:
- Indoors during hot days or nights below freezing: Place pumpkins in a cool room, garage, or basement away from direct sunlight.
- Shaded porches or entryways: If kept outside, make sure the pumpkin is in a shaded area to avoid heat and sun exposure.
- Off the ground: Use a board, tray, or shelf to reduce moisture contact and prevent bugs or mold from creeping in.
- Well-ventilated areas: Good airflow prevents moisture buildup, which reduces mold growth.
Storing your pumpkin in these conditions can add several days to its lifespan and preserve jack-o’-lanterns, keeping them looking fresh longer.
Don’t use candles in carved pumpkins
Carved pumpkin designs show off more beautifully when the pumpkin is lit from within. Unfortunately, this also produces heat, requires a chimney hole to be cut into the design, and speeds up the rotting process. Open flames can also cause fires.
Instead of real candles, use battery-operated LED lights inside the pumpkin. Some other good options are LED light sticks and flameless candles.
Tips for keeping uncarved pumpkins fresh
Although whole pumpkins keep longer than carved ones, they still need a few steps to keep them fresh when used in decorations.
- Keep in a cool, dry place, away from direct sunlight.
- Avoid stacking or crowding to prevent bruising.
- Check the pumpkins regularly and remove any that show mold or soft spots.
- Optionally, apply a thin layer of vegetable oil or petroleum jelly to slow moisture loss.
- Bring the pumpkins indoors during extreme temperatures, either hot or freezing.
- Spray WD-40 all over the surface. It will repel outside moisture and keep the pumpkins fresh longer.
What do I do with pumpkins after Halloween?
Once Halloween is over, your pumpkins don’t have to go to waste. You can add the pumpkins to a compost pile instead. Not only will you be helping to keep the landfills down, but you’ll also be contributing to making fertilizer for your garden beds next year!
Tip: Be sure that every seed has been scraped out of the inside of your pumpkin before you add it to a compost pile. Otherwise, you might end up growing a patch of new pumpkins in your compost.
You can also use the flesh of your carved pumpkins in soups or baked goods, or freeze the pumpkin puree for later use.
Remove any moldy or soft spots first to help ensure they’re safe to eat or compost. Don’t use pumpkins that have had bleach or petroleum jelly on them for recipes.

Share this guide for how to preserve pumpkins on X
If you enjoyed learning how to preserve a carved pumpkin, why not share this guide with a friend? Here is a post to get you started:
🎃 Do you want your jack-o’-lantern to last all Halloween? Learn how to preserve a pumpkin carving & how to keep whole pumpkins fresh too! Head to The Gardening Cook for tips.🍂✨#PumpkinCarving #HalloweenTips #JackOLantern… Share on XPin this post for how to keep pumpkins from rotting
Would you like a reminder of this post on how to make pumpkins last longer? Just pin this image to one of your Halloween boards on Pinterest so that you can easily find it later.

You can also watch our video on how to preserve a pumpkin carving on YouTube.
Admin note: This article about keeping pumpkins from rotting first appeared on the blog in October 2021. This post has been updated with new photos, a printable project card, and a slideshow video.
How to Preserve a Pumpkin Carving

Pumpkins carved into Jack O Lanterns are so much fun around the Halloween but those cuts into the skin makes a pumpkin start to rot very quickly.
Fortunately, there are some ways to slow down this process and make your Jack O Lantern carving last longer!
Materials
- Bleach (see note section)
- Petroleum jelly (see note section)
- Carved pumpkin
- Water - enough to cover your pumpkin completely
- Clear Acrylic Spray (optional)
- LED lights
Tools
- Bucket large enough to hold your carved pumpkin
- Pair of rubber gloves
Instructions
- Carve your pumpkin no more than 48 hours before you plan to display it.
- Use rubber gloves.
- Add 1 tablespoon of bleach to each quart of water and fill a bucket with enough of the mixture to cover the pumpkin.
- Hold the pumpkin in the water for 30 minutes. Allow it to dry.
- Coat all the cut edges of the design with petroleum jelly.
- Optional: Spray the design with a clear acrylic spray.
- Keep the pumpkin in the fridge or in a cold, dark room when not on display.
- Use LED lights instead of candles to light the Jack O'Lantern.
Notes
Natural alternative to bleach soak:1. 40 drops of peppermint essential oil to 4 gallons of water. 2. 1 part vinegar to 10 parts water.
Natural alternative to petroleum jelly: use olive oil.
Recommended Products
As an Amazon Associate and member of other affiliate programs, I earn from qualifying purchases.