
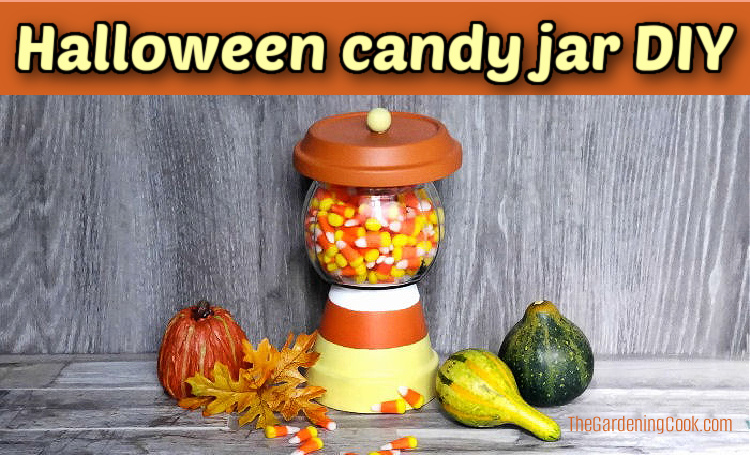
This adorable Halloween candy jar DIY is easy to make and adds a festive touch to your home. With just a few materials, you can transform a plain terracotta pot and saucer into a candy corn decoration that is perfect for parties or table displays.
This tutorial walks you through each step, from painting the pot in candy corn colors to securely attaching the lid on the top.
When you are done, you’ll have a charming, Halloween candy jar ready to hold your candy corn. Keep reading to learn how to make this fun clay pot craft.
Some of the links below are affiliate links. I earn a small commission, at no additional cost to you, if you purchase through an affiliate link.
Supplies for the painted terracotta pot candy jar
To make this easy Halloween table decor project, you’ll need the following supplies:

- 4 ½ inch clay pot
- 6 inch clay saucer
- Masking tape
- ¾ inch wooden ball
- Acrylic craft paint and brushes
- 6-inch glass jar with a screw lid
- Hot glue gun and glue sticks
- Candy corn
Note: Hot glue guns and heated glue can burn. Please use extreme caution when using a hot glue gun. Learn to use your tool properly before you start any project.
How to make this Halloween candy jar DIY
This fun fall candy jar is made to look like candy corn – everyone’s favorite Halloween candy. It will look really cute on your Halloween party table or as a part of a centerpiece for your Thanksgiving table.
Follow these steps to make one for your home.
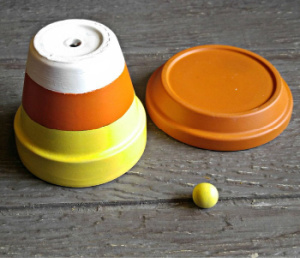
Painting the clay pots
Start by painting the clay pot – Masking tape method:
- Put masking tape around the pot about 1/3 up the body of the pot.
- Paint the bottom of the pot and the lower sides of the pot white. Allow it to dry.
- Remove the masking tape, discard it, and tape again 2/3 up the body of the pot.
- Paint the next area yellow, taking care not to paint into the white section. Allow the paint to dry.
- Remove the masking tape and discard it.
- Paint the top area orange on the sides and opening of the pot, taking care not to paint into the yellow area. Allow the paint to dry.
Note: If you have a steady hand, you can use a pencil to make your lines and a flat-edged brush. Carefully paint the stripes by hand. This is what I did, and it worked fine.
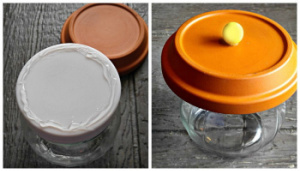
Paint the lid of the glass jar and the clay saucer orange to match the center stripe of the pot. Paint the wooden ball yellow to match the yellow on the top edge of the pot.
Allow the paint to dry.

Making the candy jar
When the paint has dried, you’ll make the candy holder.
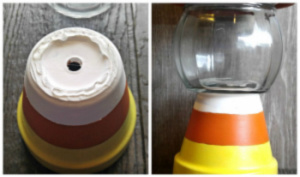
Using hot glue, attach the yellow ball to an upside-down orange clay saucer. Allow the glue to set.
Add more hot glue to the top of the glass jar lid. Carefully place the upside-down pot with the wooden ball over the top of the glass jar.
Press firmly until the glue is firmly set. 
When the glue on the candy jar top is completely set, attach it to the upside-down painted clay pot.
To do this, turn the clay pot over and add some hot glue to the bottom of it. Press the candy jar firmly on top of the clay pot, as shown below.
Allow the glue to set.

The last step in the project is to use hot glue to attach two pieces of candy corn to the bottom of the DIY candy jar.
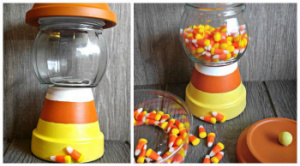
Now it’s time to fill the terracotta candy jar with candy corn.
Twist the clay pot jar topper to open the glass jar. Fill it with candy corn and replace the lid.
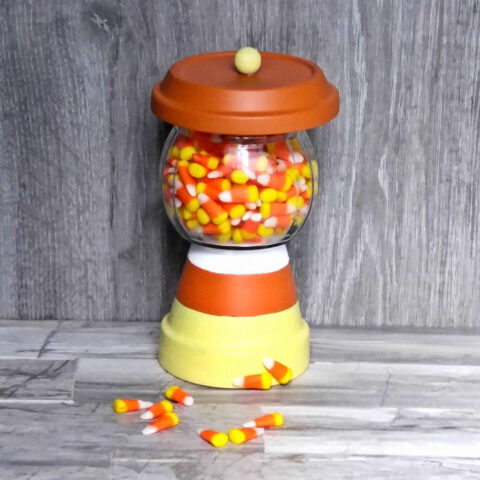
This DIY Halloween centerpiece project is so quick and easy to do. It’s finished in less than 2 hours, and that includes drying time!
Who would have thought that this adorable candy corn holder started life as a clay pot?
Your guests will love to dig into this cute terracotta pot candy jar and help themselves to candy corn. It would make a great table centerpiece on Halloween night, or a fun way to greet trick-or-treating guests!
Share this clay pot candy dish project on X
If you enjoyed this fun fall candy jar craft project, be sure to share the tutorial with a friend. Here is a post to get you started:
🎃✨ Transform a simple clay pot into a festive candy corn candy jar! It's perfect for Halloween treats or as a charming centerpiece. 🍬🧡Get the DIY guide on The Gardening Cook. #HalloweenDIY #CandyCornCrafts #TerracottaProjects… Share on X
Display the candy corn craft project on your table next to some fall leaves, a faux pumpkin, and another fun project – a wine cork pumpkin. Don’t they look cute together?
I also made a Halloween gumball machine using clay pots for my holiday blog as a variation of the project. They also look really cute together!
More clay pot craft projects to try
The shape of clay pots lends itself to so many cute projects. Here are a few more to try:

Pin this easy Halloween craft idea
Would you like a reminder of this clay pot candy corn jar? Pin this image to one of your Halloween boards on Pinterest so that you can easily find it later.
You can also watch this YouTube slideshow video about making this Halloween candy dispenser!

Admin note: This project for a Halloween candy jar first appeared on the blog in September 2017. This post has been updated with new photos, a printable project card, and a slideshow video.
DIY Candy Dispenser - Halloween Candy Jar
This adorable DIY candy jar is made from a clay pot and saucer and painted in the colors of the traditional Halloween treat - candy corn.
It's easy to make and perfect for your Halloween party.
Materials
- 4 ½ inch clay pot
- 6 inch clay saucer
- ¾ inch wooden ball
- 6-inch glass jar with a lid
- Candy corn
Tools
- Masking tape
- Acrylic craft paint and brushes
- Hot glue gun and glue sticks
Instructions
- Paint the clay pot with three stripes: white on the bottom, orange in the middle, and yellow on the top. You can use masking tape to help you keep the lines straight, or paint the stripes freehand with a flat-edge brush.
- Allow the paint to dry.
- Paint the lid of the glass jar and the clay saucer orange.
- Paint the wooden ball yellow.
- Allow the paint to dry.
- Using hot glue, attach the yellow ball to an upside-down orange clay saucer. Allow the glue to set.
- Add more hot glue to the top of the glass jar lid.
- Carefully place the upside-down pot with the wooden ball over the top of the glass jar.
- Press firmly until the glue is set.
- Add hot glue to the white painted bottom of the clay pot.
- Firmly press the bottom of the glass jar against the white-painted bottom of the clay pot, where the glue is.
- Allow the glue to set.
- Use hot glue to attach two pieces of candy corn to the bottom of the DIY candy jar.
- Twist the clay pot jar topper to open the glass jar. Fill it with candy corn and replace the lid.
- Display the clay pot candy jar on a mantle or table.
Recommended Products
As an Amazon Associate and member of other affiliate programs, I earn from qualifying purchases.
-
 81 Oz/0.6 Gallon Airtight Glass Jar with Lids, Wide Mouth Half Gallon Mason Jar for Pickle, Cookie, Kombucha, Flour, Sugar. Set of 2
 -
 Acrylic Paint Set with 10 Brushes, 18 Colors(59ml, 2 oz) Art Craft Paint Non Toxic, Perfect for Hobby Painters, Ideal for Crafting
 -
 6 Pack Terra Cotta Pots with Saucer, 4.5 Inch Clay Planters for Indoor/Outdoor Plants, Drainage Hole, Succulent, Cactus, Flower Pots