
It’s easy to propagate Thanksgiving cactus using stem cuttings in soil or water. Schlumbergera truncata roots quickly when given the right light, moisture, and humidity. These steps help you grow healthy new plants for your home this holiday season.
Start with firm, healthy cuttings and choose a well-draining soil mix or a clean container of water. Keep the plant in bright, indirect light and maintain consistent moisture for the best results. Following these tips prevents common issues like shriveled stems or poor rooting.
In just a few weeks, you can expand your collection of holiday cactus succulents or share new plants with friends and family. These practical steps make Thanksgiving cactus propagation easy, predictable, and fun. If you have a mature plant, you’ll also learn how to divide it to grow multiple plants.

How to propagate Thanksgiving cactus
There are several reliable ways to propagate Thanksgiving cactus (Schlumbergera truncata):
- Rooting cuttings in soil
- Starting cuttings in water
- Dividing a mature plant
The best time to take cuttings is in late spring or early summer. Avoid propagating while the plant is flowering, since it’s putting energy into blooms rather than new roots.
These same steps also work for Christmas cactus and Easter cactus— perfect for expanding your holiday cactus collection.
Some of the links below are affiliate links. I earn a small commission, at no extra cost to you, if you purchase through an affiliate link.

Propagating cuttings in soil
To propagate Thanksgiving cactus with root cuttings in soil, you’ll need the following supplies:
- A healthy Thanksgiving cactus (S.truncata)
- Clean, sharp scissors
- Small plant pots
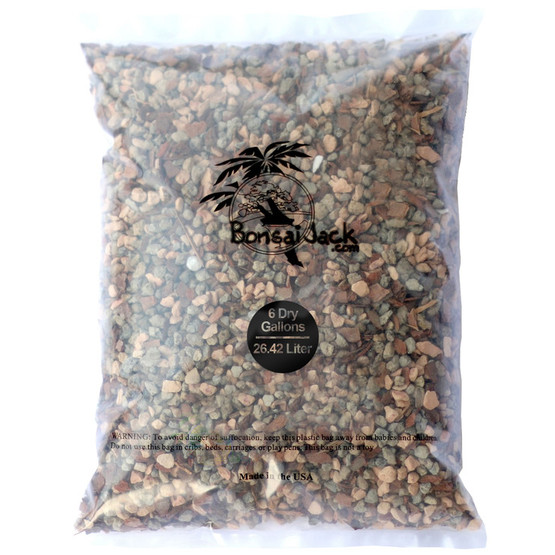
- Sand, or a succulent/cactus potting mix
- Plastic wrap or a cut-down plastic bottle (to create a mini-greenhouse)
Step-by-step instructions
Follow these steps for soil propagation of Thanksgiving cactus|
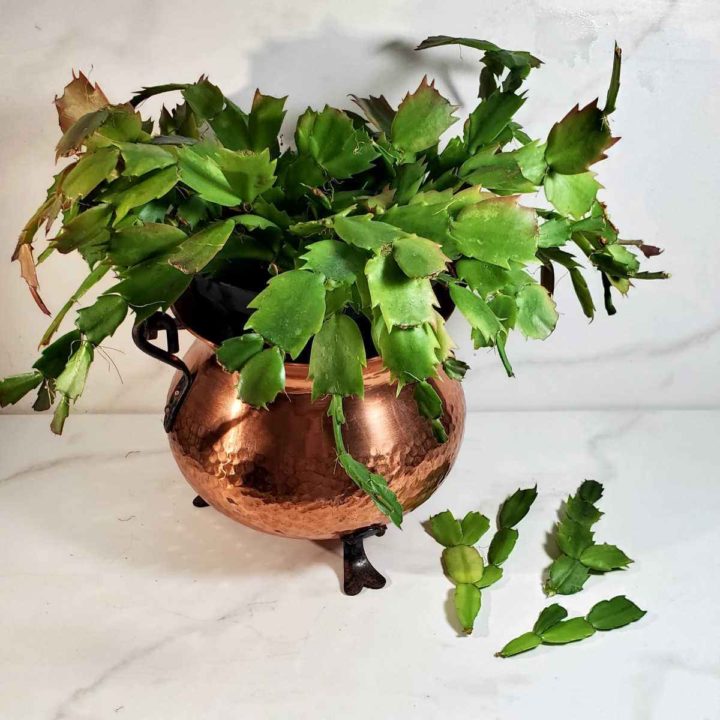
1. Taking healthy cuttings
- Using sharp, clean scissors, cut off 2-3 segments of a healthy Thanksgiving cactus. Avoid dry and withered stems. Look for segments with no flower buds.
- If any of the segments have epiphytic roots already growing at the joint, these will root more quickly.
2. Use a hormone powder
- A rooting powder can be used to speed up the process of root formation, if desired. This step is optional but improves the chances of successful propagation.
- To use the hormone powder, dip the ends of the cuttings in the powder and shake off any excess.
3. Allow the cuttings to callus over
- Place the cuttings on a clean surface for 1-2 days until the ends become dry and form a callus.
- This prevents rot when the cuttings are placed in soil.

4. Preparing the soil
- Fill small pots or containers with sand or succulent/cactus soil.
- The soil should be well-draining. Too much moisture can cause rot.
5. Plant the cuttings
- Insert the end of each stem cutting into the soil, burying it about ½ to 1 inch deep.
- You can use individual pots, or plant multiple cuttings in the same pot, making sure they are not crowded.
- Water the cuttings lightly.

6. Create a mini-greenhouse
To create a humid environment, cover the cuttings with plastic.
- A leftover rotisserie chicken container can be used to give the cuttings extra humidity.
- For several cuttings in one container, wooden bamboo sticks and clear plastic wrap work well.
- For single plants, cut off plastic bottles over the cuttings act like mini terrariums.
- A tray of pebbles under the cuttings also helps with humidity.

7. Provide bright, indirect light
- Place the Thanksgiving cactus stem cuttings in a location with bright, indirect light.
- Avoid direct sunlight, as this can be too harsh for the cuttings.
- Check the cuttings regularly to ensure the soil is slightly moist but not soggy.
8. Water sparingly
- Mist the soil lightly to keep it moist but not soggy.
- Once roots have developed (about 2-4 weeks), you can water more often.
9. Check for rooting
- After a few weeks, test for rooting. Gently tug on the cutting. If you feel resistance, roots have formed.
- Once the cuttings have rooted, remove the plastic cover and gradually acclimate the plant to normal growing conditions.
10. Transplant to new pots
- When the cuttings are well rooted and show new growth, transplant them into their own pots.
- Plants can take 1-2 years to bloom.
- To get a mature plant more quickly, place several rooted cuttings in one pot.

How to propagate Thanksgiving cactus in water
While soil propagation is the most common method of propagating Thanksgiving cactus, many gardeners enjoy rooting the cuttings in water because it’s an easy way to monitor root growth. With a little patience, this method can be just as successful.
You’ll need many of the same supplies as for soil propagation, but with a few differences.
- Healthy Thanksgiving cactus cuttings
- Clean, sharp scissors
- A small glass or jar
- Filtered water
- A plastic bag or humidity dome for humidity (optional)
The process for taking and preparing cuttings is the same as with soil propagation. Once your cuttings have callused, follow the steps below to root them in water.
1. Prepare the water container
- Fill a glass or jar with room-temperature water.
- Filtered or distilled water will prevent the buildup of salts and minerals.
- If your tap water is heavily chlorinated, let it sit out overnight.
2. Place the cuttings in water
- Submerge just the bottom part of the cuttings in the water.
- Too much water on the upper leaves will cause rot.
3. Provide bright, indirect light
- Place the jar in a spot that gets bright, indirect sunlight.
- Avoid direct sun, which can overheat the water.
4. Change the water regularly
- Add new water every few days.
- This keeps it fresh and prevents bacteria from forming.

5. Watch for root formation
- In 2-4 weeks, roots will form.
- Wait until they are at least ½ long before transferring to soil.
6. Transfer to soil
- Once the roots are well-developed, gently transplant the cuttings into a well-draining potting mix.
- Water lightly and care for the cuttings as you would a mature plant.
Plants rooted in water may take a little longer to adjust once moved to soil, since the roots are formed in a different environment. Handle them gently during transplanting, and they’ll catch up quickly with soil-propagated cuttings.

Dividing a mature plant
Stem cuttings in soil or water are the most common way to propagate a Thanksgiving cactus. However, dividing a mature Thanksgiving cactus is an easy way to create multiple plants from one healthy parent plant.
You’ll need these items:
- A large, mature Thanksgiving cactus
- A sharp knife
- Small plant pots
- Succulent/cactus soil mix
1. Inspect the plant
- Remove the plant from its pot.
- Examine the root system to locate areas where the stems and roots can be separated.
- Be sure each section has its own set of roots.

2. Divide the sections
- Gently pry the sections apart if the plant is not too pot-bound.
- For plants with roots that are a solid mass, use a sharp knife to cut between the sections. Try not to disturb the roots too much.

3. Plant the divisions
- Place each of the sections, with roots, into a succulent/cactus potting mix.
- Water lightly.
- Place in bright, indirect light until the divisions are well established.
- For ongoing care of the new baby plants, see my tips for growing a Thanksgiving cactus.
More holiday plant inspiration
If you enjoyed learning how to propagate Thanksgiving cactus, check out these posts for care tips, creative display ideas, and how to get its cousin, the Christmas cactus, to bloom every year.

- How to get a Christmas cactus to bloom each year—it works for Thanksgiving cactus too!
- Create a charming coffee pot terrarium—perfect for displaying your rooted holiday cactus cuttings.
- Thanksgiving cactus care guide—learn how to care for S.truncata and keep it healthy all year round.
Share this post about propagating cuttings of Thanksgiving cactus on X
If you enjoyed learning tips for how to propagate a Thanksgiving cactus, be sure to share these tips with a friend. Here is a post to get you started:
🌿✨ Want to grow more Thanksgiving cacti? It's easy! Learn how to propagate your plant through stem cuttings, water rooting, or division. It's a great way to expand your indoor garden or share plants with friends. 🎄🪴 👉 Read the full… Share on XPin this post for Thanksgiving cactus propagation
Would you like a reminder of this post for the propagation of Schlumbergera truncata? Just pin this image to one of your gardening boards on Pinterest so that you can easily find it later.
You can also watch our video on YouTube!

Admin note: This article on Thanksgiving cactus propagation appeared on the blog in November 2023. This post has been updated with new photos, a printable project card, and a slideshow video.
Easy Thanksgiving Cactus Propagation: Growing Cuttings in Soil
Grow new Thanksgiving cactus plants in just a few weeks! Follow these easy steps for propagating holiday cactus plants by rooting cuttings in soil.
Materials
- Schlumbergera truncata plant
- Succulent/cactus soil
- Hormone Rooting Powder
- Small pots
- Plastic wrap
Tools
- Watering can
- Clean, sharp scissors
Instructions
- Take cuttings in late spring or early summer.
- Be sure the plant is healthy. Choose stems that are not withered, and those with no flower buds on them.
- Using clean scissors, carefully snip pieces of stems that are at least 3-4 segments long.
- Dip the ends of the cuttings in rooting hormone. (optional)
- Allow the ends of the cuttings to callus for 2-3 days before planting them in soil.
- Plant the cuttings into a container with well-draining succulent/cactus soil. Sand also works well.
- Cover the container with plastic wrap or a cut-down soda bottle to increase humidity.
- Place the cuttings in bright light but not direct sunlight.
- Mist gently to keep the soil moist but not soggy.
- Roots should form in 2-4 weeks. To test, tug on the cuttings. If you feel resistance, they have rooted.
- When roots are established and new growth is present, transfer the cuttings to individual pots.
- Care for the cuttings as you would mature Thanksgiving cactus plants.
Notes
For water propagation of Thanksgiving cactus and tips for dividing a mature plant, see the full guide above this project card.
Recommended Products
As an Amazon Associate and member of other affiliate programs, I earn from qualifying purchases.
![Schlumbergera truncata - Jolly Purple [limited]](https://thegardeningcook.com/wp-content/uploads/2025/10/Schlumbergera-truncata-Jolly-Purple__71568.1753467185.555.555.jpgc3.jpg)
![Schlumbergera truncata - Vida Orange [limited]](https://thegardeningcook.com/wp-content/uploads/2025/10/Schlumbergera-truncata-Vida-Orange__56054.1753466737.555.555.jpgc3.jpg)