No-Carve Pumpkin Decorating Idea – Decor Without the Mess!
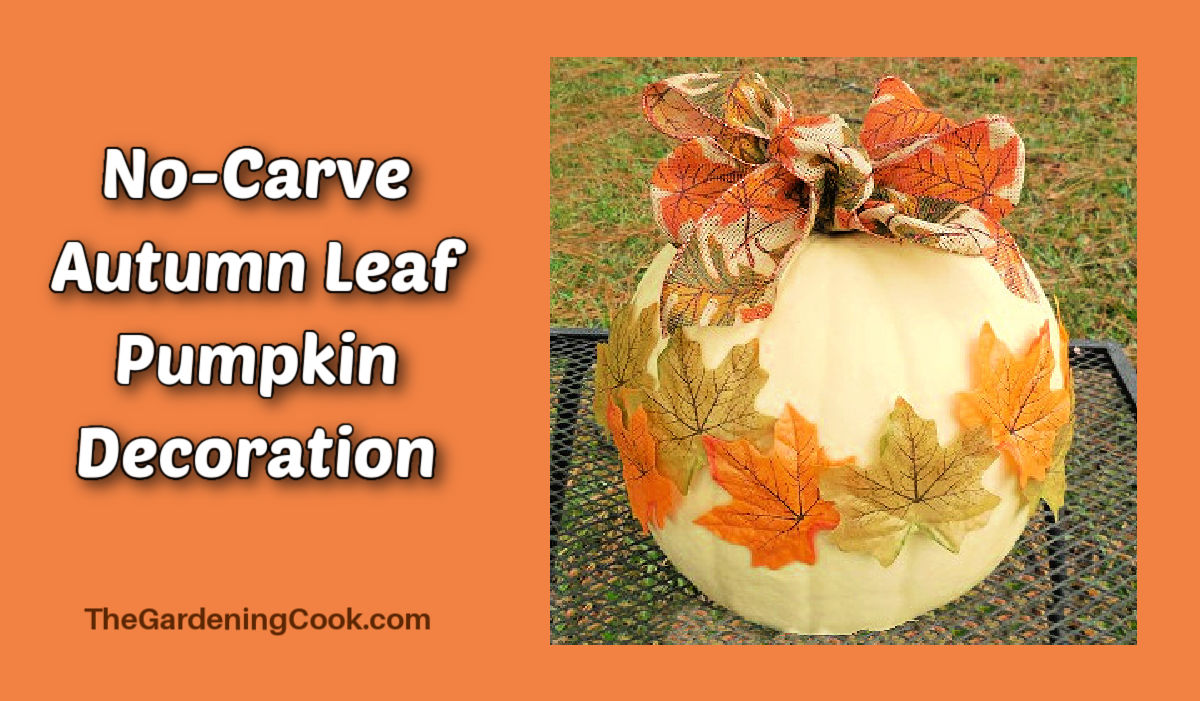
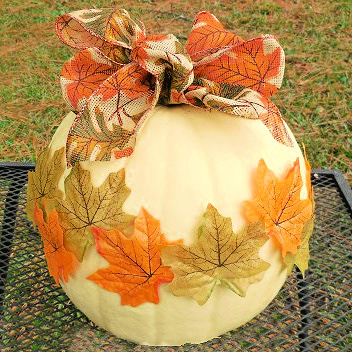
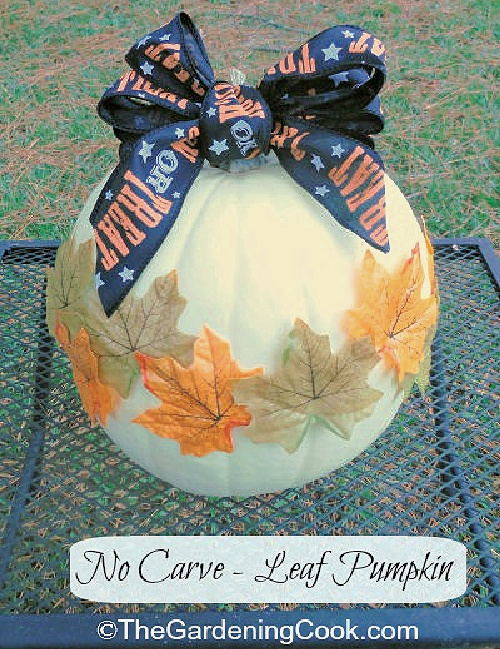
Do you hate the mess of a carved pumpkin? You are in luck! This creative no-carve pumpkin idea features a white heirloom pumpkin with a single row of faux leaves and a pretty autumn floral bow.
This easy fall decoration uses just 3 supplies and a glue stick! It looks great in your fall entry or on an occasional table.
The autumn leaf pumpkin craft project can be made in about 30 minutes, but looks great enough for your mantle or as a focal point on your Thanksgiving table centerpiece.
Best of all, there is no mess with this pumpkin with leaves decoration, and it looks great both indoors and out.
Some of the links below are affiliate links. I earn a small commission, at no additional cost to you, if you purchase through an affiliate link.
Why a no-carve pumpkin?
Carving pumpkins is a lot of fun, especially when you do it with children, but it is also messy. There are over 100 varieties of pumpkins. Some are best for eating, and the others work best for carving. This project can use either type of pumpkin!
In addition to being less messy, no-carve pumpkin projects are also quicker to do. Fortunately, there are many alternatives for carved pumpkins that will still set a fall theme around your home. This project is one of those ideas!
Supplies for the no-carve leaf pumpkin
To make the autumn leaf no-carve pumpkin project, you will need the following supplies:
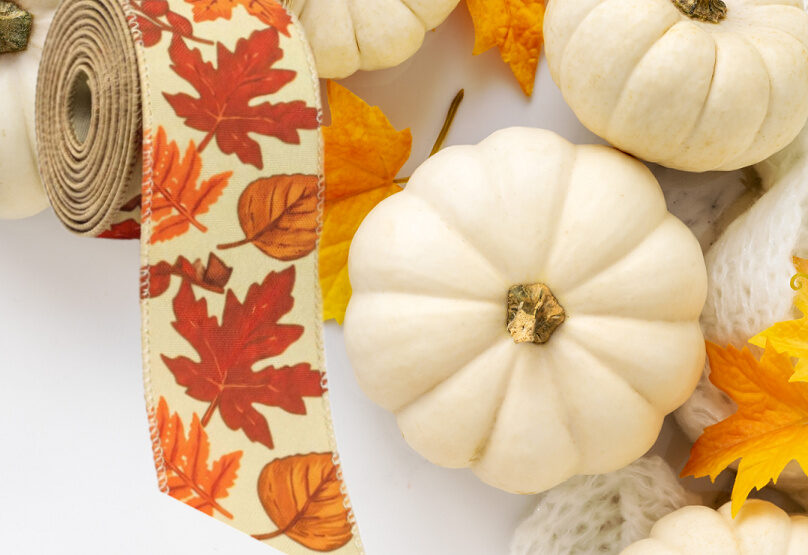
- 8-inch white heirloom pumpkin with a stem (You can also use a white foam pumpkin)
- 14 silk leaves in fall colors
- 1 roll of 2-inch-wide wire-edged fall ribbon with leaves
Tools
- 1 glue stick
How to make this no-carve autumn leaf pumpkin
This project is very easy to put together.
Glue the leaves
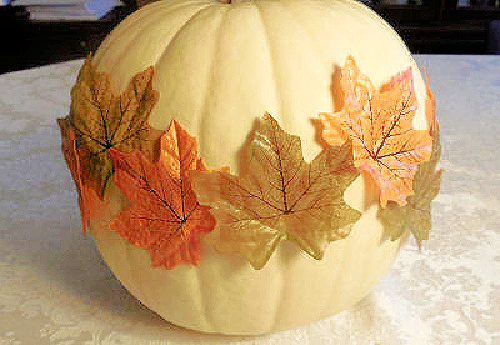
- Use the glue stick to attach the leaves in a single row around the center of the pumpkin.
- Place them haphazardly, rather than in a straight line, for more interest.
Make a floral bow
NOTE: Be sure to use wire-edged ribbon. This allows the bow to be puffed up, and it stays in that shape. Normal ribbon will flop over.
To see the step-by-step tutorial for making this floral bow, please visit my holiday site, Always The Holidays.
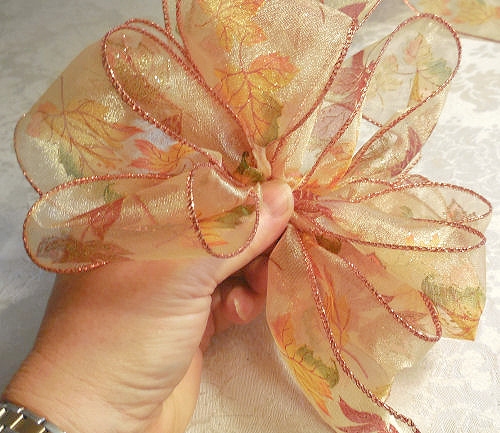
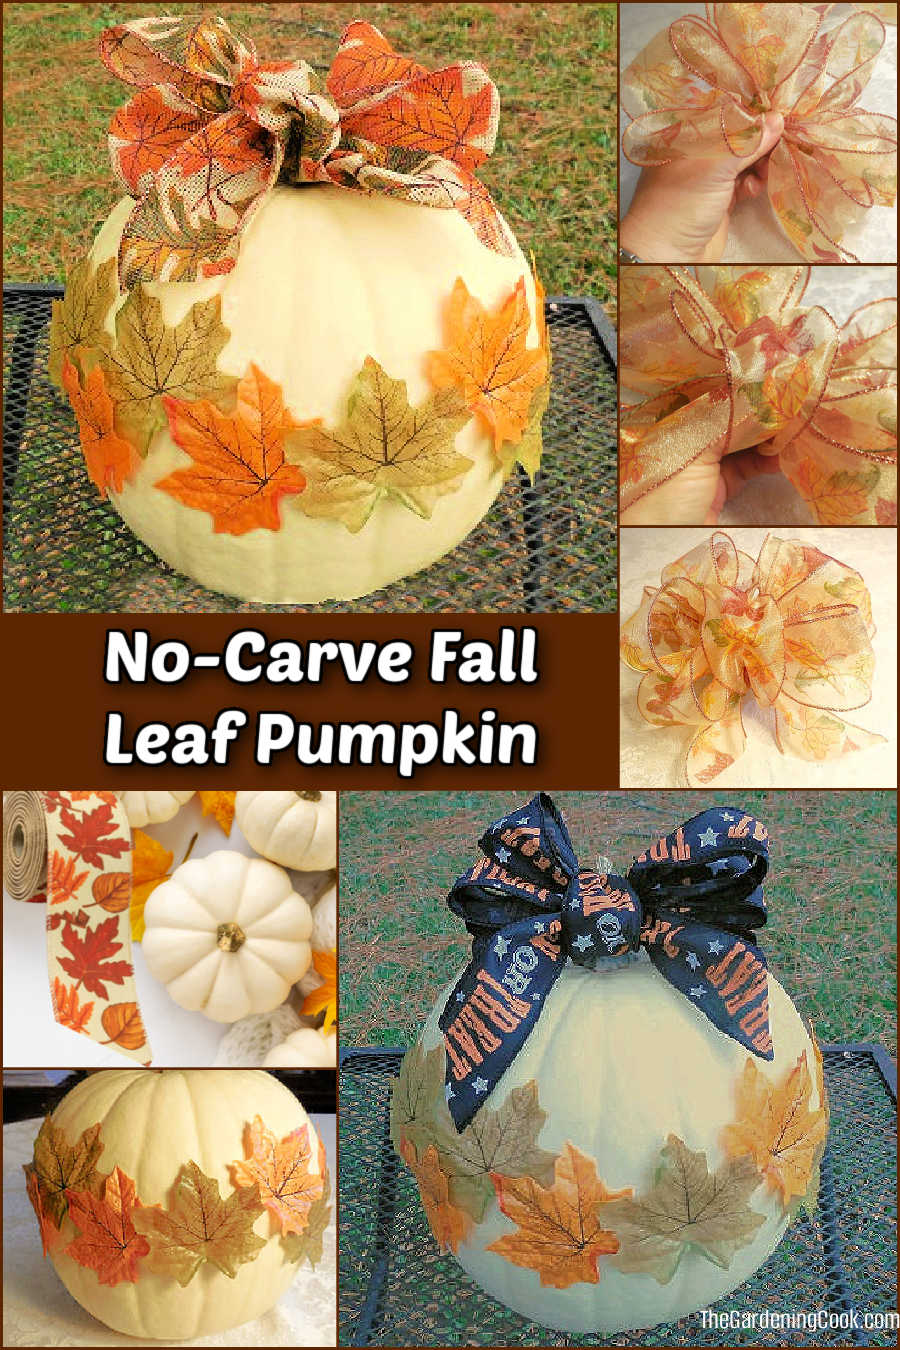
- Leave one long end of ribbon, then start making loops with the wire-wrapped ribbon.
- Make loops and pinch them in the center.
Note: These images show an eight-loop bow. If you have a small pumpkin, you can make the bow with fewer loops.
Add a center loop
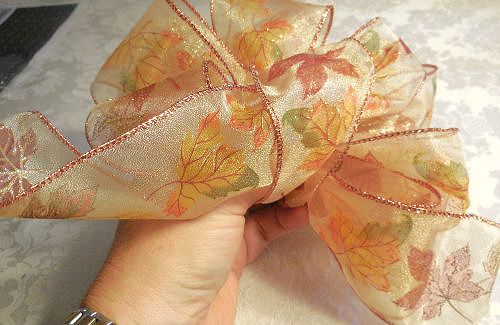
- Pull the free end of the ribbon around the front middle to make a center loop.
- Pinch it with your thumb under the loop.
Pull the ribbon end through
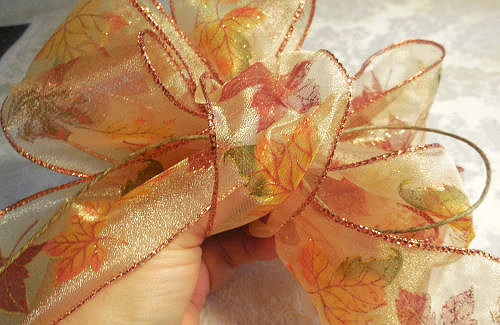
- Take the free end of the ribbon and insert it from the back through the top of the center loop and toward the left side.
- Pull the tail through firmly.
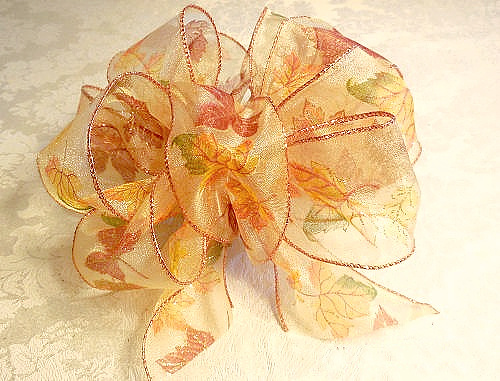
Attach the ribbon to the no-carve pumpkin
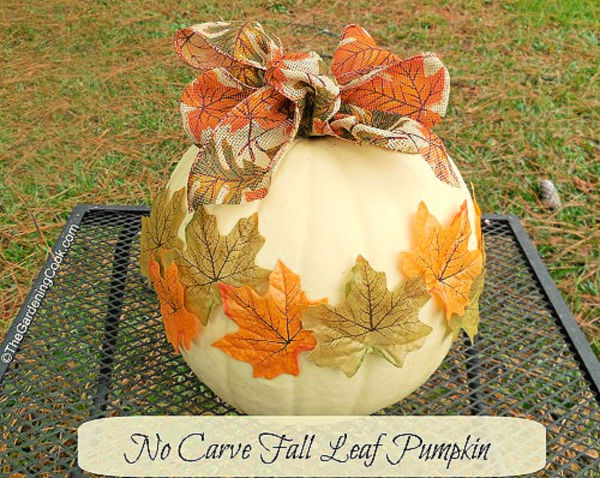
- Tie the bow onto the stem of the autumn leaf pumpkin with the loose ends of the ribbon.
- Pull on the wire edges to fluff it up so that it sits nicely above the pumpkin.
This creative no-carve pumpkin will stay fresh for several weeks on its own. For keeping it fresh longer, see my tips for keeping this pumpkin fresh here.
Displaying the no-carve fall leaf pumpkin
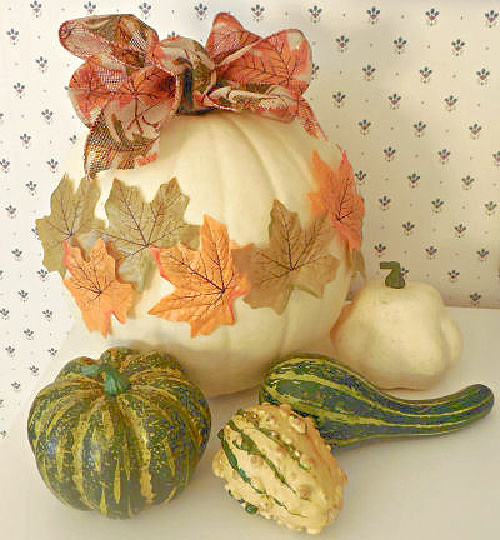 To display indoors, surround the autumn leaf pumpkin with a few gourds for a fall vignette. So pretty!
This project is shown as a decoration for Thanksgiving but can be used any time in the fall. Want something different for Halloween night? Just switch out the bow for a Halloween-themed one.
Share this no-carve pumpkin decorating idea on X
If you enjoyed making a pumpkin decoration without carving the pumpkin, why not share this project with a friend?
🍂🎃 Love decorating pumpkins without the mess of carving? This No-Carve Autumn Leaf Pumpkin is a beautiful fall DIY project that uses silk autumn leaves to create seasonal charm. The updated tutorial includes more step-by-step photos… Share on XPin this autumn leaf no-carve pumpkin idea
Would you like a reminder of this no-carve pumpkin decorating ideas project? Pin this image to one of your DIY boards on Pinterest so that you can easily find it later.
Admin note: This no-carve pumpkin decorating project first appeared on the blog in October 2015. This post has been updated with new photos, a printable project card, and a slideshow video about using greenery for fall decorating.
No-Carve Autumn Leaf Pumpkin

Skip the mess of a carved pumpkin with this easy no-carve pumpkin idea. This project features an heirloom pumpkin, decorated with faux fall leaves and a wire-edged floral ribbon.
Materials
- 8-inch white heirloom pumpkin with a stem (You can also use a white foam pumpkin)
- 14 silk leaves in fall colors
- 1 roll of 2-inch-wide wire-wrapped fall ribbon
Tools
- 1 glue stick
Instructions
- Use the glue stick to attach the leaves in a single row around the center of the pumpkin.
- Place them haphazardly, rather than in a straight line, for more interest.
- Leave one long end of the ribbon loose, then start making loops with the wire-wrapped ribbon.
- Make 4 to 8 loops and pinch them in the center.
- Pull the free end of the ribbon around the front middle to make a center loop.
- Pinch it with your thumb under the loop.
- Take the free end of the ribbon and insert it from the back through the top of the center loop and toward the left side.
- Pull the tail through firmly.
- Tie the bow onto the stem of the autumn leaf pumpkin with the loose ends of the ribbon.
- Pull on the wire edges to fluff it up so that it sits nicely above the pumpkin.
- Display on a side table or with other items for a Thanksgiving centerpiece.
Notes
You can make this bow with 4 to 8 loops, depending on the size of your pumpkin.
Recommended Products
As an Amazon Associate and member of other affiliate programs, I earn from qualifying purchases.
-
 2 Rolls 2.5 Inch Fall Fabric Ribbon Autumn Ribbon for Craft Wreath Bow | Autumn Leaves Edge Wired Decor Ribbons Thanksgiving Burlap Linen Ribbons for Thanksgiving Party Decor Gift Wrapping 5 Yards
-
 WESPPINC 2 Pack 8 Inch Large White Artificial Pumpkins for Fall | Lightweight foam decoration creates an elegant fall local point for tables, mantels, entryways, weddings Halloween
-
 Moon Boat 1100PCS Maple Leaves Fall Artificial Bulk Autumn Decor | Polyester Faux Leaf in 5 Colors, Table Centerpiece, Wedding, Wreath Craft Supplies