
This Shiplap Barn Door step by step tutorial will show you how to make a sliding door yourself, easily.
If you are a fan of the HGTV show Fixer Upper, you will know that shiplap has taken the decorating world by storm.
Mr. Gardening Cook and I decided to use it as part of our galley kitchen make over. A sliding barn door is a great space saver in a small kitchen. 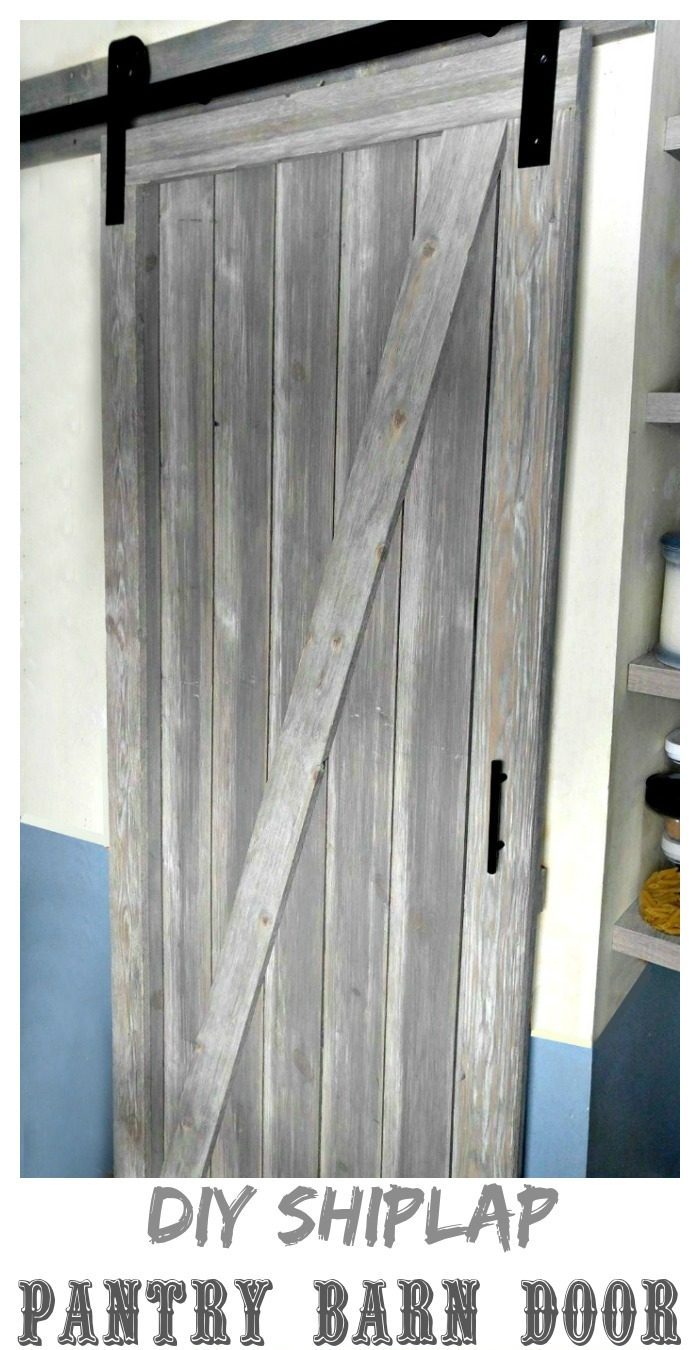
We are in the middle of a (very slow) kitchen remodel. Richard gave my pantry a fabulous make over a few months ago, but it has been sitting with no door on it since then, so we decided that it was time to tackle a barn door to finish it off.
The pantry had a concertina style of door before the make over and opening it up meant that it stuck out into the kitchen about a foot.This made it hard for us both to move around in the galley kitchen.
The first step in making the sliding barn door was to frame out the opening. We used 3 1/2″ x 3/4″ flat boards to do this since they will mimic the look of the shaker cabinets that we plan to install later.
You have no idea how pleasing a door frame can be unless you have done without one for several months!
Note: Power tools, electricity, and other items used for this project can be dangerous unless used properly and with adequate precautions, including safety protection. Please use extreme caution when using power tools and electricity. Always wear protective equipment, and learn to use your tools before you start any project.
It’s time to start the DIY Shiplap Barn Door.
Once we got the door frame in place it was time to tackle the barn door. We started by making a header beam. Our home is older and the barn door kit was very heavy, so we wanted to make sure that the door stayed up.
A piece of 6″ x 1 1/2″ wood formed the header and it was stained a medium gray to match the shiplap boards. The beam also matches some open floating shelves that we have on one wall so it ties the two together.
Once the header was in place we attached the barn door slider to it.
We purchased some 4 1/2″ shiplap tongue and groove boards and some 3 1/2″ distressed wood boards in a medium gray color from Home Depot.
These would form the sliding barn door.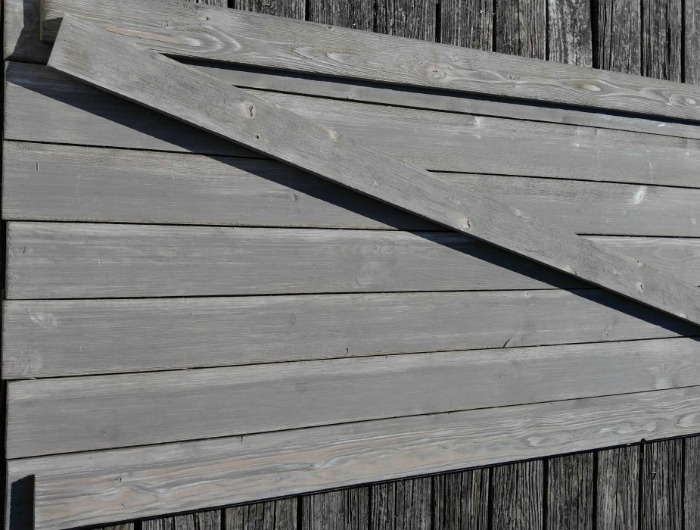
The first step was to measure and lay out the board on our back deck to see what kind of look we wanted. We went for a single Z diagonal in the end, since the door would go on a pantry and the kitchen is small.
The shiplap boards formed the door and the plain distressed wood would be the brace piece as well as the door frame.
Assembly Time!
Once we had the design in place, it was time to cut, sand and attach them together. This was the longest part of the project.
We were back and forth from the deck to the pantry many times making sure it was coming together correctly.
We trimmed the ends of the brace on a diagonal and used a rubber mallet to pound it into the door.
Once we were happy with the placement, we screwed it in place. All of the screws are on the back side of the door, since the back side did not need the same finished look as the front.
It’s getting there!
Tada! The barn door is finished! 
Now for the sliding Frame.
Now for the fun part – attaching it to my pantry! We measured (and measured again, and again and again) and drilled the holes for the door hangers.
The last step in making the sliding Barn Door was to attach the door to the sliding frame and measure and install the bottom piece. Can you believe one small slider is all that it takes to keep this thing in place?
The door just sits on it and rolls smoothly. Two pieces of metal at the end of each side of the top track that keep it on the track.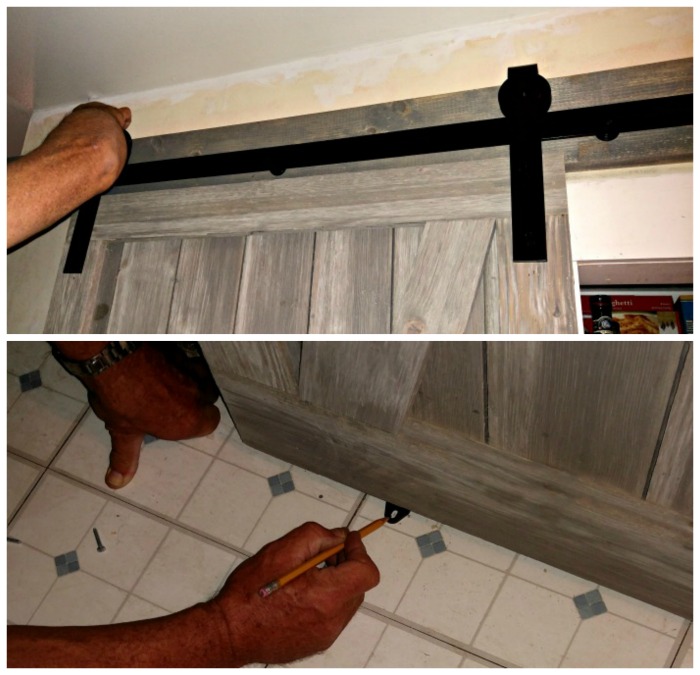
Once the shiplap barn door was in place, we installed the handle. We chose a simple straight black door handle that attached from the back of the door for a clean look.
(measure, measure, measure became our middle names for this step.)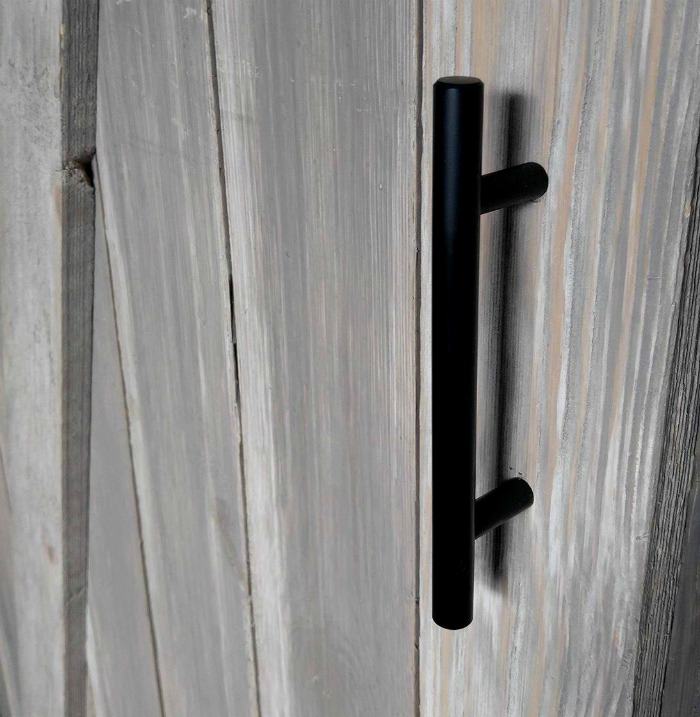
The Sliding Barn Door is Finished!
And it’s done!!! I must have opened and closed the darn thing dozens of times on the first day. I just LOVE IT!
This DIY Shiplap Barn Door is so much better than the old concertina door. It slides so smoothly and gives the pantry a very professional finish.
The next step will be filling the holes in the kitchen walls, sanding and painting them. After that it will be time to install the bead board paneling to the lower half of the walls. Any guesses how long that step will be?
For more ideas for home improvement, see my Home Decor Board on Pinterest.
Scott
Sunday 15th of August 2021
That's T&G not shiplap
Jennifer Cratch
Sunday 30th of December 2018
What does the back of the door look like? I need a door similar but it would be in our bedroom leading into a bathroom so both sides need to look nice.
Carol
Sunday 30th of December 2018
Hi Jennifer. The back of the door is unfinished. Works perfectly for a pantry closet that is small like mine but not for a bathroom. Two sided sliding doors normally have a frame on both sides to enclose the shiplap inner door and the frame holds the boards in place. (back looks similar to front.) Since I needed a door that fit snugly against the opening, and my kitchen is narrow, I didn't want this width to the door. Carol
john e potter
Thursday 28th of June 2018
what did you use to attach the boards together.
Carol
Thursday 28th of June 2018
Hi John, The boards have a lip where they overlap. The back of the boards have one piece of wood attached across the back in the center, but basically what holds it all together are screws from the back side through the boards and into the frame. Carol
Michael Turner
Sunday 28th of May 2017
We are looking to do the same exact thing to the doorway into a sitting room from our bedroom. Thanks for the tips.
Carol
Sunday 28th of May 2017
My Pleasure Michael. Hope it turns out well. Carol