
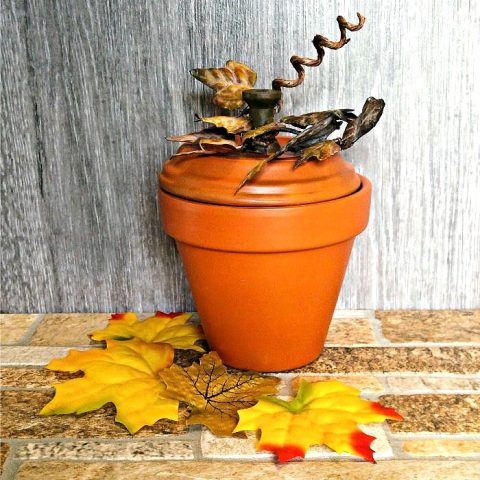
This terra cotta pumpkin looks great as a home decor item and also does double duty as a candy dish.
Using household items to recycle them into crafts is a great idea. Not only does it save money, but helps our environment.
Today, we’ll be using an old clay pot to make a fun fall decoration.

Some of the links below are affiliate links. I earn a small commission, at no additional cost to you, if you purchase through an affiliate link.
How to make a terra cotta pumpkin
I visited a thrift shop over the weekend and came home with a decrepit-looking stem of dusty brown silk flowers for 99c that had seen its better days.
But it had very nice detail on the leaves, and I figured I’d find a way to use it somehow in a craft project.
The color is just perfect for my pumpkin stems!
Note: Hot glue guns, and heated glue can burn. Please use extreme caution when using hot glue. Learn to use your tools properly before you start any project.
Supplies for a terra cotta pumpkin:
To make this clay pot candy dish, you will need these items:

- 4-inch clay pot and saucer
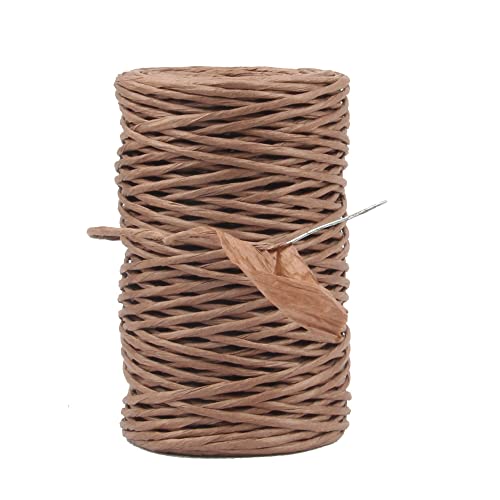
- 12-inch piece of wire rope
- craft paint
- silk leaves
- 1 ¾-inch wooden spool
- scandy pumpkins
- hot glue gun and glue sticks
Making the clay pot pumpkin
This has to be one of the quickest projects I have done in a long time. The only real time is drying time for the paint, and if you like the color of your terra cotta pot, you don’t even need to do that!
Start by painting the clay pot and saucer with orange craft paint and allow them to dry.
Next, combine some orange and black craft paint to make a burnt orange color. Paint this on the wooden spool. Let it dry.

When the paint is dry, assemble the stem of the pumpkin. Do this by winding the wire rope around a pencil to give it a nicely curled shape. 
Remove the rope from the pencil and wind it around the wooden spool. Tack it in place with some hot glue.
A quick dab of hot glue on the center of the upside-down saucer holds the pumpkin stem in place and functions as a candy dish handle.
Use two pieces of silk leaves and tack them on both sides of the wooden spool.
Fill the clay pot pumpkin with candy pumpkins and pop on the lid. 
Tada !! All done in less than a couple of minutes! I LOVE that this looks just like a pumpkin decor item, but it secretly holds the candy inside it. Who would ever guess? What fun!
This flavor of candy, along with candy corn, is very popular, particularly in the fall. Did you also know that you can grow candy corn plants in your garden?
You won’t get the candy, but the look and colors are the same! 
Staging the terra cotta pumpkin candy dish
Use a couple of old books, some faux gourds, and silk leaves to stage the candy dish. You’ll end up with a very pretty fall vignette that will be perfect for either Halloween or Thanksgiving.
Thanksgiving tablescapes often make use of a centerpiece that gets showcased in the middle of a table. This idea would make a perfect addition to any holiday table.
If you have an hour (or less if you don’t paint) of spare time and an old terra cotta pot, make your own pumpkin candy dish today. The vignette would be perfect on a fall mantle!
See more terra cotta pot projects here:
Clay pots can be made into many DIY projects. Here are a few more ideas to try:

- Clay pot snowman
- Bubble gum machine
- Leprechaun hat centerpiece
- Giant Terracotta jingle bell
- Candy corn Halloween dispenser
Share this play pot pumpkin project on X
If you enjoyed learning how to transform an old clay pot into a candy dishy, why not share this project with a friend? Here is a post to get you started:
Turn an old clay pot into a whimsical pumpkin candy dish with just a few supplies. See the tutorial on The Gardening Cook. Share on XPin this terra cotta pumpkin candy dish for later
Would you like a reminder of this clay pot pumpkin project? Just pin this image to one of your craft boards on Pinterest so that you can easily find it later.
 Admin note: This post for the terracotta pumpkin candy dish first appeared on the blog in September 2017. I have updated the post with a printable project card and a video for you to enjoy.
Terra Cotta Pumpkin - Clay pot Pumpkin Candy Dish
Turn a few craft supplies and an old terra cotta pot into a pumpkin shaped candy dish for Halloween or Thanksgiving.
Materials
- 1 - 4″ clay pot and saucer
- 12 inches of wire rope
- orange and black craft paint
- a few silk leaves
- 1 ½ inch small wooden spool
Tools
- Paint brush
- Pencil
- Hot glue gun and glue sticks
Instructions
- Paint the pot and saucer orange. (If you like the color of your pot and it is very clean and new, you don't need to paint it.
- Mix black and orange paint for a burnt orange color.
- Paint the wooden spool burnt orange.
- Wrap the wired rope around the pencil to form a tendril shape.
- Remove the wire rope from the pencil and wrap it around the spool.
- Tack the spool to the saucer bottom with hot glue.
- Hot glue the flowers to both sides of the spool and tendrils.
- Fill the pot with candy corn.
- Replace the lid and display with pride.
Recommended Products
As an Amazon Associate and member of other affiliate programs, I earn from qualifying purchases.
-
 4 Inch Terracotta Plant Pots with Saucer - 6 Pack Clay Flower Pots with Drainage, Great for Plants, Crafts
 -
 Floral Wire, Rustic Paper Wrapped Wire 2mm 14 Gauge 164 Feet Waterproof Paper DIY Projects (Brown Color)
 -
 Acrylic Paint Set with 10 Brushes, 18 Colors(59ml, 2 oz) Art Craft Paint Non Toxic, Ideal for craft projects