
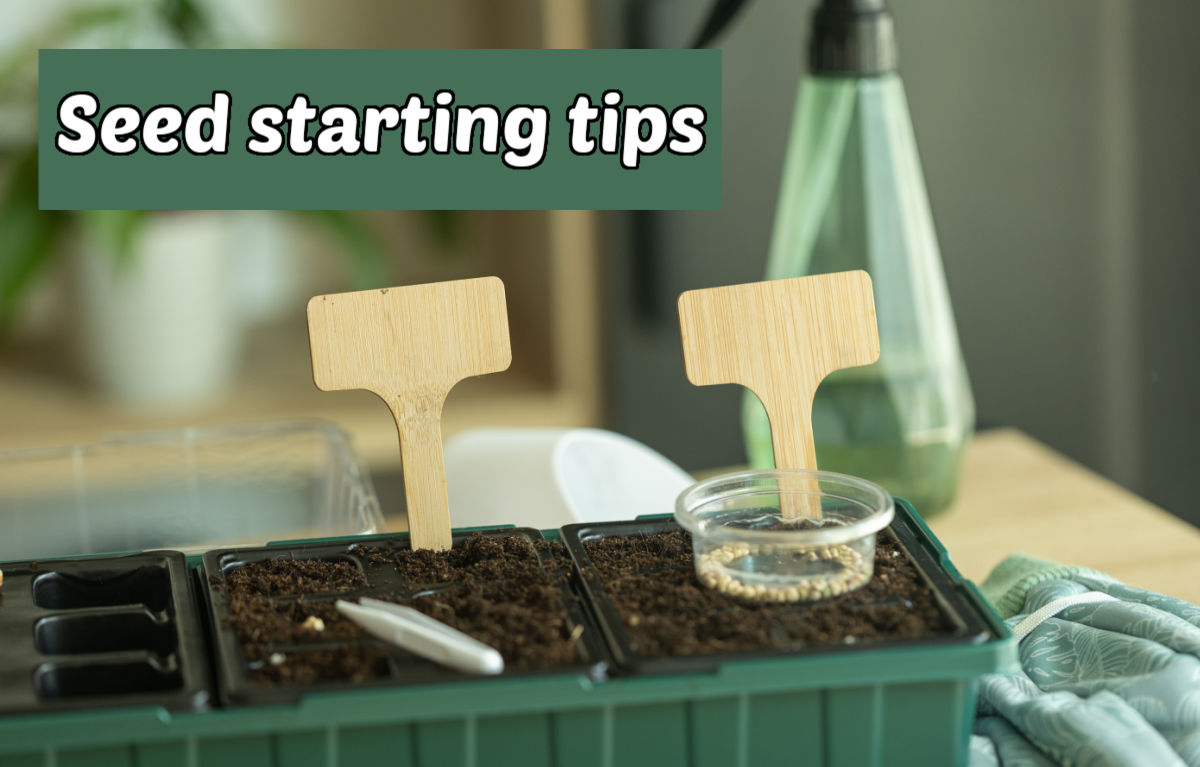
Start seeds indoors to get a head start on spring gardening. You’ll get healthy, strong plants without spending extra on store-bought seedlings or plants from garden centers.
Whether you plan to grow flower or vegetable seeds, knowing when to start seeds indoors is critical. Sow them too early, and they may be ready to plant outdoors before it is warm enough; sow them too late, and they may not have enough time to mature before fall frosts hit.
The 20 tips for starting seeds indoors below will guide you through planting, growing, hardening off, and transplanting seedlings successfully. Keep reading to learn about growing plants from seed indoors and give your garden the best possible start!
Some of the links below are affiliate links. I earn a small commission, at no additional cost to you, if you purchase through an affiliate link.
When to start seeds indoors
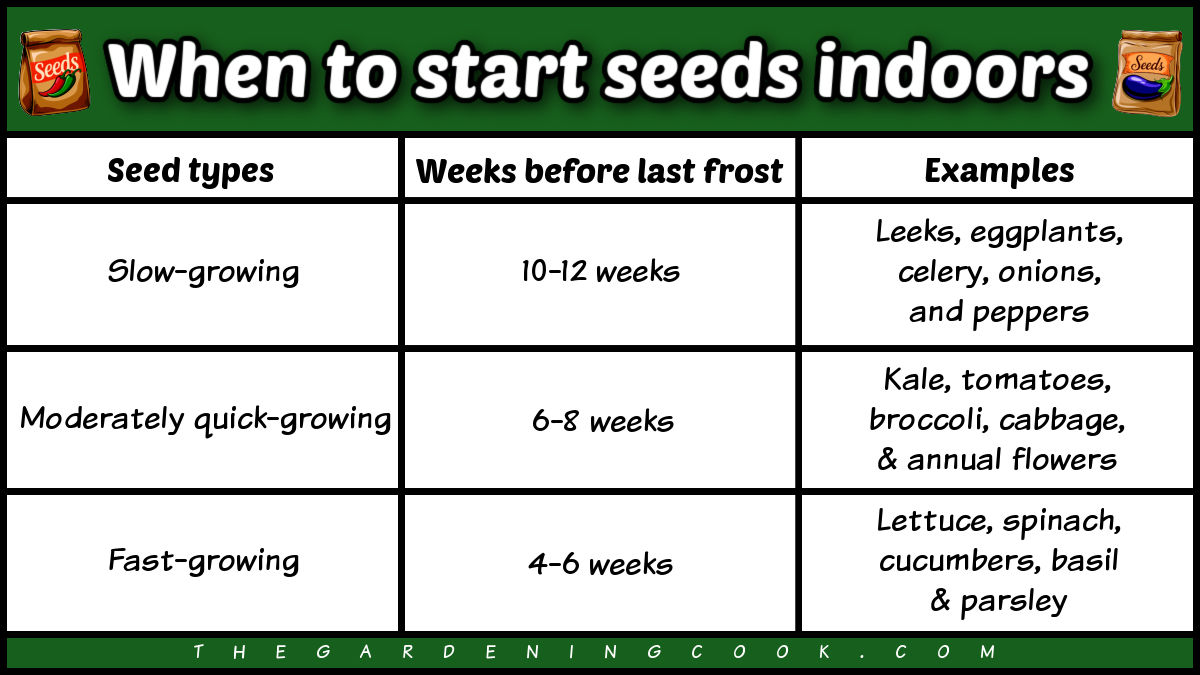
The best time to start seeds indoors is 4–12 weeks before your last spring frost, depending on the rate of growth.
Starting seeds indoors successfully means knowing when and how early to plant seeds for vegetables, herbs, and flowers. While there is no exact “date” for a seed starting indoors timeline, these ranges provide a helpful guide:
- Slow-growing seeds: 10-12 weeks before the last frost (leeks, eggplants, celery, onions, peppers)
- Moderately quick-growing seeds: 6-8 weeks before the last frost (kale, tomatoes, broccoli, cabbage, and annual flowers)
- Fast-growing seeds: 4-6 weeks before the last frost (lettuce, spinach, cucumbers, basil, and parsley)
Pro tip: To find your expected last frost date by zip code, consult this page from the Farmer’s Almanac. Count backwards from your last frost date, using the infomation on the seed packet.
Note: Not all seeds should be planted indoors. Some should be sown directly in the garden, including those with long taproots (carrots, turnips, parsnips, radishes, and beets), legumes (beans and peas), and those with large seeds (corn, melons, and squash).
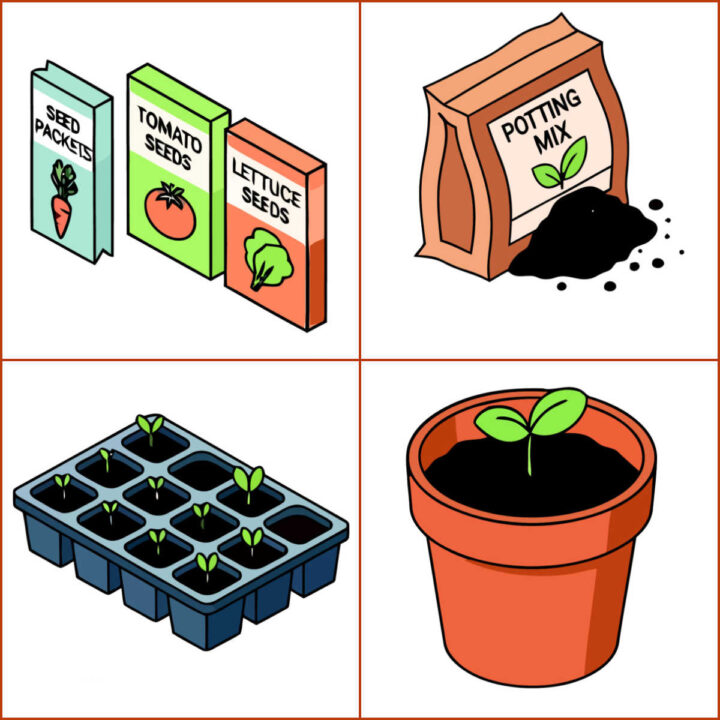
You can buy seeds from local garden centers or online seed catalogs. Look for high-quality, disease-free seeds appropriate for indoor starting.

Choosing indoor seed starting containers
The best seed starting containers hold moisture well, provide good drainage, and allow seedlings space to develop healthy roots.
You can purchase seed starting containers, such as trays and pots, or save money by recycling common household items. When choosing containers, consider these factors:
- Choose wide shallow containers so seedlings have room to grow without crowding each other.
- Recycled rotisserie chicken trays come with a lid that traps moisture and raises the humidity around the seedlings.
- Plastic containers hold in moisture better than porous clay pots.
- Many pots are biodegradable and can be planted directly in the garden later.
- You can also use items like newspaper pots, citrus rinds, and avocado shells as biodegradable seed-starting containers.
- Peat pellets expand with moisture and can also be planted directly in soil outdoors.
- No matter the type of container you use, it should have drainage holes in the bottom to prevent root rot.
Seed starting mix
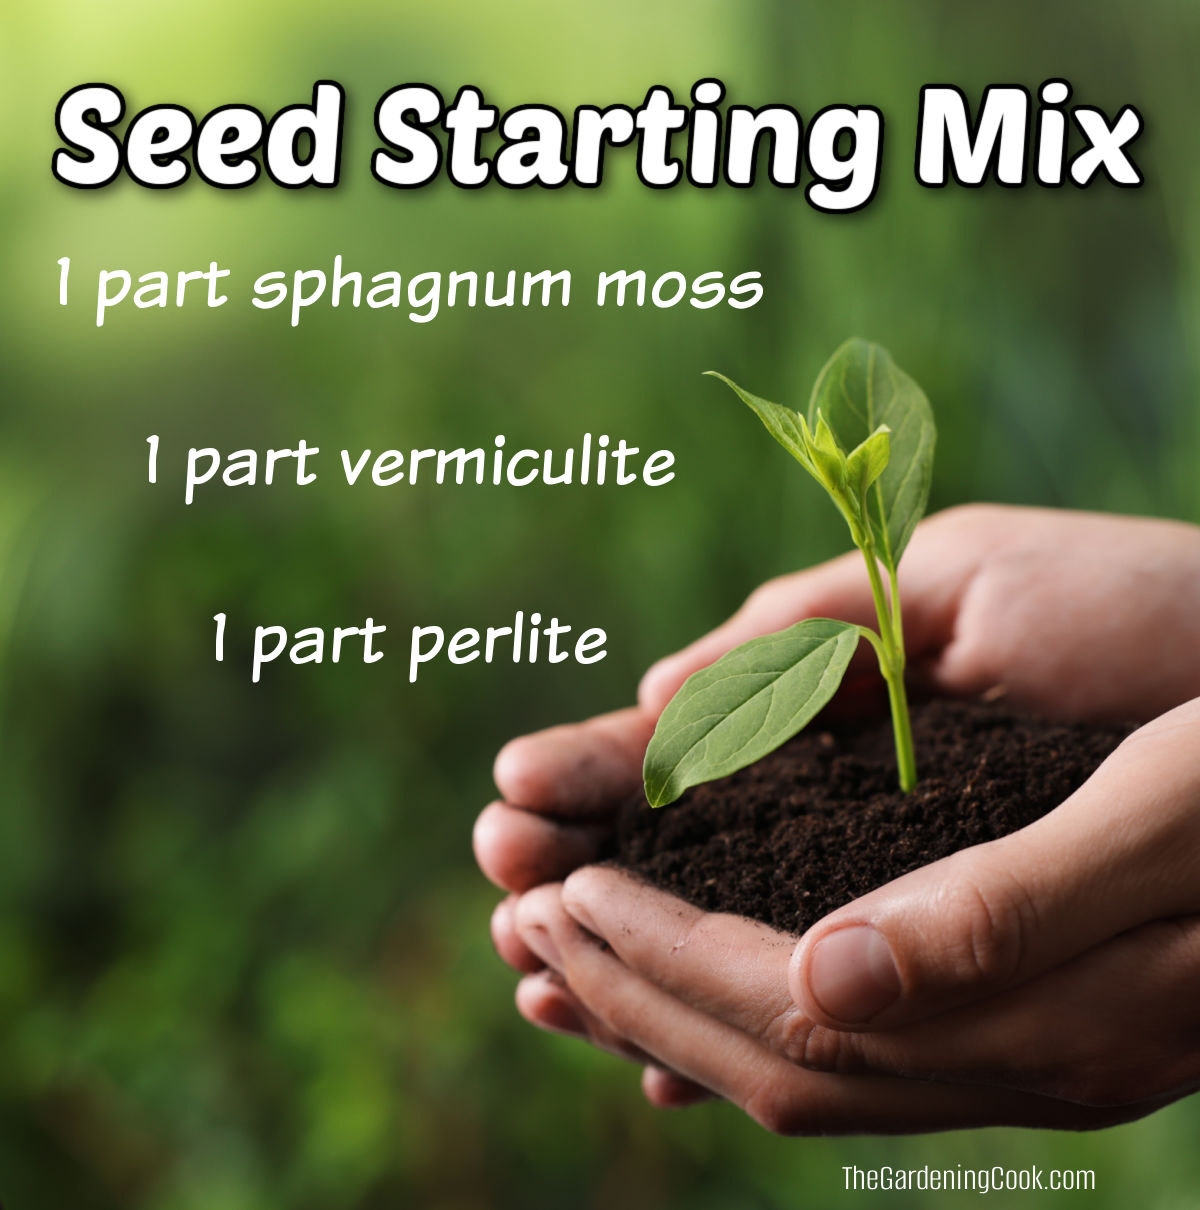
Seed starting mix is lighter than garden soil and helps seeds germinate quickly while preventing compaction and disease. A good seed starting mix is fluffy, sterile, lightweight, and holds moisture well.

- I recommend a DIY seed starting mix that combines equal parts of sphagnum moss, vermiculite, and perlite.
- This seedling potting mix promotes healthy root development and ensures proper drainage.
- Avoid normal potting soils; these are too dense and nutrient-rich for delicate young roots and can lead to poor germination and damping off.
Planting seeds indoors
Plant seeds indoors at the correct depth to improve germination rates and help them develop strong roots.
Here is a simple step-by-step method for planting seeds indoors successfully:
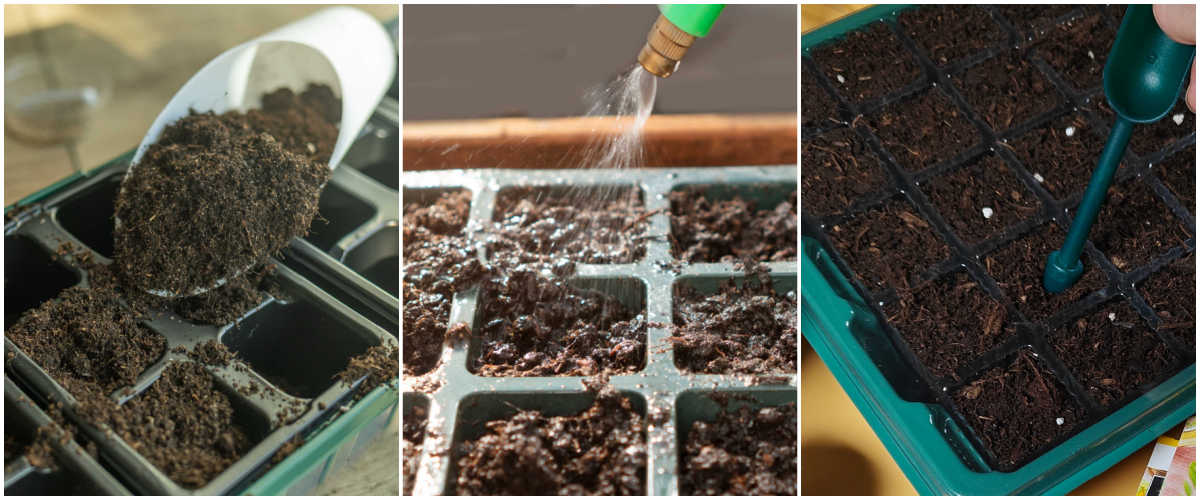
- Fill your seed starting trays or pots with your soil mix.
- Water the seed starting mix before planting to prevent the seeds from washing away later.
- Plant seeds at a depth of about 2-3 times the size of the seed.
- Use tweezers to handle small seeds more easily.
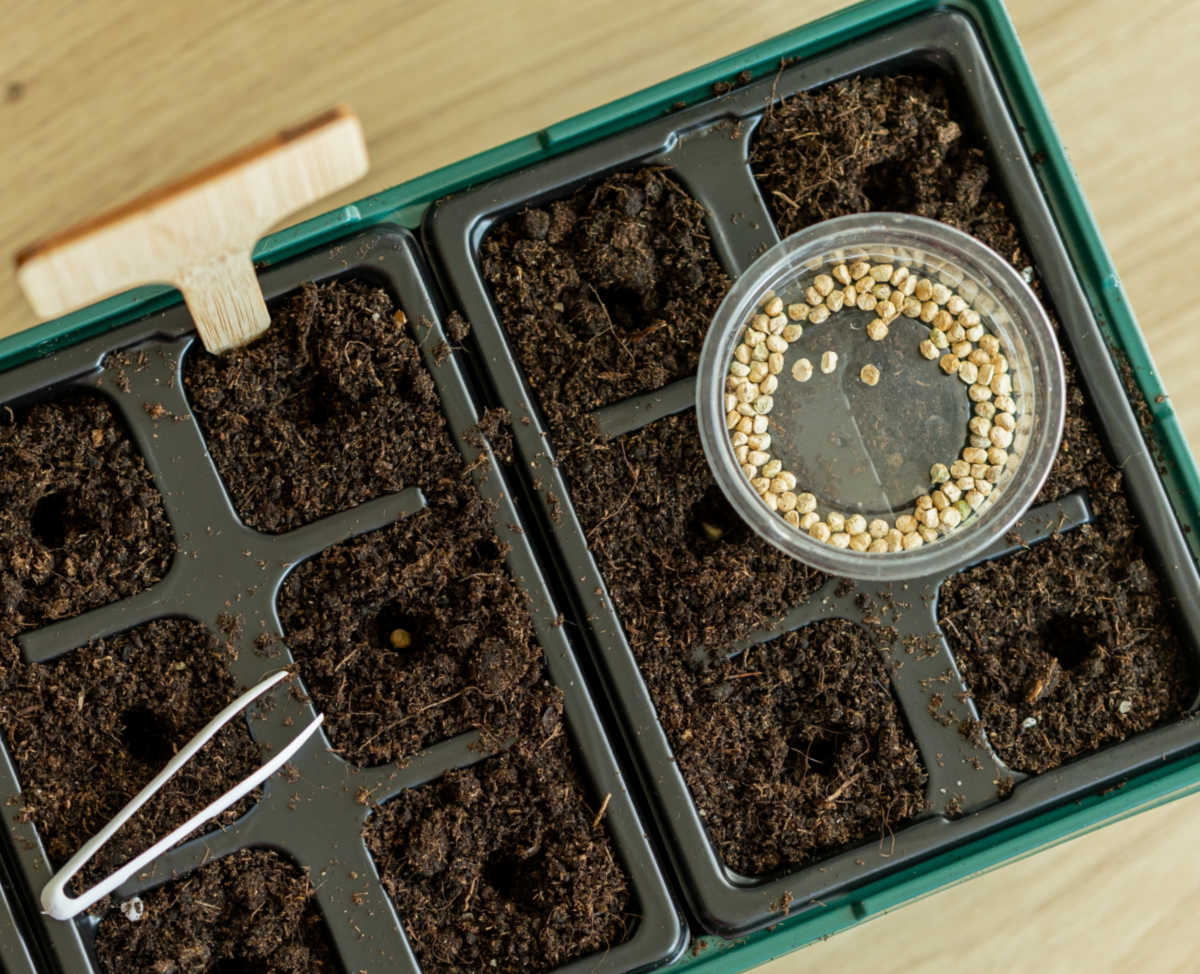
- If using open flats, space seeds about ½ – 1 inch apart. In cell trays, plant 2-3 seeds per cell.
- Very small seeds and those that require light to germinate should be placed directly on the surface of the seed starting mix.
- Make sure the seeds are in firm contact with the planting medium by gently pressing them down.
- You can tamp the soil lightly by using something flat, such as the bottom of a glass.
- A small kitchen sieve is a useful tool for covering seeds with the right amount of soil.
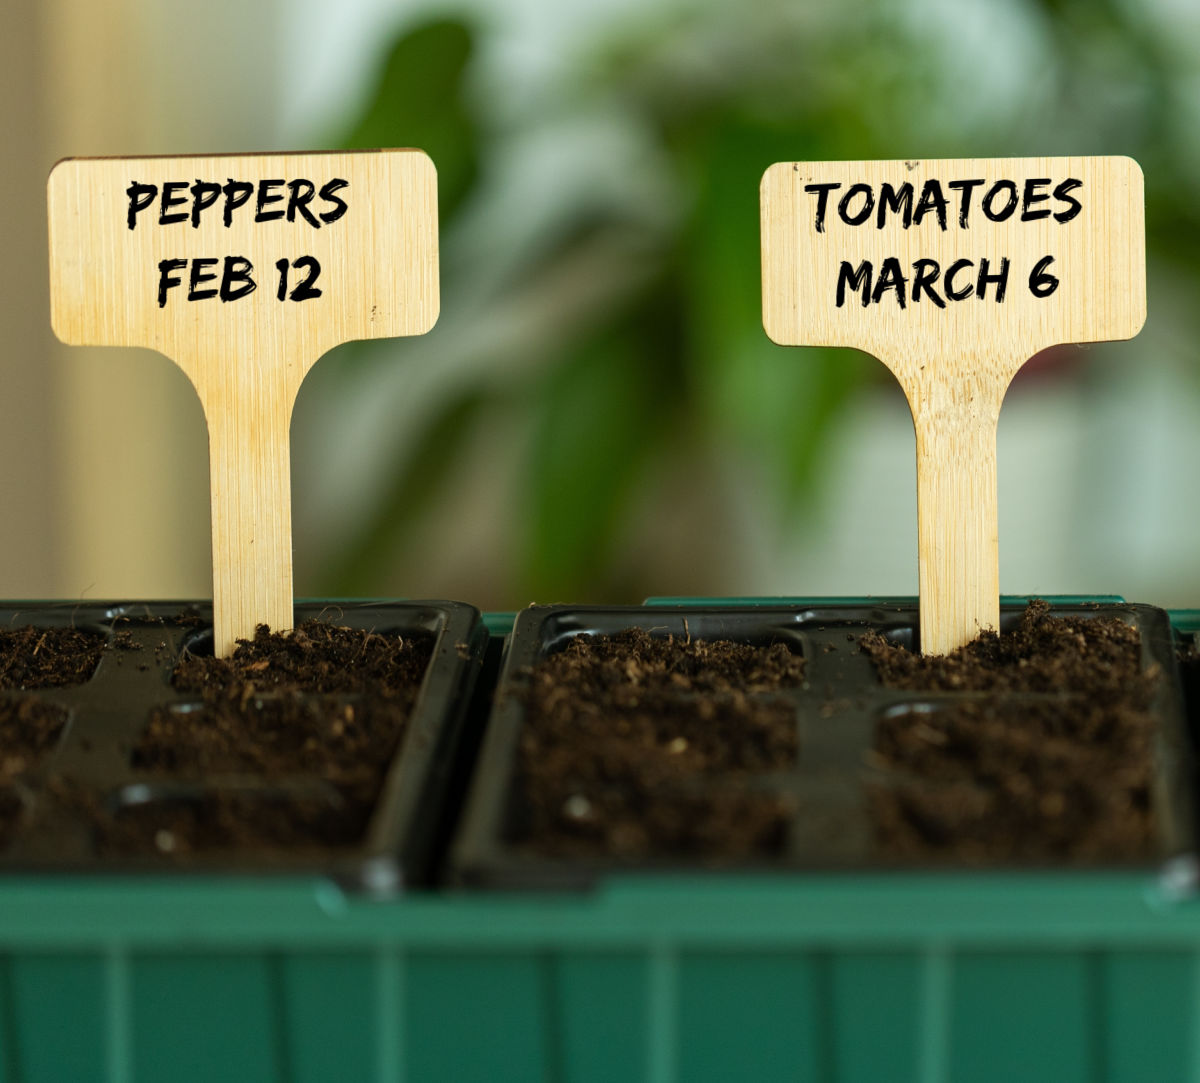
Pro tip: Labeling seedlings is important since many look alike in the early stages. You can recycle items such as old popsicle sticks to use as lables, or buy plant labels online.
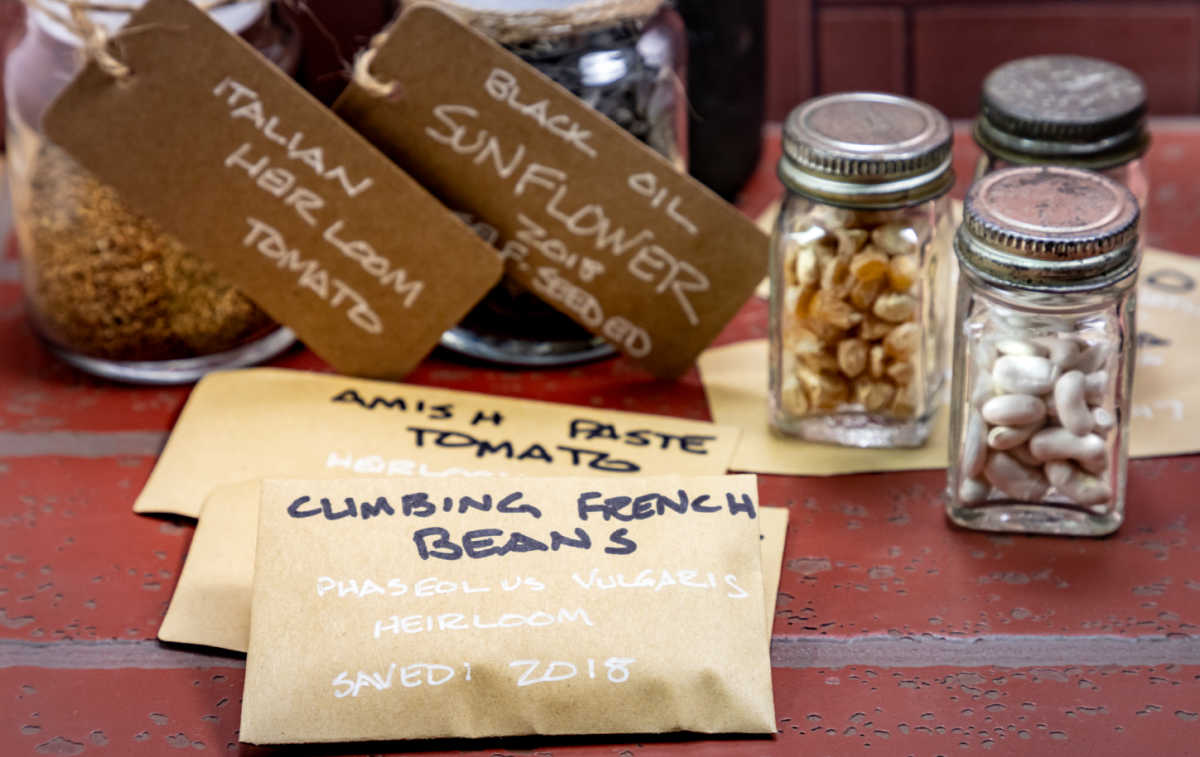
Storing your unused seeds
Store seeds in a cool, dry place in airtight containers. Label them with the variety and year, so you know their type and age.
Store them in temperatures between 35°F–40°F (1°C–4°C). with limited exposure to humidity and light.
Ideal spots for storing seeds:
- Fridge
- Cool closets
- Basements
- Specialized seed organizers
Caring for seedlings indoors
Healthy seedlings need strong light, consistent moisture, and good air circulation to grow sturdy stems and develop into strong garden plants.
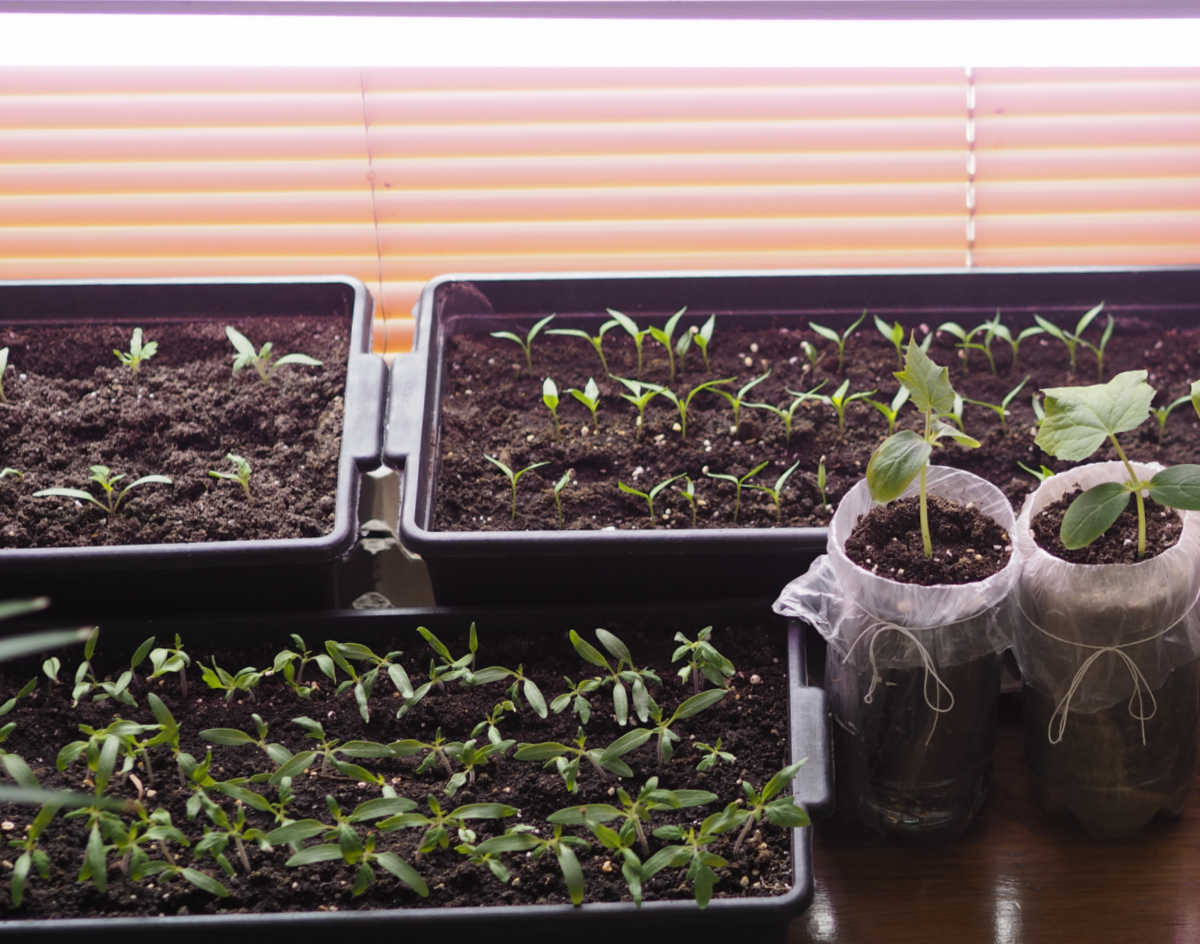
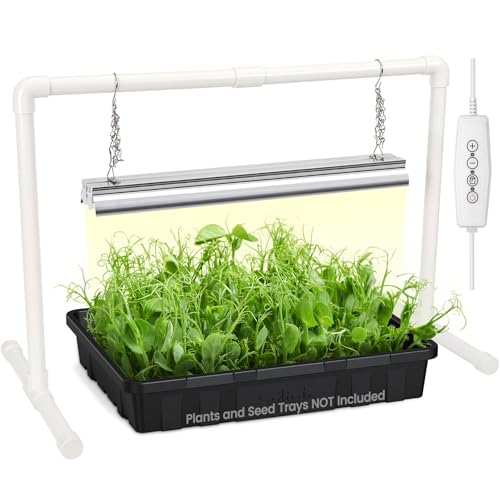
Provide enough light for seedlings
Once they have sprouted, seeds planted indoors will need 14-16 hours of bright light daily. Without this, they will be weak and leggy.
- Full-spectrum LED grow lights, placed 2-3 inches above seedlings, are ideal for strong, healthy plants.
- Leave LED lights on for 14 to 16 hours a day. Seedlings need 8 hours of darkness each day to rest.
- If using natural light, place seedlings in the brightest window available; a south-facing window is optimal.
- Rotate seedling trays regularly when using natural sunlight to prevent seedlings from stretching towards the light.
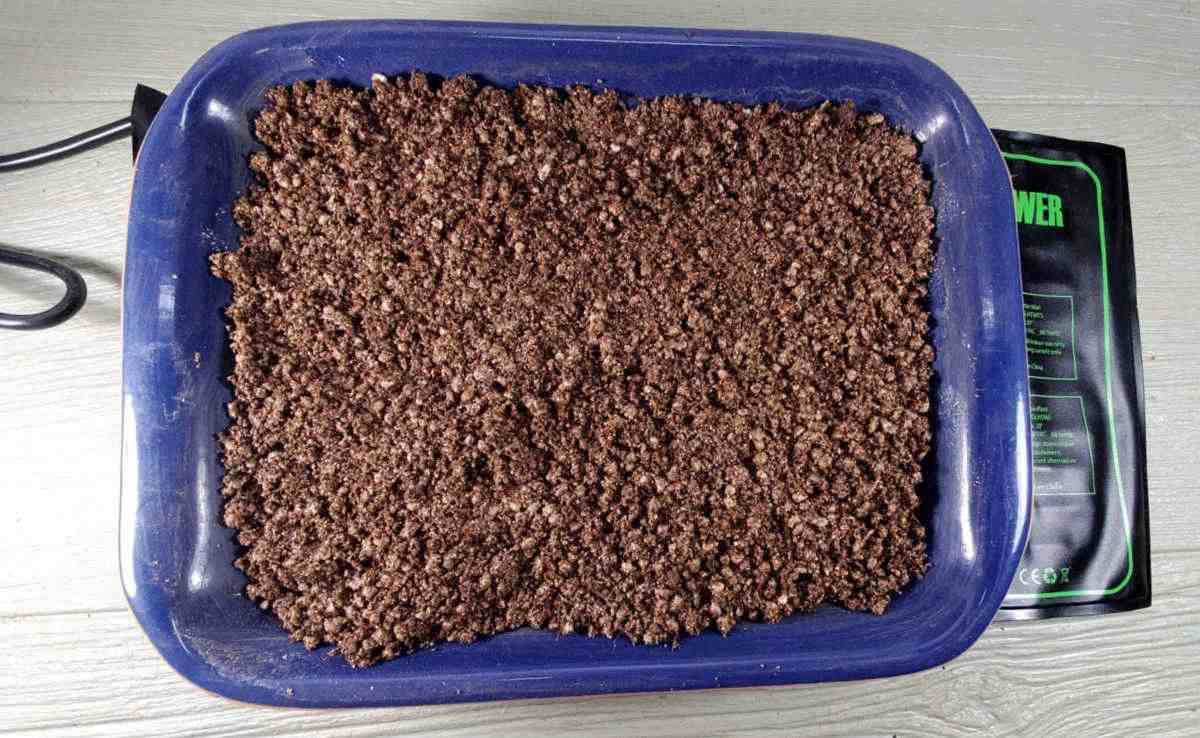
Provide warmth for germination of seeds
Indoor seeds germinate best in a warm, humid environment. Higher humidity helps keep the seed-starting mix from drying out while the seeds sprout.
- The ideal temperature range is typically between 70°F and 75°F (21°C and 24°C).
- Waterproof seedling heat mats with a thermostat are the most effective way to maintain consistent, direct bottom heat.
- You can also place your seedling tray on top of a fridge or water heater for extra warmth.
- The extra heat dries the soil more quickly, so keep an eye on watering if you use one.
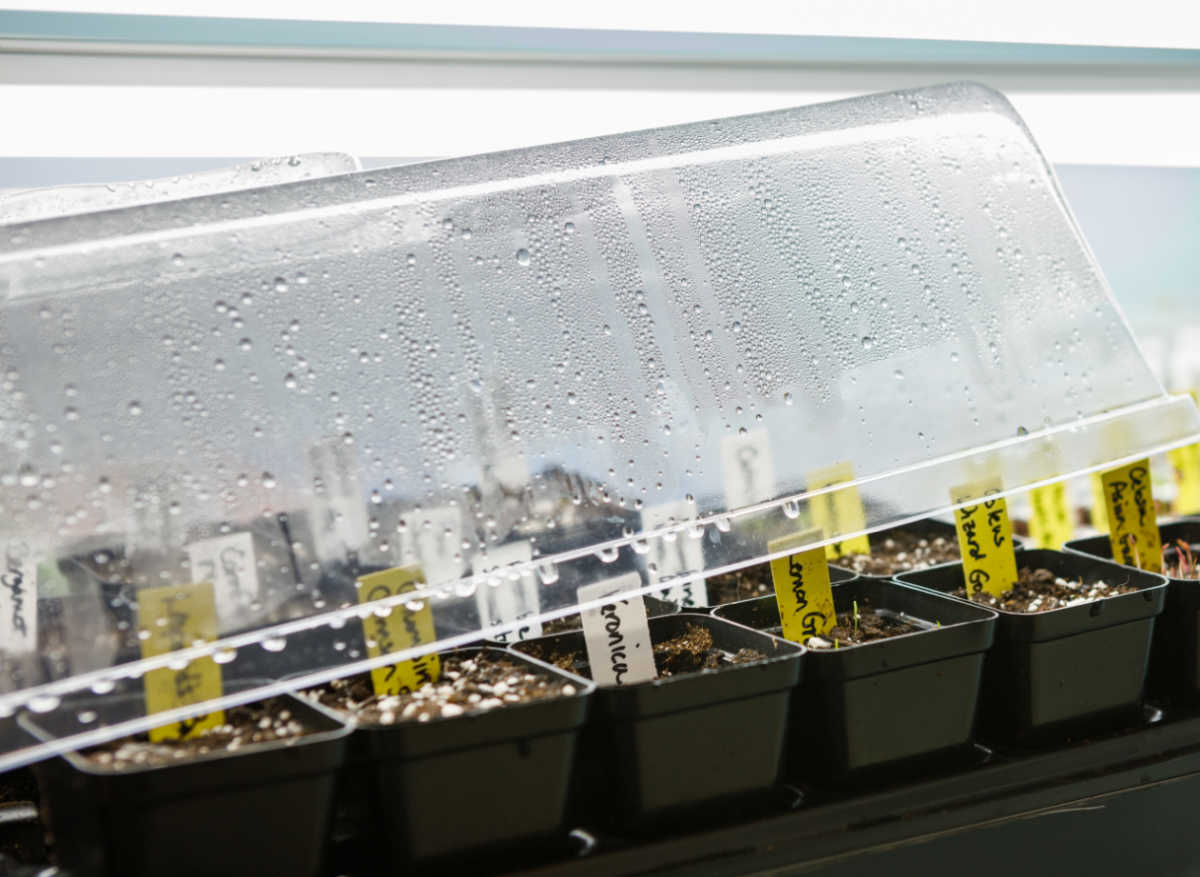
Providing humidity for seeds
Indoor seeds germinate best in a warm, humid environment. Higher humidity helps keep the seed-starting mix from drying out while the seeds sprout.
- To raise the humidity on your seedlings, use a humidity dome.
- You can create a DIY humidity dome by repurposing old rotisserie chicken trays as seed-starting trays.
Provide good air circulation
Good airflow helps prevent fungal diseases and encourages stronger stems as the seedlings grow indoors.
- Once the seeds have sprouted, remove any humidity domes to allow fresh air to circulate.
- A small fan on a low setting can strengthen stems and reduce excess moisture.
- Keep seedlings spaced so that the air can move freely around them.
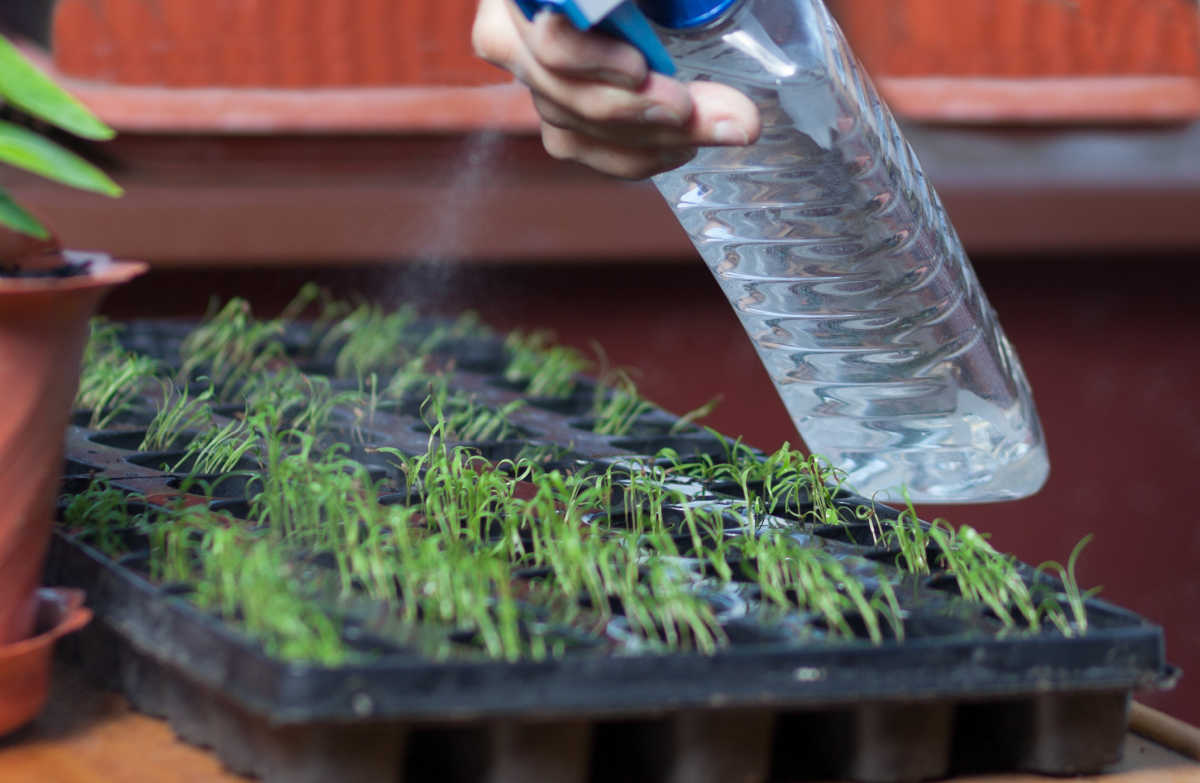
How to water seedlings indoors
Seedlings growing indoors require consistent moisture, but overwatering can lead to damping-off disease and weak, stunted roots.
- Water lightly until the seedlings start to grow. A spray bottle works well until the seeds sprout.
- The soil should be consistently moist but never soggy.
- Once seeds have sprouted, water from the bottom, if possible, to avoid disturbing young seedlings.
- Check the soil daily. Water when the surface begins to dry.
- Good light and warm temperatures will cause trays to dry faster.
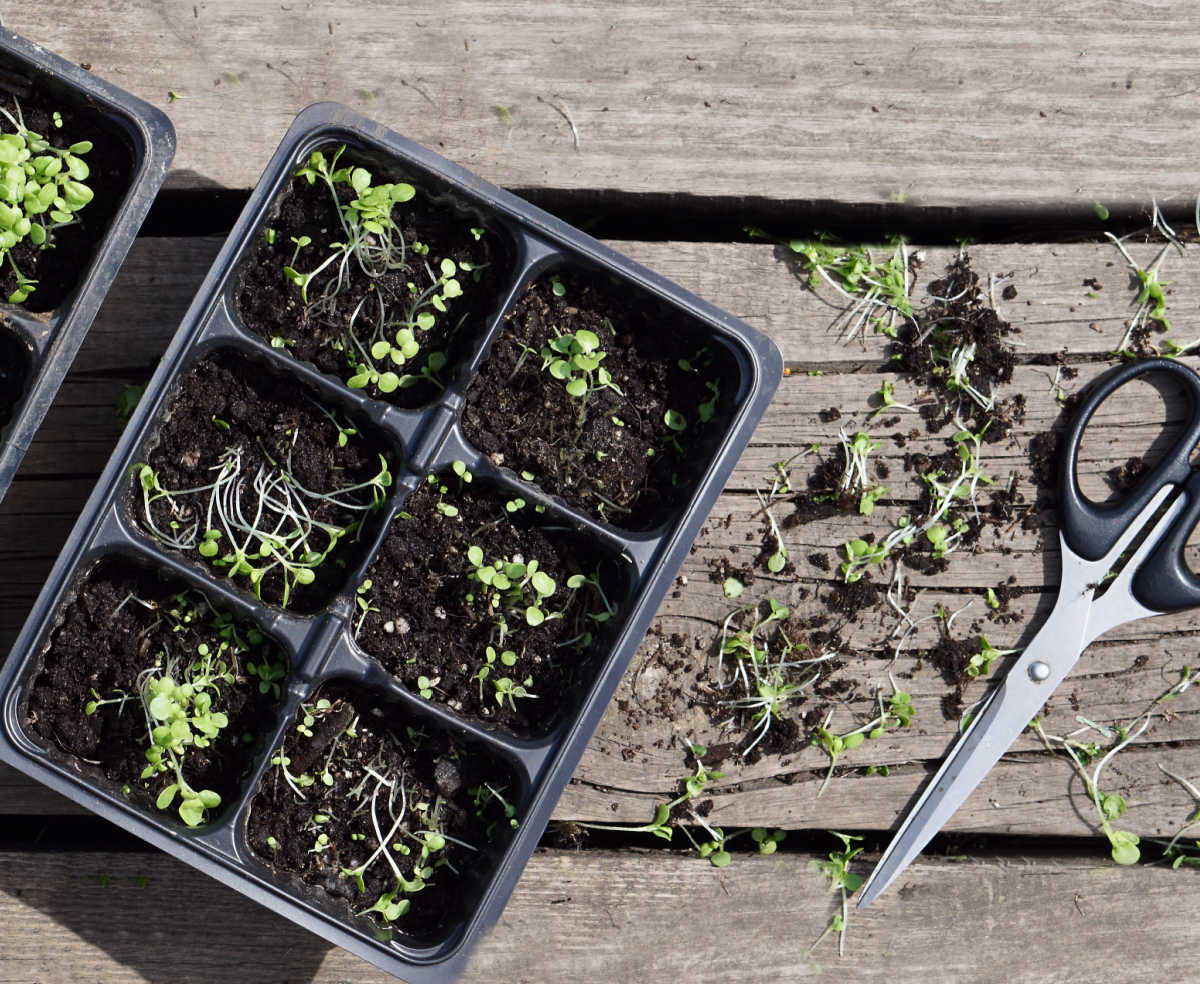
Thin crowded seedlings
You should thin seedlings grown indoors to ensure they have enough space, nutrients, and light to develop into strong, healthy plants. Here is how to thin seedlings:
- Wait until the seedlings are about 3 to 4 inches tall (8 to 10 cm).
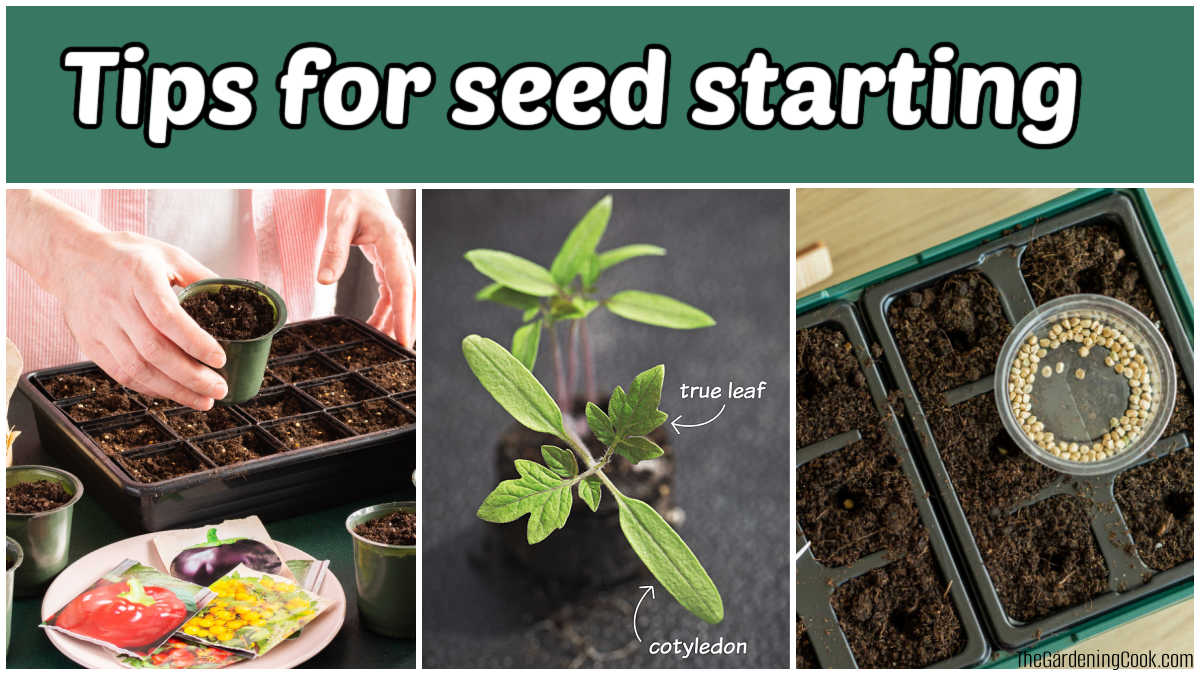
- Make sure the seedling has developed its first set of true leaves.
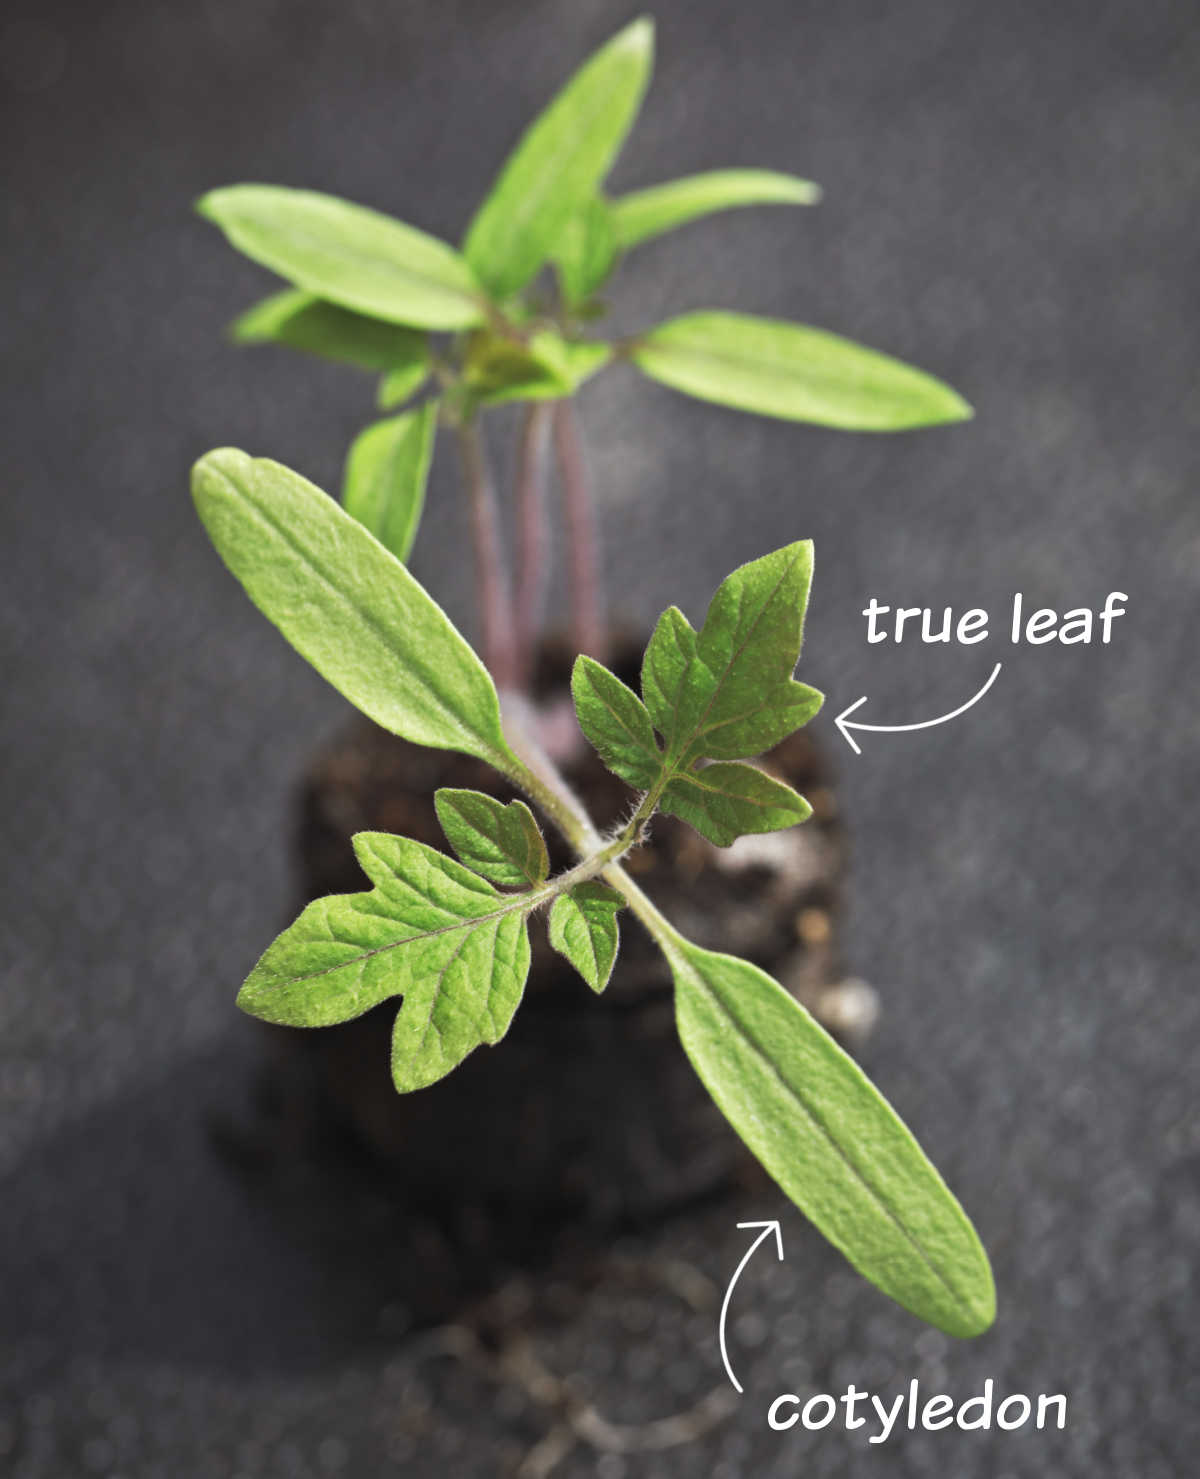
- The first set of “true leaves” resembles the mature plant and appears after the initial seed leaves (called cotyledons).
- Use a pair of small scissors to cut off crowded seedlings at the soil line, leaving the strongest ones.
- The remaining seedlings will have extra room to grow.
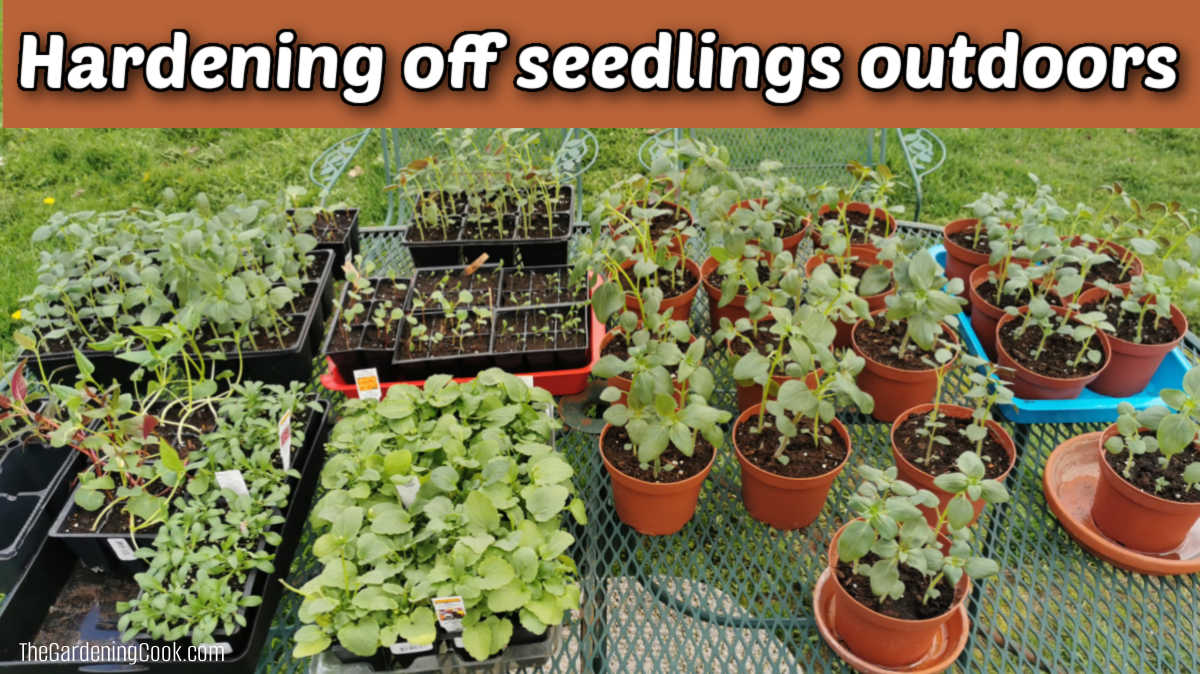
Hardening off seedlings
Seedlings that have been growing indoors need time to adjust to outdoor conditions before they can be safely planted in the garden. This process, called hardening off, gradually exposes young plants to sunlight, wind, and cooler temperatures so they do not suffer transplant shock.
Once seedlings have developed their first true leaves and are sturdy, they are ready to begin the hardening-off process in preparation for transplanting outdoors.
Why hardening off seedlings is important
- Indoor seedlings are used to stable temperatures and gentle indoor light.
- Direct sunlight, wind, and cooler nights can damage tender plants.
- Gradual exposure helps seedlings develop stronger stems and thicker leaves.
How to harden off seedlings
- Start about 7-10 days before you plan to transplant the seedlings into the garden.
- Place seedlings outdoors in a sheltered, shady location for 1–2 hours on the first day.
- Increase the amount of outdoor time each day.
- Gradually introduce seedlings to direct sunlight.
- Bring seedlings indoors if temperatures drop too low at night or if strong winds are expected.
Simple 7-day hardening off schedule
- Day 1–2: Place seedlings outdoors in shade for 1–2 hours.
- Day 3–4: Increase outdoor time to 3–4 hours with some morning sun.
- Day 5–6: Leave plants outside most of the day in partial sun.
- Day 7: Seedlings can remain outside all day and overnight if temperatures are warm enough.
Pro tip: Avoid hardening off seedlings on windy or very cold days. Gentle conditions help plants adjust more easily.
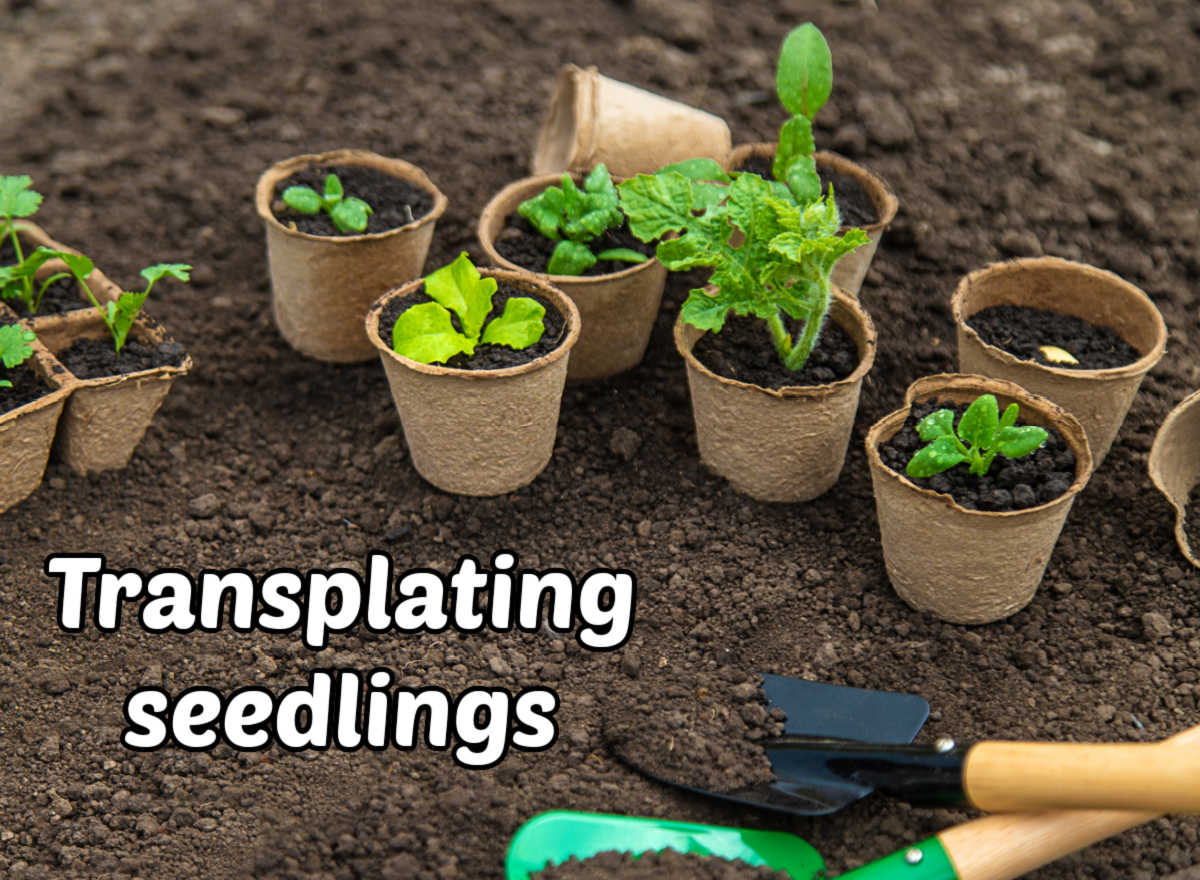
Transplanting seedlings outdoors
Once you have hardened off the seedlings for 7-10 days and they have developed two sets of true leaves, you can transplant them into the garden or larger containers. Be sure all danger of frost has passed.
Step-by-step tips:
- Choose a mild day: In the morning, on a partly cloudy or overcast day with temperatures between 60–75°F (15–24)° is ideal.
- Select the location: Check sunlight, soil type, and spacing requirements for each plant.
- Prepare the soil: Loosen garden soil and amend it with compost if needed.
- Dig holes: Holes should be slightly larger than the root ball of each seedling.
- Remove seedlings from containers: Gently loosen roots if they are root-bound.
- Plant at the correct depth: Most seedlings should be planted at the same depth as they were in their pots.
- Water thoroughly: Water immediately after planting to settle the soil around the roots.
- Mulch lightly: This helps to retain moisture and regulate soil temperature.
- Spacing: Leave room between seedlings for growth (check your seed packets for recommended spacing).
Pro tip: Use row covers for the first few days will protect your transplanted seedlings to give them the best start.
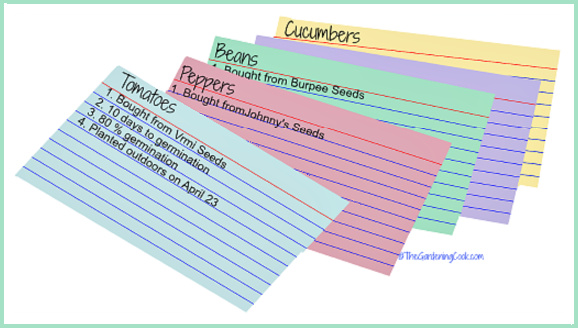
Keep records of your seed starting attempts
It is a good idea to keep written records of your seed starting endeavors. This will allow for better planning for the subsequent years.
Keep track of these items:
- Name of seed
- Where you purchased it
- Date of planting
- Germination success rate
- When seeds were transplanted
When to start seeds indoors chart

This downloadable printable is a quick reference for when to start common vegetables, herbs, and spring flowers, based on weeks before your local last frost.
You can print the seed starting timeline printable as high-resolution JPGs or PDFs by using the links below:
Printing instructions:
- Select portrait orientation and “fit to page” on your printer settings for a full-page printout.
- You can also print out the seed starting chart from the project card at the bottom of this page. Scroll down to the card and press “print.
Frequently asked questions abou t starting seeds indoors
Do seeds need light to germinate?
Most seeds germinate best when covered lightly with soil, but some very small seeds need light to sprout. In those cases, press the seeds gently onto the soil surface instead of burying them.
Why are my seedlings tall and leggy?
Leggy seedlings are usually caused by insufficient light. Provide 14–16 hours of bright light daily, ideally from grow lights placed close to the plants.
Do seedlings need fertilizer?
Seedlings usually do not need fertilizer until they develop their first true leaves. After that, feed them with a diluted liquid fertilizer every 1–2 weeks.
Can seed starting containers be reused?
Yes. Containers can be reused if they are cleaned and disinfected first to prevent the spread of plant diseases.
Share these tips for starting seeds on X
If you enjoyed learning how to start seeds indoors, please share this seed starting guide with a friend.
🌱 Ready to get a head start on your garden? Starting seeds indoors is easier than you think—and it can save you money on plants too! Learn when to plant seeds, how to care for seedlings, and how to avoid common mistakes. Plus, grab… Share on XPin these seed starting tips for later
Would you like a reminder of these tips for starting seeds? Just pin this image to one of your gardening boards on Pinterest so that you can easily find it later.

Admin note: This post first appeared on the blog in January of 2015. I have updated the post to add new photos, a printable “when to start seeds” chart, and a video for you to enjoy.
Printable Indoor Seed Starting Chart – When to Start Seeds Before Your Last Frost
Start your garden the right way with this printable indoor seed starting chart. It shows when to start vegetables, herbs, and flowers indoors based on weeks before your last frost date, making it easy to plan your spring garden and grow strong seedlings.
Materials
- Computer paper
Tools
- Computer
- Printer
Instructions
- Load your paper into your printer.
- Using the print function on this card will give you a seed starting timeline printable that fills about ¾ of an 8.5 x 11-inch sheet of paper.
- Choose portrait layout and, if possible, "fit to page" (or 125%) in your settings.
- Prefer full-page printing? You can also print the guide as a high-resolution file using your browser’s print feature: (PDF) | (JPG).
- Please note that creating free printables takes a long time. This seed starting timeline guide is for personal use only. If you are sharing it (and thank you for that!), please link directly to this post, rather than to the actual image. We appreciate your help in supporting the site.
- This printable may not be used for any retail purpose or for mass distribution.
Notes
Recommended Products
As an Amazon Associate and member of other affiliate programs, I earn from qualifying purchases.
-
 Grow Lights for Seed Starting, 2FT LED Full Spectrum Seedling Grow Lights with 4 Brightness & 8/12/18H On Timer
 -
 Seedling Heat Mat Durable Waterproof Plant Heating Pad 10"x 20.75" for Germination, Indoor Gardening, Greenhouse
 -
 55 Vegetable Seeds Variety Pack - 35,600+ Non-GMO Heirloom Seeds in Individual Seed Packets, Home Garden Seeds
Jamie
Wednesday 18th of March 2020
Actual fine written threads. It will be helpful to anyone who uses it, as well as me. Have responsibility what you are doing – i will certainly read additional posts.
Ann Bradley
Sunday 18th of February 2018
Great article! I was just wondering what zone your 'Sow What' chart is aimed at? I am in zone 7b, fairly new to gardening, and a little over whelmed with all the info out there! Lol Thank you!
Carol
Sunday 18th of February 2018
Hi Ann. The chart is not really aimed at any particular zone, but from the dates on it, it should cover most of the country that gets really cold in the winter. I am in zone 7b and I plant outdoors at least a month earlier than the chart. Carol
Jono
Saturday 18th of February 2017
Have you ever tried starting seed in an eggshell? If you keep it as intact as possible, wash it out, fill with some soil and plant the seed. When it is time to transplant just break the bottom of the eggshell and put it all in soil. The eggshell is also good for the plant. Hope this is a little interesting. Love the article though very informative, thanks.
Carol
Saturday 18th of February 2017
Hi Jono. Yes, I tried that last year. It worked like a charm. Glad you enjoyed the article! Carol
Wednesday-Elf
Monday 16th of March 2015
Wonderful tips, especially handy for non-gardeners who need lots of help getting started!
admin
Monday 16th of March 2015
Thanks! Glad you liked the post. Carol
ozge
Sunday 1st of February 2015
These pics are amazing. i will share them on my blog.