
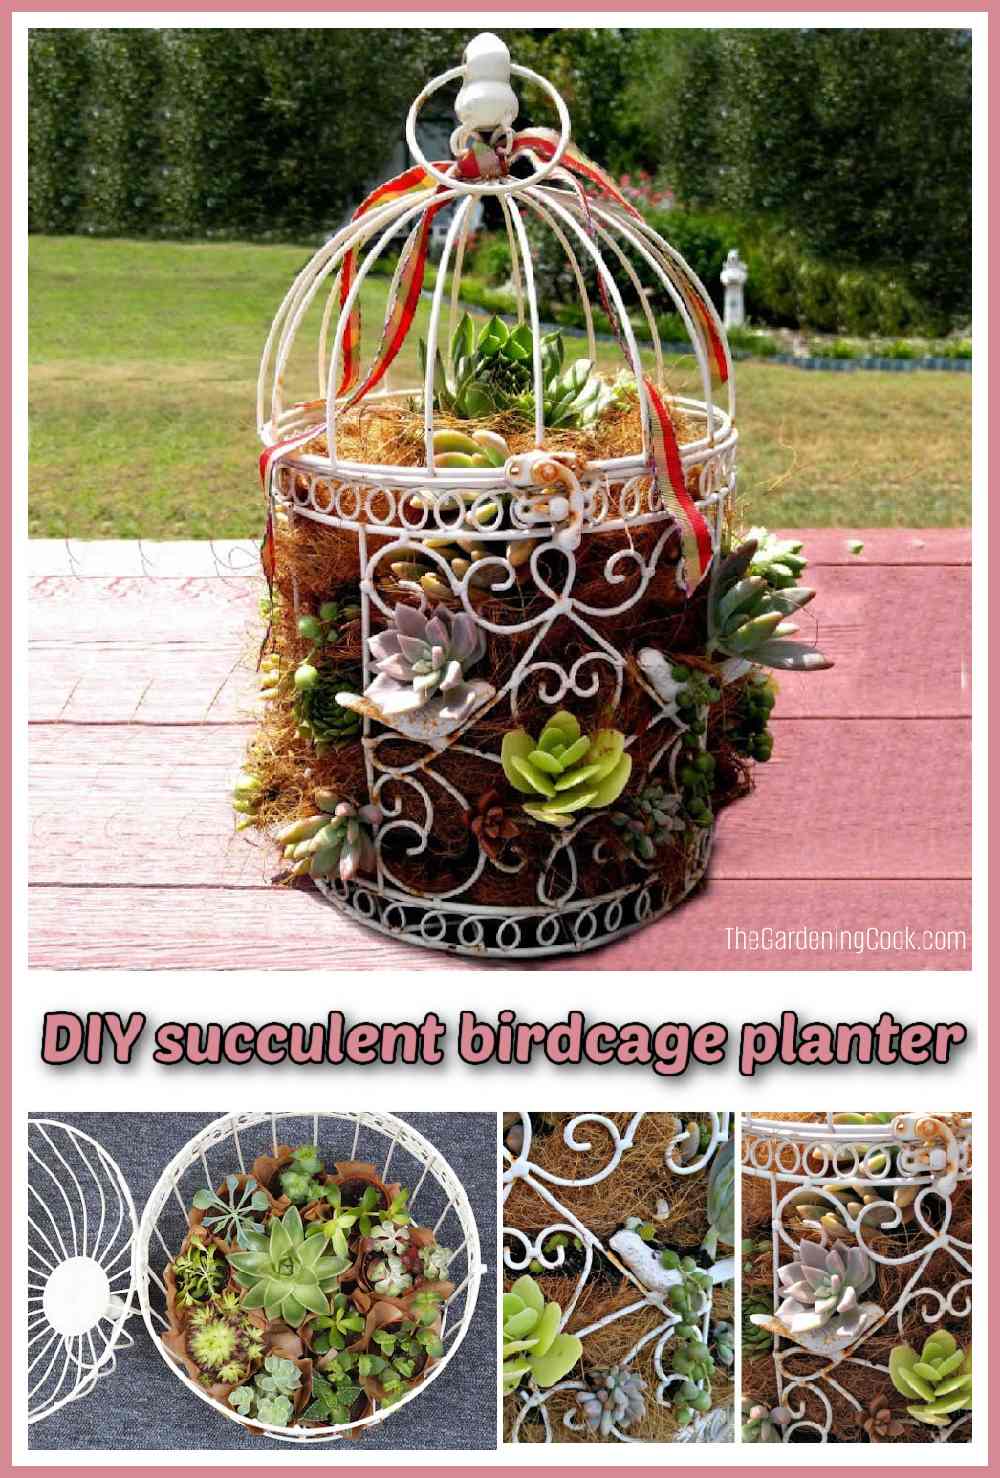
This DIY succulent birdcage planter tutorial shows how easy it is to transform household items into succulent planters.
Recycle an ordinary birdcage in a few hours with some simple modifications and an assortment of plants.
Succulents are great for a project like this because of their compact size and drought tolerance.
Do you have an old (or new!) birdcage hanging around? Keep reading to learn how to make a hanging birdcage planter for your succulents.

Throughout this post are affiliate links to Mountain Crest Gardens, my favorite supplier of succulents and other online sites. I earn a small commission, at no extra cost to you if you purchase through an affiliate link.
How to make a birdcage planter
There are a few things to consider when determining which bird cage to buy for your planter.
First, be sure to get the right size birdcage planter for the succulents you’re going to be using. The one I used for this tutorial was approximately 10 inches wide and 15 inches tall.
It’s also important to ensure there is a wide enough opening to add your plants. Look a birdcage with a top that swivels open.

Birdcage planter supplies:
Gather these supplies for this DIY birdcage planter:
- White birdcage with a top opening
- Weather-proof spray paint – Optional, but useful if your birdcage is in poor condition.
- Coco coir basket liner
- Succulent potting soil
- Fall colored plaid ribbon
- Assorted succulents
- Scissors

Making the hanging birdcage planter
If the paint on your birdcage is in bad condition, spray it with weather-proof paint first.
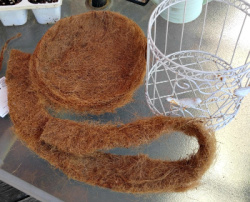
Cut the cocoa coir basket liner in a circle that is three inches larger than the base of your birdcage. The coco coir liner will keep the soil inside the birdcage.

Don’t throw away the coco coir scraps. You’ll use the pieces you cut off as “filler” for the spaces between the plants.
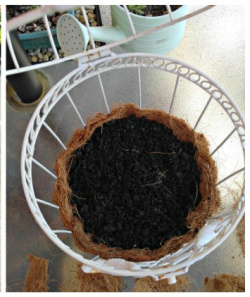
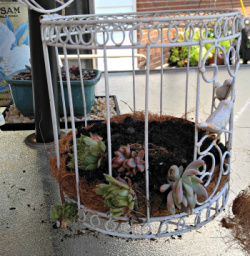
Place the cutout circle of cocoa coir in the bottom of the birdcage. Add a layer of succulent potting soil to the center of the cocoa coir basket liner.

Decorating birdcages with plants
Now it is time to start planting the succulents. You’ll need about 30 succulents of various sizes for this project.
If possible, try to have a combination of rosette succulents, like echeverias, as well as some trailing types, such as Thanksgiving cactus.
I was fortunate enough to have several trays of succulent leaf cuttings from a project that I did a few months ago. You can also purchase small succulents if you don’t have any rooted cuttings.
 When you put the succulents in your birdcage, instead of placing them face up as you would in a normal pot, lay them on their sides.
Position the succulents so they’re poking out through the openings in the side of the birdcage. Alternate with both large and smaller succulents. Then cover the roots with a thin layer of soil.
Add some of the coco coir scraps you saved earlier to fill in the spaces between the succulents on the outside edges of the birdcage.
This finishes the first layer of the succulent birdcage planter.

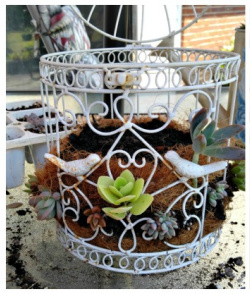
To start the next layer, add roughly two inches of soil in the center of the planter, and another layer of succulents laying sideways, poking out of the birdcage.
Add more soil to cover the roots, and more coco coir between the succulents on the outside of the birdcage.
Repeat this process until you have enough layers to fill your birdcage (mine was about 5 layers).
Alternate between large, small, compact, and hanging plants to give interest and dimension to the succulent birdcage planter.
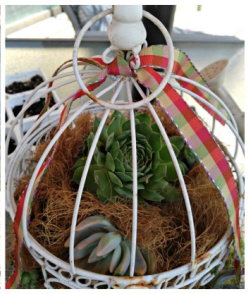
For the top layer, add a large succulent facing up, such as hens and chicks. This plant will send out offsets in time, and the baby succulents will fill in the top layer. Fill in the area around this succulent with more coco coir.

Close your birdcage and tie two pieces of plaid ribbon to the top as a decoration.
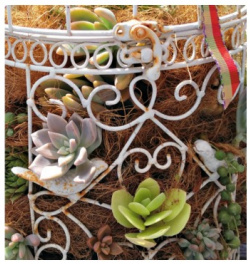
When you are finished planting, you may notice that there are some areas on the side of the planter where the soil shows. Fill these in by stuffing cocoa coir through the birdcage into the areas that need covering.

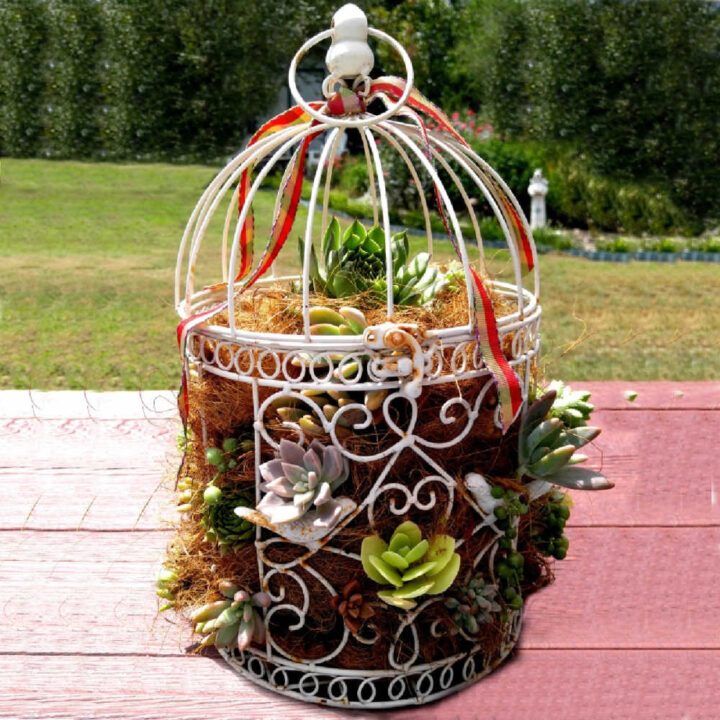
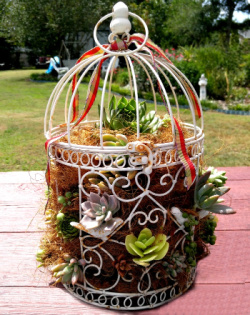
The decorative succulent birdcage planter is done!

Displaying a bird cage succulent planter
Once you have finished your succulent birdcage planter, you can display it in a variety of ways.

You can place it on a patio table, hang it on a tree or attach it to a fence post.
If you have a hook on the eave of your home, you can hang this succulent birdcage planter there, too.
More DIY succulent display projects
If you are looking for other projects that feature succulents, check out these tutorials:
- Wooden succulent arrangement
- DIY succulent arrangement
- DIY strawberry planter for succulents
- Coffee pot succulent terrarium

Share this hanging birdcage planter on Twitter
If you enjoyed learning how to recycle your old birdcage into a succulent planter, why not share this tutorial with a gardening friend? Here is a tweet to get you started:
Got an old birdcage that you don't use anymore? Don't throw it away! Turn it into a succulent birdcage planter. 🌵🐦✨ Head to The Gardening Cook for a step-by-step tutorial. #SucculentLove #GardenDIY #UpcycledDecor #HangingPlanter… Share on XPin this birdcage planter tutorial
Would you like a reminder of this post for decorating birdcages with plants? Pin this image to one of your gardening boards on Pinterest so that you can easily find it later.
Admin note: This post for a DIY birdcage planter first appeared on the blog in August 2016. I have updated the post to add clearer instructions, a project card, and a video for you to enjoy.
How to Make a Birdcage Succulent Garden
Don't throw that old bird cage away. Recycle it into a bird cage planter. All you need are a few supplies and a group of small succulent plants.
Materials
- Bird cage with a top opening
- Spray paint (optional)
- Cocoa coir fiber basket liner
- Succulent potting soil
- 30 large and small succulent plants
- Fall plaid ribbon
Tools
- Heavy duty scissors
- Watering can
Instructions
- Clean the bird cage.
- Depending on the condition, if it needs a touch-up, add a coat of spray paint.
- Cut out a circular piece of the cocoa coir liner three inches larger than the base of the birdcage. Reserve the extra pieces of coco coir for later.
- Add the circular piece of cocoa coir liner to the bottom of the bird cage.
- Fill the liner with potting soil.
- Adding succulent plants, laying on their sides, on the outside edges of the soil so they're poking out of the bird cage.
- Cover the roots with thin layer of soil.
- Add pieces of the cocoa coir fiber between the plants near the upright rungs of the birdcage to hide the soil.
- This completes the first layer.
- Add two inches of soil in the center and continue layering succulents, soil, and coco coir until you reach the top of the birdcage.
- Alternate between small and large plants as you're layering, making sure to pull the plants through the rungs of the birdcage slightly.
- Once you get to the top of the birdcage, add soil and place a large succulent, face up, in the center.
- Surround this large succulent with more cocoa coir.
- Have a look at the birdcage and make sure all areas showing exposed soil are covered with cocoa coir fiber.
- Close the top of the birdcage.
- Cut two pieces of plaid ribbon and tie them around the top of the birdcage.
- Water well.
- Display on a patio table, or as a hanging planter.
Notes
Use a combination of small and large succulents. Also, incorporate some rosette types and some that hang down, such as a string of pearls or a Thanksgiving cactus.
Recommended Products
As an Amazon Associate and member of other affiliate programs, I earn from qualifying purchases.


Cheryl
Monday 31st of October 2022
I have a birdcage but I haven't decided what to do yet. Fake or real? It's going to be indoors. I love the one with the wooden birds the best - it is Amazing! So my style. I'm definitely Maximalist. I bought an expensive 'string of pearls' it died. I got a replacement and it is outside. Part is in it's original plastic planter, part has grown into the soil below- I have to bring it inside before it freezes. Do you have a suggestion how to uproot the parts on the soil?
Carol Speake
Saturday 5th of November 2022
It is impossible to tell what to do with a specific plant problem without seeing the plant in person. However, ff the roots are growing through the hole in the bottom into the soil, separating them should not hurt it. If the plant has rooted outside the pot in the soil, separating them won't hurt it either. IN this case, you may end up with two plants.
Sophia
Tuesday 26th of March 2019
You have made a wonder birdcage planter. Do you have a YouTube channel as well? I want to see the complete process in the video if you have a video tutorial for this birdcage planter.
Carol
Tuesday 26th of March 2019
Hi Sophia. I don't do live videos but thank you for your interest.
Jess Speake
Monday 29th of August 2016
What a lovely planter! It looks just gorgeous on your patio table!
Jess
Carol
Monday 29th of August 2016
Thanks Jess. This is one of my favorite projects!
Jacki
Saturday 27th of August 2016
I have a smaller version of this bird cage which I was going to line with sheet moss and do the same thing. Maybe coco fiber would be easier...
Carol
Saturday 27th of August 2016
I liked working with the coco fiber because it is quite solid and holds the bottom layer in well as a base for the soil. It still pulls apart for filling in too. I'd love to get my hands on your birdcages! Carol