
Learn how to repot succulents for healthier growth and a more attractive display! In this guide, we’ll cover the basics of repotting succulents, including when and how often to repot succulents and so much more.
Whether you’re an experienced gardener or a new-comer to growing succulents, you’ll learn everything you need to know to replant your succulents with confidence.

Do succulents need to be repotted?
Repotting succulent plants into new containers is a necessary step to making sure the plant stays healthy and thrives. Repotting a succulent lets you give the plant fresh soil, better drainage, and also gives the roots of the plant room to grow.
If succulents are left in their original post for years without repotting they become root bound and their growth will slow down. As time passes, the nutrients in the soil will diminish and the plant will generally suffer.
If you are new to gardening or to growing succulents, the task of succulent potting might seem daunting. You may wonder how to repot succulents or ask yourself when to repot succulents.
In this post, we’ll give you with step-by-step instructions for how to transplant succulents, as well as some tips to make sure the plant grows well in its new pot.
When to repot succulents
Knowing when to repot your succulent is crucial for maintaining good health and growth.
Succulents can stay in the same pot for weeks without damage. New succulent plants in good sized pots with drainage holes can be left in their pots for many months and they will grow just fine.
However at some point, your plant will let you know that it needs more room for its roots to grow.
A general rule is to repot the succulent every 1-2 years, or more often if you notice any of the signs below. However, there are exceptions to this rule, since each variety grows at its own rate.
Spring is a good time to repot, since most succulents start growing then. Never repot when the plant is dormant.
Slow growers can spend a few years in the same pot without needing it to be changed. However, even if you don’t repot, it’s a good idea to regularly replace the soil to ensure the plant gets critical nutrients.
There are some tell-tale signs that it is time to replant your succulent into a new pot. Look for these issues. If you notice them happening to your plant, it is an indication that it is time to repot it.

Newly purchased succulents in tiny pots
Succulents are a popular indoor plant and many of the big box stores sell a variety of them in tiny pots.
Even though succulents are generally slow-growing plants, these very small, plastic containers which do not allow for much growth. It is recommended that you replant the succulents into a larger container after they have had a couple of weeks getting used to their new location.
Roots coming out of the drainage hole shows that it’s time to repot succulents
Overcrowded roots can become tightly packed in a small pot. The roots will circle around the bottom of the pot, taking up more and more space in the container.
They may even start to come out of the drainage hole on the bottom of the pot. This is a good indication that the pot is getting too small and preventing the plant from growing to its full potential.

Growth slowing down
If your succulent plant is not in a dormant period and has been showing limited growth, it may indicate that its roots require additional space to grow and would benefit from being repotted.
Waterlogged soil
Do you water your succulent and notice that it always seem to be over-watered even after several days have passed? Poor drainage could be the culprit. This often happens to succulents grown in pots without drainage holes.
Replacing the plant with fresh soil and into a pot with a hole on the bottom with help with your watering problems.
Soil that dries out too quickly
If you water your succulent and find that it dries out in just a few hours or days, it could mean that the plant is pot bound and doesn’t have enough soil around its roots.
If this happens, take the plant out of its pot and inspect the roots to see if its root bound and need to be repotted.
Your succulents get top heavy
Most succulents are fairly slow-growers but some can grow quickly and get quite tall and top heavy. This might mean that the plant will topple over.

If your succulent is top-heavy, it could mean that the plant has outgrown its pot, but could also show you that it just needs repotting in a much heavier pot to support its weight.
Once again, inspecting the root ball will tell you whether to repot in a larger pot, or just a heavier one.
The succulents has produced offsets
As some succulents mature, they will produce offsets, or babies, often called “pups.” This means the plant is happy and growing well.
If your plant has produced pups, it doesn’t mean that you need to repot, but it is a good time to separate the pups from the mother plant and pot them up separately.
You can refresh the soil from the mature plant at this time and all plants will grow better. An added benefit is that you’ll end up with several plants instead of just one!

How do you repot succulents?
Now that you know why and when to repot your succulent, let’s find out how to do the job.

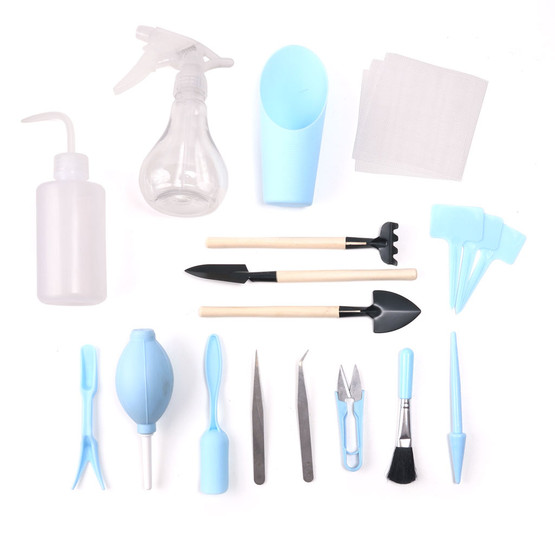
Gather your materials
Repotting a succulent is a job that needs just a few supplies, most of which you likely have on hand. Gather everything that you will need to do the job of replanting succulents.
- Your succulent plant
- Fresh potting soil, suitable for succulents
- A new pot, preferably with a drainage hole.
- Gardening gloves (optional)
- Tool kit for succulents (optional – even a spoon will do in a pinch)
- Water
- Newspaper
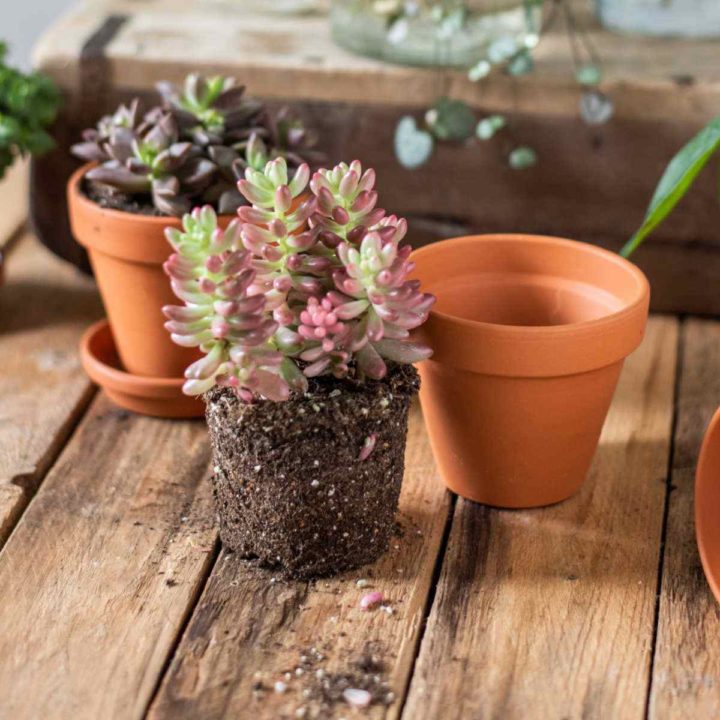
Add fresh soil to the new pot before repotting succulents
Water your succulent well a few days before you start the job of repotting. Doing so will make the root ball easier to handle and easier to remove from the pot.
Place newspaper on your work surface. Repotting a succulent can be a messy job!
Choose a new pot that is about 2 inches wider than the diameter of your succulent. This gives the plant room to grow and also gives you space for adding soil.
Start by adding some fresh soil to the new pot about half way up the pot. This will give the succulent roots a bed of soil to sit on.
You can purchase repotting succulents soil especially formulated for this type of plant, or make your own. A combination of half potting soil and half perlite is a good mixture to use.
When mixed well with your potting soil, perlite helps to allow the soil to drain and not become over-watered.

Removing the succulent from its pot
To remove the succulent, turn the pot upside down while holding on to the crown of the plant. Gently tap the bottom of the pot to loosen the soil. The plant should slide right out.

If you find that the plant is stuck in the pot, use a tool, or spoon to loosen the soil around the edges of the pot.
Clean the roots of the succulent
Once you have the succulent free of the pot, take a good look at the roots. If the roots circle the bottom of the root ball, pry them apart with your fingers.
Gently loosen the roots. Spreading them out allows the roots area to stabilize in the larger pot. They will also get used to the new soil more easily.
If you find any dead or dying roots, remove them with a pair of clean scissors. Also clean up the plant in general by removing any dead leaves from around the base of the plant.
Brush away any old and extra dirt. The plant will do better with as much new soil as possible.
This is also a good time to inspect the plant for signs of mealybugs and white flies, two common insects that love succulents.
If you find any “babies” or offsets, you can remove these and pot them up separately. I often remove a few leaves to add to my succulent propagating tray at this time, too. It’s always nice to get plants for free!

Add the plant to the new pot
You already have some soil in the pot from step one in the list of instructions above. Make a shallow hole in the soil and gently place your succulent in the pot.
Add some more soil to stabilize the plant. Back fill with fresh soil around the outside of the root ball, being sure to add enough to reach the base of the plant. Tamp down the soil with your fingers to remove any air pockets.

Try to make sure that the base of the succulent sits in the new pot at the same soil level as it did in the old pot. Also try not to let upper leaves rest on the soil as this can lead to leaf rot from excess moisture.
Don’t have the soil sit too high in the pot. Be sure to leave some room at the top for watering.
Add top dressing after repotting succulents
Once the succulent is in the new pot with new soil, you can add some top dressing. While this is an optional step, it makes the finished planter quite pretty.
You can use colored rocks, moss, pebbles or sand. Whatever form of top dressing you use, be sure that the material drains well so that water will get to the roots in the soil below.
See my note at the bottom of the post about repotting succulents that have rocks glued to the surface of the soil. This seems to be more and more common lately, and can make repotting a real chore.
Water after repotting
After you are done repotting the succulent, water it well, making sure the the entire soil ball is evenly moist.
Don’t water again until the soil dries out well. This will give the roots of the plant time to recover from the repotting experience.

Place in a bright and sunny spot
Your plant will take a few weeks to get used to the new pot and to start growing. Place it in a bright and sunny spot, but avoid direct sunlight for the first week.
That’s all there is to repotting succulents! Care for the newly potted plant by watering it when the soil is dry to the touch and gradually moving it to a spot with more direct sunlight.
Succulents are very forgiving plants that will thank you for repotting them by growing and thriving.
Repotting succulents with rocks
Sometimes, even armed with the how-to instructions above, repotting succulents can prove to be a real chore. This happens when you purchase succulents with glued rocks on the top of the soil.
This is often done to protect plants during shipping, since overturned plants will lose soil and often arrive dead.
However, since succulents often need repotting every few years, this is not a good idea and certainly not a great experience when you try to repot the plants in a larger pot.
Glued rocks can limit the growth of the stem of a succulent and will attract too much heat to the soil they sit in. Also, water will have a hard time penetrating the glued rocks and this can give you the problem of underwatered succulents.
I recently had an experience with some “bargain priced” succulents that were purchased with rocks on top. I planned to put them in a dish garden as a succulent arrangement. I figured that I’d have them re-potted in 20 minutes or so.
Sometimes gardening doesn’t go quite as expected. My 20 minute task ended up taking all day.
How to repot a succulent with rocks glued on soil
If you find yourself in this situation, there are a few things that you can do to speed up the process. I tried all of these at various times in my repotting exercise.

Soak the plants before repotting. Although succulents don’t like to sit in water, they can withstand a short period of time soaking without damage. Try doing this step first to see if the glue will dissolve.
You might have to weigh the plant down so that the rock topping will be submerged as well as the soil. If you do this overnight, the rocks should peel off.
Chip away the rocks. If the soaking fails, gently chip the rock away from the surface of the soil. Be patient. This can take a long time.
A screwdriver or knife will help to pry the rocks away. Even pliers can be used to pull away the rocks.
Remove the soil and rocks together. If the rocks won’t bulge, you can unpot the plant and wash away the soil from the roots. The gap between the rock layer and roots should let y you remove the rocks.
Repot the succulents with new soil and remind yourself never to buy succulents with rocks glued to the surface, no matter who bargain priced you find them!
Don’t throw the rocks away. At least you will be able to use them as unglued toppings for future succulent planter arrangements!
Share this post about repotting succulents on X
If you enjoyed learning about how to repot succulents, be sure to share this post with a gardening friend.
Do you have succulents that have outgrown their pots? It may be time to re-pot them. It's not as hard as it sounds. Head to The Gardening Cook for a step by step tutorial on repotting succulents. Share on XPin this post for tips on repotting succulents
Would you like a reminder of this post for succulent repotting? Just pin this image to one of your gardening boards on Pinterest so that you can easily find it later.

Admin note: this post for repotting succulents first appeared on the blog in September of 2o13. I have updated the post to add all new photos, a project card with instructions, and a video for you to enjoy.
How to Repot Succulents - A Step by Step Guide
When your succulent gets too big for its pot, it's time to replant it. The job is much easier than it sounds. This tutorial on repotting your succulents will show you how to transplant your plant into a larger pot.
Materials
- A succulent plant
- Fresh potting soil, suitable for succulents
- A new pot, preferably with a drainage hole.
- Top dressing (optional)
- Water
Tools
- Gardening gloves (optional)
- Tool kit for succulents (optional – even a spoon will do in a pinch)
- Watering can
- Newspaper (to keep the work surface clean.)
Instructions
- A few days before you start, water the succulent well. It will be easier to handle during repotting
- Choose a container that is 2 inches wider than your current pot.
- Spread newspaper on your work surface.
- Add fresh soil about 1/2 of the way up the pot.
- Remove the succulent from its old pot. (see tips for this in the post above)
- Spread out the roots and remove any lower leaves that are dead or dying, as well as any dead roots.
- Place the succulent into the new pot on the soil.
- Back fill with more fresh soil around the edges of the succulent.
- Be sure not to fill too high or watering will be a problem.
- Tamp down the soil to remove air bubbles.
- Water well and place in a sunny, bright window away from direct sunlight for two weeks.
- Don't water during this time.
- After two weeks, move to a sunnier location and resume watering.
- Enjoy your happy plant!
Recommended Products
As an Amazon Associate and member of other affiliate programs, I earn from qualifying purchases.


Katherine
Friday 10th of May 2019
That cement pebble topping has always infuriated me, and I would not purchase. Then I was gifted a cool grafted cactus in just such a state (with no drain hole!). What to do with the repotting? Help.
Carol
Friday 10th of May 2019
Basically you will have a day like I described mine to be. I had to sort of chisel the stones out being careful of the plants and then I started over. I also get so mad when I see them sold like that. It is pretty and gets it over the door as a sale, but it's a horrible customer experience.
Mary Ann Anderson
Tuesday 13th of May 2014
I have NEVER had any succulents but I love my plants and I am interested in starting a planter. What do I need to start.? I know the small pebbles go on the bottom but what do I use as the planting medium and which plants are the best to start with. I live in zone 9. thanks for your help Mary Ann
admin
Tuesday 13th of May 2014
Hi Mary Ann. An all purpose cactus potting soil is perfect for succulents. It allows for good drainage. You are lucky in zone 9, almost all of the succulents will over winter outdoors. I have to bring mine in.
Just choose the ones you like the look of. They are very easy to grow.
Carol
Nikki
Wednesday 12th of March 2014
It's never crossed my mind to see if the rocks are glue together. Silly me assumes no one would glue them. Thanks for sharing your experience so that I know to check before buying!
admin
Wednesday 12th of March 2014
Hi Nikki,
If you shop for plants (indoor plants) at either Lowe's or Home depot, you will find them. I saw some again this year, and not just on succulents. Makes me a bit angry, actually. Anything to make it look pretty for a sale without a thought as to what is good for the plant. Carol
Oh No You Didn't! 6 Common Gardening Mistakes - Empress of Dirt
Sunday 9th of March 2014
[…] Carol: Sometimes it’s not you, it’s the plant! | The Gardening Cook […]