
These DIY Halloween wooden decorations have been a favorite yard decor idea for our family for years.
When my daughter was much younger, I was very much into all sorts of crafts. I especially loved decorating for the various holidays because she loved what I came up with for decorations.
This project takes more time than most of my craft ideas, but it gives you a set of decorations that you can store and reuse year after year. The neighborhood kids will love them!
Keep reading to see how I made this Halloween yard decor project.
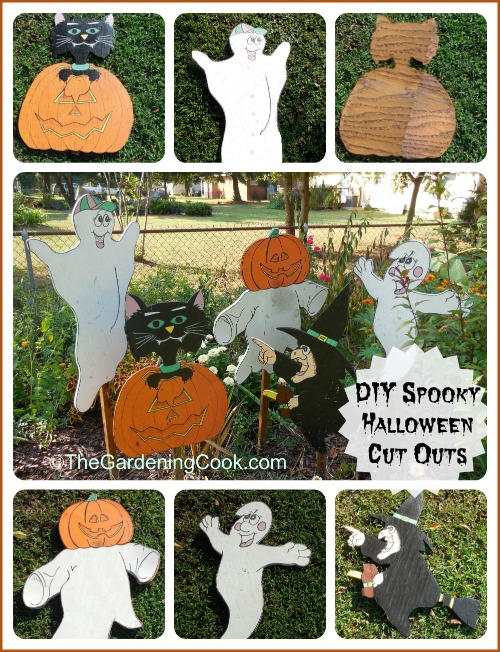
DIY Halloween Cut Outs
Not being happy with just one decoration (call me an overachiever!), I decided to do a full set of large Halloween cut-out decorations to put on your front lawn.
I have a limited amount of talent for painting but it takes me a long time to get perspective right. So, for this project, I purchased a Dollar Store Halloween coloring book.
 I found the images I wanted and put a grid over the pages so that I could make a larger template. The next steps were fun.
Jess colored the photos of the pictures we had chosen the way she wanted them. I applied a grid to the photos in the coloring book.
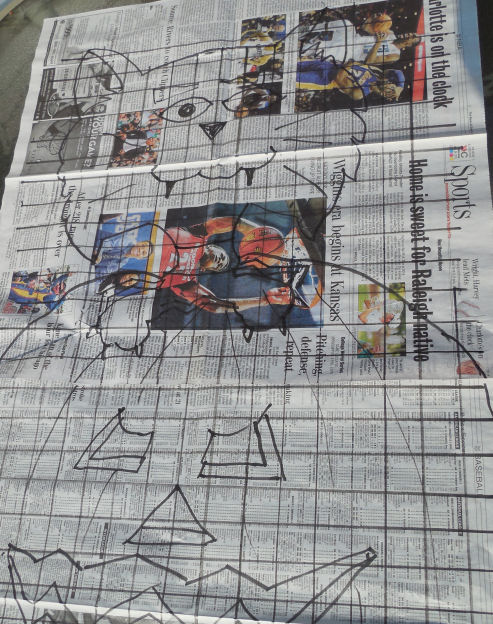
 The next step was to take two large pieces of newspaper and make lines with markers on it. This gave me an idea of shape and how to paint the project when it was done.
Note: Power tools, electricity, and other items used for this project can be dangerous unless used properly and with adequate precautions, including safety protection. Please use extreme caution when using power tools and electricity. Always wear protective equipment, and learn to use your tools before you start any project.
My husband took over next. We laid the newspaper template on a piece of chipboard and he used his jigsaw to cut out the shapes.
 I added grid lines to my cut-out using a pencil.
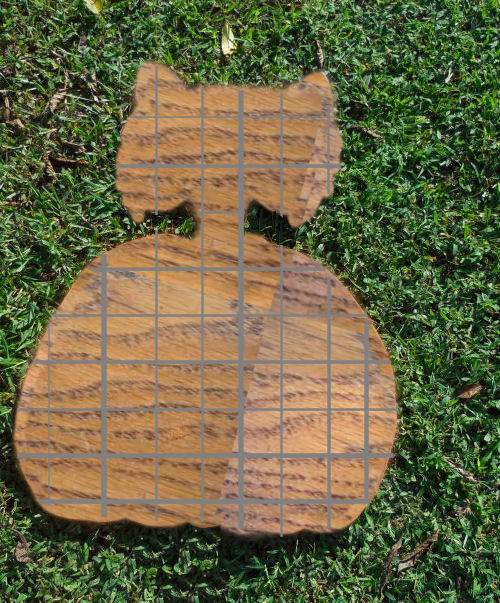 Using the two grids that I had prepared, I just got out weatherproof paint and painted the design as closely as I could following the grid patterns.
Wooden Halloween cut-out decorations
The decorations took a few hours to paint and allow to dry, but they turned out well.
Ghost decoration
What would Halloween be without a ghost decoration?
I love his little green striped hat. The ghost was the easiest decoration to do. Very little painting was involved after the white paint was applied.

This ghost never fails to delight the children who come for trick-or-treating time.
For another easy Halloween ghost be sure to check out how I added wiggle eyes to my old man cactus to make a Halloween ghost for my next scary party.
Cat wooden decoration
Black cats are a symbol of Halloween, so they needed to make an appearance in my decorations.
It is only fitting that the cat is popping out of a pumpkin – another Halloween symbol.

Wooden wicked witch decoration
Witches abound on Halloween, from costumes to fun Halloween treats.
This wicked witch is taking a ride on her broomstick this Halloween night. Since the bulk of this decoration was painted black, it was ready in a flash, too.

Pumpkinhead ghost decoration
This cute yard decoration is two symbols in one, the pumpkin and the ghost.
I love his happy smile. He won’t be scaring any neighborhood kids this year!

Friendly ghost decoration
It seems I have a thing for friendly ghosts. This one looks a bit like Casper the Ghost to me.
I loved that cartoon show as a kid and wanted to share it with my daughter.

Finishing the wooden decorations
The wooden Halloween decorations needed something to help them stand on the front lawn.
We used a two-by-two piece of wood with an end that was cut to a point, They were easy to attach to the back of the cutouts.
Then we just pounded them into the ground and the project was finished.
 And here they are all lined up. The kids in our neighborhood just love them!

Share this post these Halloween outdoor decorations on X
Have you enjoyed learning how to make these outdoor Halloween decorations? Let your friends and family know about them by sharing this post:
Dress up your yard this year with DIY Halloween wooden decorations in the shape of ghosts, cats, witches and pumpkins! 🎃👻🧙♀️ #HalloweenOutdoorDecoration #DIYHalloweenDecoration #OutdoorHalloweenDecoration #HalloweenWoodenDecoration Share on XPin this post with a tutorial for Halloween wooden decorations
Would you like a reminder these wooden Halloween cutouts? Just pin the image below to one of your Halloween boards on Pinterest so you can easily find it later.
