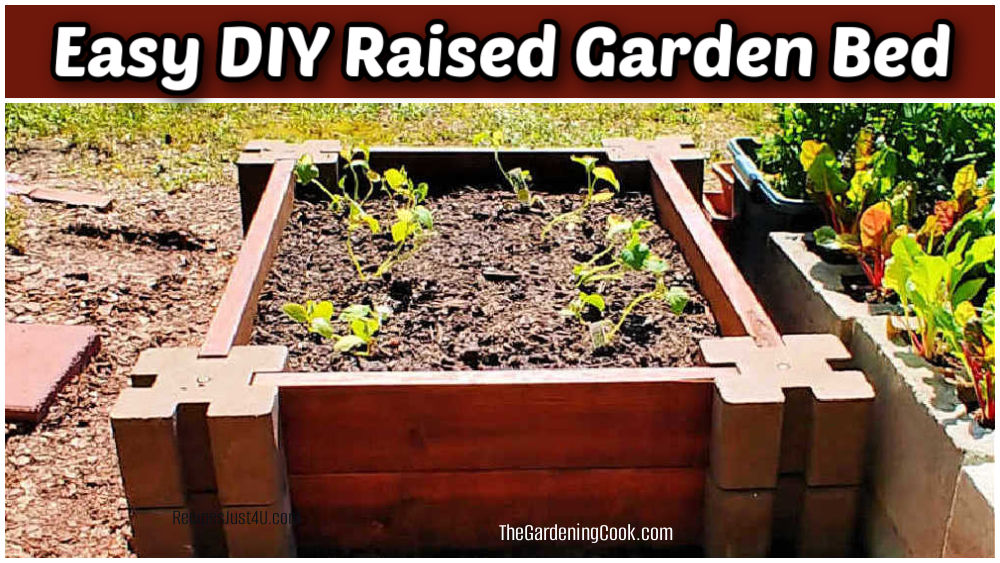
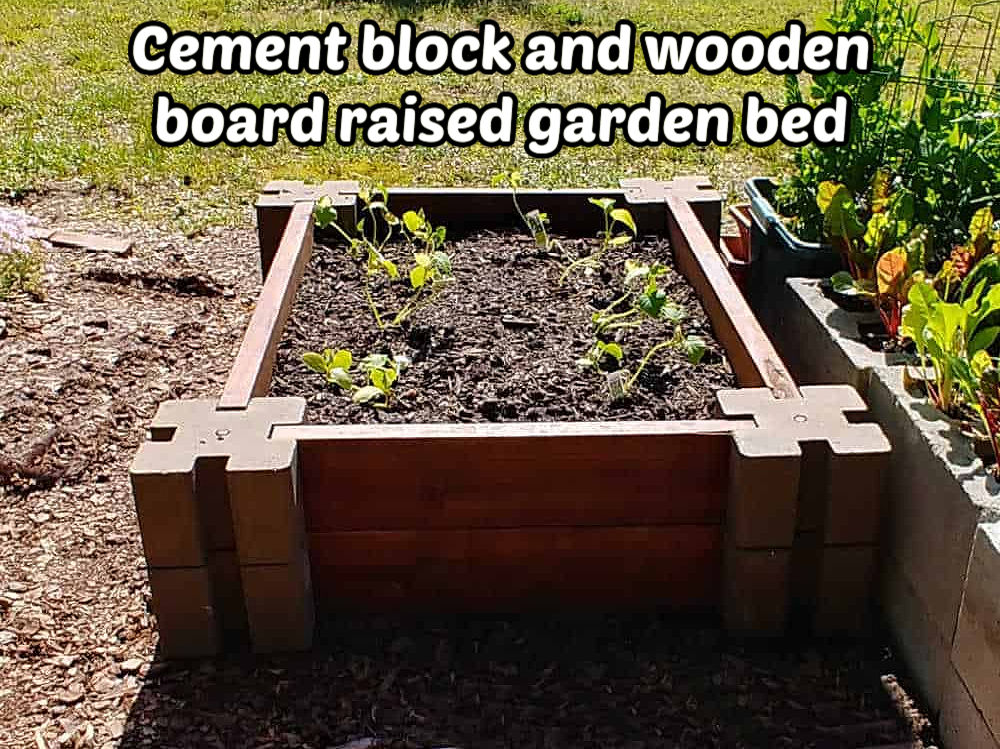
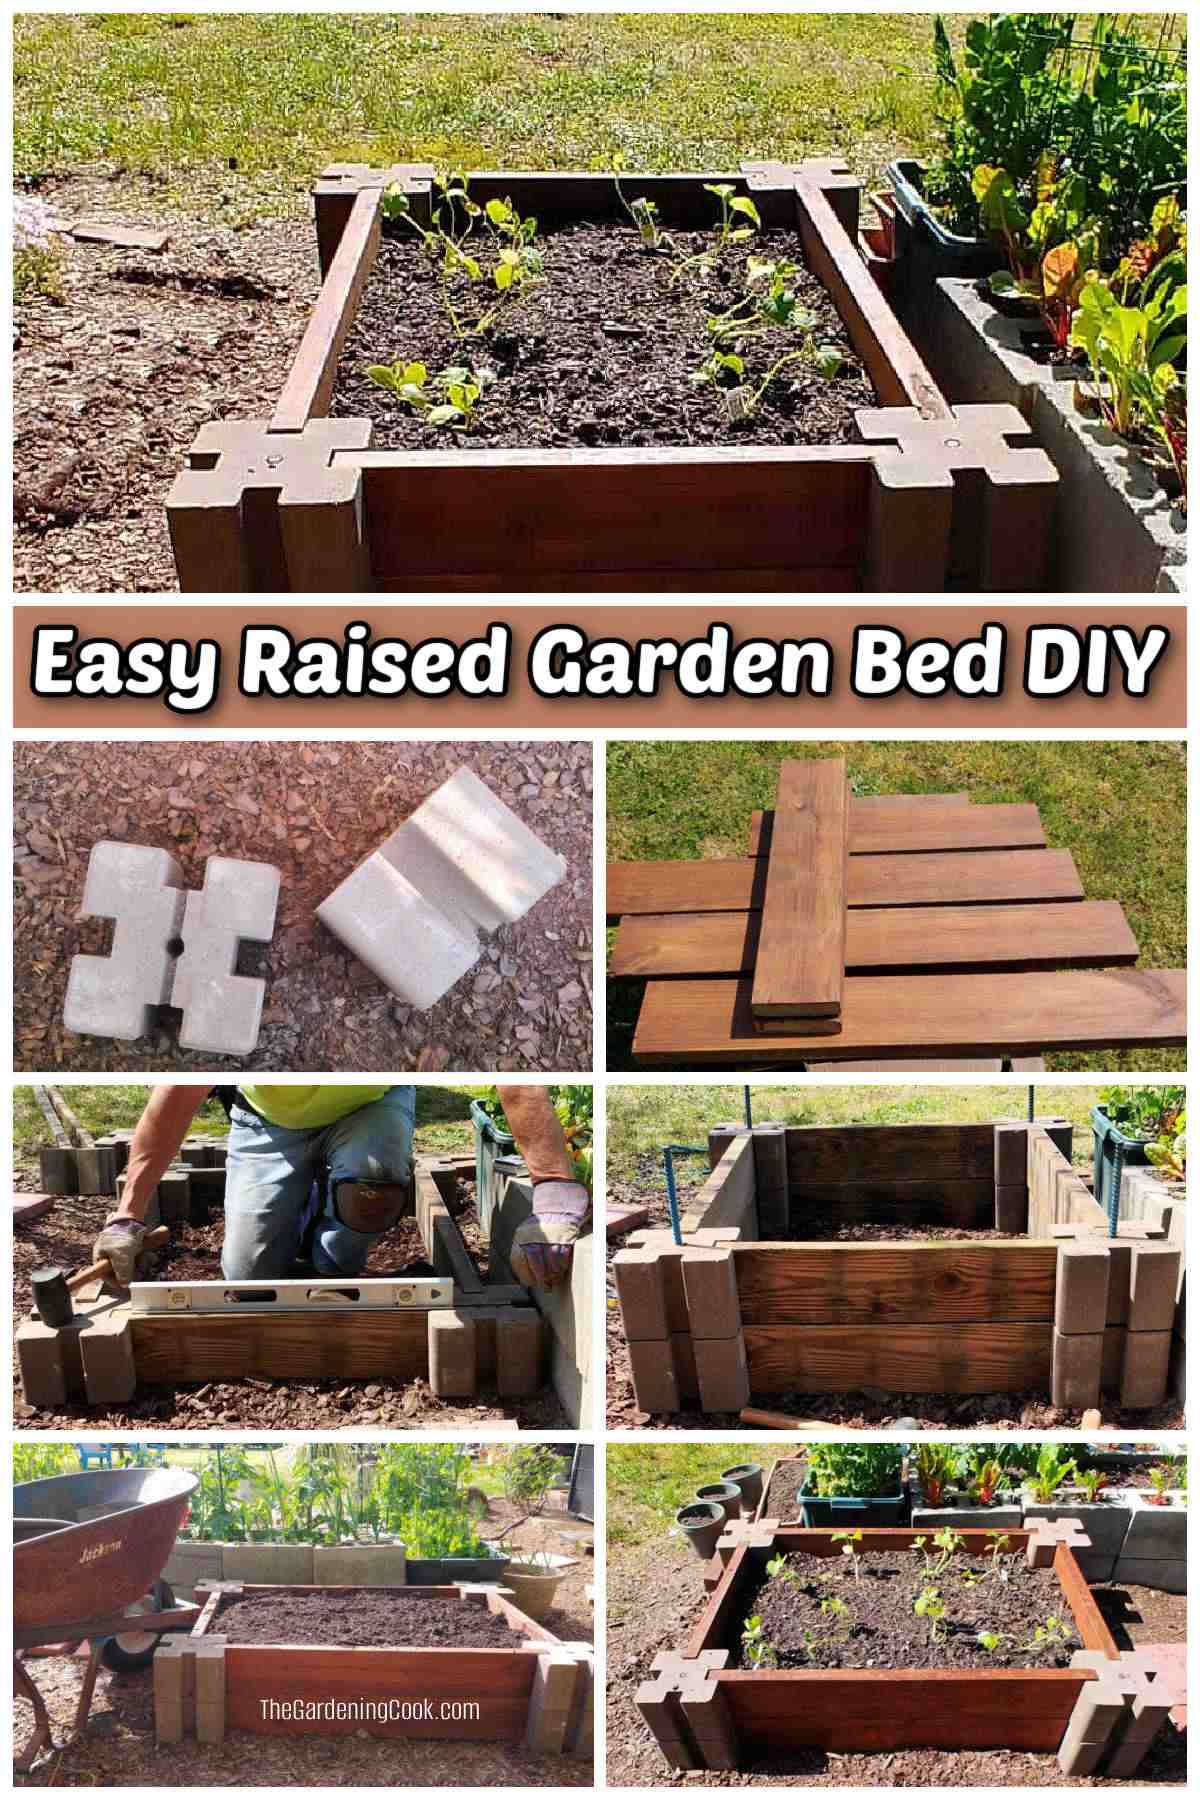
This easy raised garden bed is a simple DIY project built with a wood frame supported by concrete planter wall blocks at the corners. Once your materials are ready, the raised bed can be assembled in an afternoon.
Most of the work is in cutting and preparing the boards. After that, the bed comes together quickly during assembly.
Some of the links below are affiliate links. I earn a small commission, at no additional cost to you, if you purchase through an affiliate link.
Why this DIY is the easiest raised garden bed to build
This raised garden bed is the perfect project for beginners because its design stays simple from start to finish.
- No complicated joinery, specialty tools, or precision cuts required
- Uses basic materials that are easy to measure, cut, and assemble
- Simple structure that comes together quickly without advanced skills
The DIY garden bed can be built in just a few hours. Two of these beds took us about 3 hours to complete, and if your ground is already level, it will take even less time.
If you’re still deciding whether a raised bed DIY project is right for your space, you can read the pros and cons of raised garden beds here.
What makes this diy raised garden bed different
This raised garden bed design features a simple block-and-board system that keeps the build flexible and affordable.
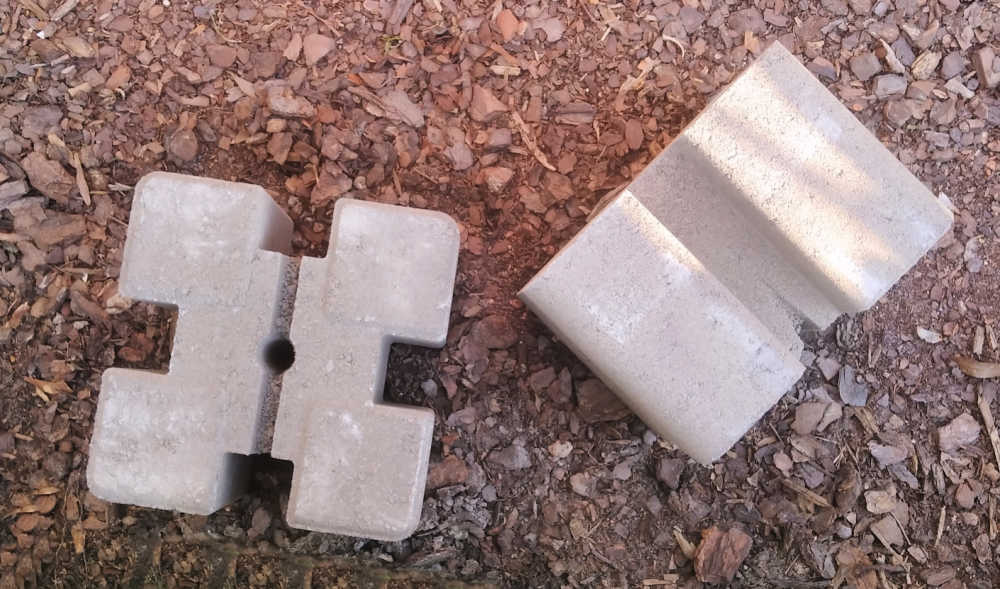
- Uses concrete planter wall blocks instead of cinder blocks for corner supports
- Unlike a cinder block raised garden bed, the concrete planter wall blocks support wooden boards
- Boards slide into built-in slots to form the sides
- No fixed sizing – board length determines the final dimensions
- Built from basic, easy-to-find materials instead of pre-cut kits
- More affordable than most store-bought raised garden bed systems
- Expandable design since blocks can be stacked to increase height
- Eliminates the need for brackets or complex joinery
This system makes it simple to customize the size and layout while keeping the build straightforward for beginners.
Materials and tools for an inexpensive raised garden bed with concrete planter wall blocks
The materials needed for this raised garden bed DIY will vary depending on the size you choose to build. This example uses a finished bed that is approximately 4 feet square.
Using recycled or reclaimed materials can significantly reduce the cost of your raised bed. In this project, the only items purchased were the concrete blocks, soil, and plants.
Materials
- 8 lengths of 2 x 6-inch pressure-treated lumber
- 8 concrete planter wall blocks (cinder block style corner supports)
- 4 pieces of rebar for stabilizing the corner blocks
- ¼ quart of exterior wood stain
- Approximately 12 cubic feet of soil (a 50/50 mix of compost and topsoil)
- Vegetable garden plants
Tools
- Skill saw, or hand saw
- Paint brush
- Rubber mallet
- Spirit level
- Shovel
- Wheelbarrow
Note: Power tools, electricity, and other items used for this project can be dangerous unless used properly and with adequate precautions, including safety protection. Please use extreme caution when using power tools and electricity. Always wear protective equipment, and learn to use your tools before you start any project.
Step 1: Plan the size and cut your boards

Plan the size of your raised garden bed, then cut your boards to match. The board length determines the final dimensions of the bed.
For a rectangular garden bed about 4 feet long, we cut:
- 4 boards: 4 ft 2 in
- 4 boards: 3 ft 9 in
If you want your garden bed to be square, you can cut the boards all the same length.
Optional prep (saves time later)
Stain the boards now and let them dry while you prepare the site.
Note: Pressure-treated wood manufactured after 2003 is generally considered safe for vegetable garden beds.
Step 2: Choose and prepare the location for your raised garden bed

- Start by preparing the ground for your raised garden bed.
- Loosen or till the soil underneath the bed area.
- Since this simple DIY raised garden bed has no bottom, loose soil helps plant roots grow deeper.
Step 3: Set and level the concrete block corner supports
- Arrange the concrete planter wall blocks in position to match the size of your cut boards.
- Adjust the blocks until you’re happy with the layout.

Step 4: Build the frame between the corner blocks
- Slip one set of the boards into the openings in the planter wall blocks.
- Use a spirit level to check that all sides are even.
- If needed, add soil under any low blocks to level them.
- Recheck until the entire frame is level.

Step 5: Secure and square the garden bed structure
- Add a second layer of planter wall blocks on top of the first row.
- Slide the second set of boards into place.
- Insert a piece of rebar into the center hole of each block.
- Use a rubber mallet to drive the rebar into the ground until secure.
The rebar stabilizes the raised garden bed and helps keep the structure square, especially once the soil is added.
Step 6: Fill the raised garden bed with soil mix

Fill your raised garden bed with a nutrient-rich soil mix.
- Use a 50/50 blend of compost and topsoil for a balanced growing mix
- Fill the bed to within 1–2 inches of the top edge
- Lightly level the surface with a rake or shovel
We bought our soil and compost by the cubic yard, which is a cost-effective option for filling larger raised beds.
You can also use bagged soil and compost, but this will increase the overall cost of the project.
Step 7: Plant your raised garden bed

Now it’s time to plant your raised garden bed. Choose vegetables, herbs, or flowers based on your growing season and available space.
- Plant seedlings at the same depth they were growing in their original containers
- If using seeds, follow the packet instructions for planting depth and spacing
- Place taller plants toward the center or back of the bed and smaller plants around the edges
- Water thoroughly after planting to help settle the soil around the roots.
In this bed, I planted burpless cucumbers and pickling cucumbers, along with yellow onion sets around the border. These are compatible companion plants and grow well together in a shared space.
One of the benefits of a raised garden bed is that you can plant more intensively than in traditional in-ground gardens, as long as you still allow enough space for airflow and growth.
You can also use a mix of seedlings and direct-sown seeds, including heirloom varieties. Peppers and beans also grow very well in raised garden beds.
Common mistakes when building raised garden beds
When building a raised garden bed DIY project, avoiding a few common mistakes can determine how well your garden performs.
- Don’t build a bed too wide: Raised beds wider than 5 feet make it difficult to reach the center without stepping on the soil.
- Using poor-quality soil: Low-quality or dense soil can lead to poor drainage and weak plant growth.
- Poor location choice: Most vegetables need full sunlight to thrive, so avoid placing your raised garden bed in a heavily shaded area.
- Using the wrong materials: Thin or untreated wood boards can warp over time.
- Making beds too shallow: DIY raised garden beds under 10 inches deep can restrict root growth and dry out quickly in warm weather.
- No pathway space between beds: Leaving no room to walk between beds makes maintenance and harvesting difficult.
Building raised garden beds FAQ
Here are some common questions about building a DIY raised garden bed.
What kind of wood should be used for raised beds?
- Cedar is the best natural option because it resists rot and lasts longer when exposed to the elements.
- Pressure-treated wood, manufactured after 2003, is generally considered safe for vegetable gardens.
How deep should a raised garden bed be?
- Most vegetable beds work best if made 12–18 inches deep.
- Shallow-rooted plants can grow in beds as low as 8–12 inches.
What do you put in the bottom of a raised garden bed?
- If building over grass, you can layer cardboard, newspaper, and organic matter such as leaves or grass clippings.
- This helps suppress weeds and improve soil over time.

Related gardening guides you may find helpful
These guides will help you improve soil health, select the right crops, and achieve success from your raised garden bed.
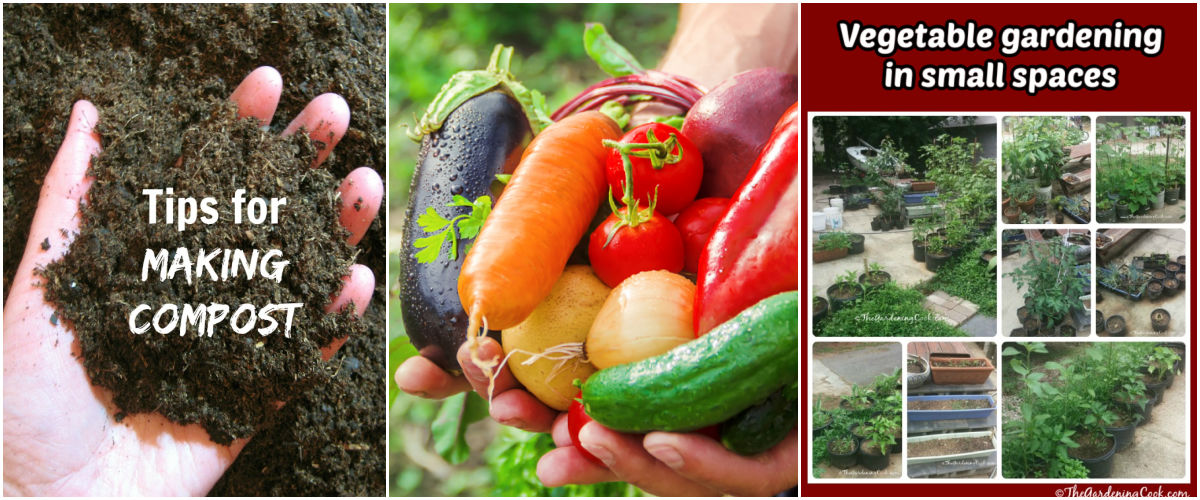
- Composting Guide – learn how to build rich soil for healthier raised garden beds
- Best Vegetables for Beginning Gardeners – easy crops that grow well in raised beds
- Vegetable Gardening in Small Yards – maximize space and productivity in limited garden areas
Share this project for a DIY easy raised garden bed on X
If you enjoyed learning how to build this raised garden bed, why not share the project with a friend?
Don't throw that old wood away. Combine it with cement planter wall blocks for the easiest and most inexpensive raised garden bed yet. Find out how to make one on The Gardening Cook.🥒🌽🥬🥕 Share on XPin this easy raised garden bed project for later
Would you like a reminder of this tutorial for building a DIY raised garden bed for vegetables? Just pin this image to one of your gardening boards on Pinterest so that you can easily find it later.
You can also watch our raised bed tutorial video on YouTube.
Admin note: This article on how to make a raised garden bed first appeared on the blog in April 2021. This post has been updated with step-by-step instructions and photos, a printable project card, and a slideshow video.
Easy Raised Garden Bed

This easy raised garden bed is flexible in design, beautiful to look at and it can be completed in just a few hours.
Materials
- 8 lengths of 2 x 6 inch pressure treated boards. Cut to the size of your space. (Mine were approximately 4 feet long.)
- 8 concrete planter wall blocks
- 4 pieces of rebar
- ¼ quart of rustic oak stain
- 12 cubic feet of soil. (I used a 50/50 compost and topsoil mix)
- Vegetable garden plants
Tools
- Skill saw or hand saw
- Paint brush
- Rubber mallet
- Spirit level
- Shovel
- Wheelbarrow
Instructions
- Cut your boards to size, making sure you have four of each length.
- Stain the boards and allow them to dry while you prepare the site.
- Loosen and roughly level the soil in the chosen location using a rake or shovel.
- Place four concrete planter wall blocks in position to outline the bed shape.
- Slide four cut boards into the block slots and check for level using a spirit level.
- Adjust the blocks by adding or removing soil until the frame is level.
- Add the second layer of blocks and insert the remaining four boards into place.
- Drive a piece of rebar through the center hole of each corner block.
- Use a rubber mallet to secure the rebar into the ground until flush with the top of the blocks.
- Fill the bed with a 50/50 mix of compost and topsoil.
- Plant vegetables or seeds and water thoroughly after planting.
Notes
The cost for this project will vary. We used reclaimed wood, bought compost/soil in bulk, and had both rebar and stain on hand. If you have to purchase soil in bags and treated lumber, your cost will be considerably more.
Recommended Products
As an Amazon Associate and member of other affiliate programs, I earn from qualifying purchases.