
How to Clean Drip Pans on Electric Stoves so They Look Like New
Do you have an electric stove with dirty drip pans that sit beneath the burners? Today, you’ll discover how to clean drip pans the easy way.
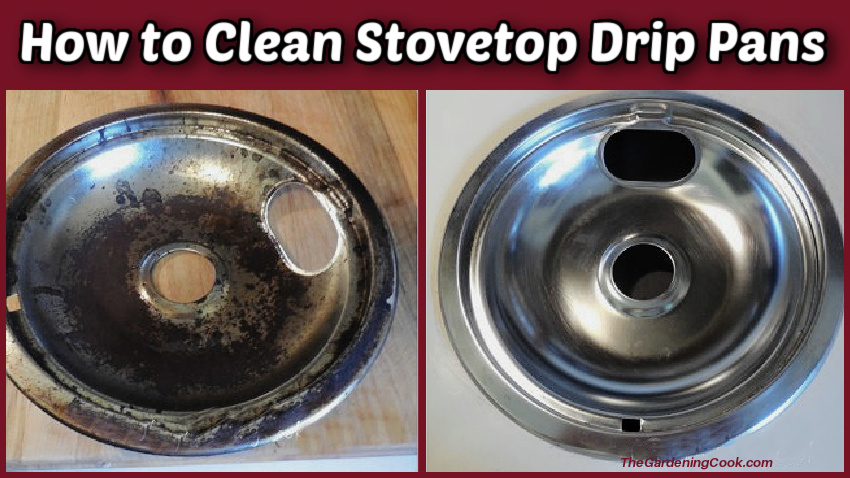
With just three common household ingredients and a little bit of elbow grease, your electric stove drip pans will be sparkling clean in just 24 hours.
This drip pan cleaning method works overnight, giving you sparkling clean stove drip pans that look like new!
Some of the links below are affiliate links. I earn a small commission, at no additional cost to you, if you purchase through an affiliate link.

Materials for drip pan cleaning
To make your drip pans look like new, you’ll need just three common household items:

Materials
- ¼ cup of household ammonia
- 4 Ziploc bags, gallon size (1 for each drip pan)
- 1 Scotch-Brite sponge with a nonstick pad on the back
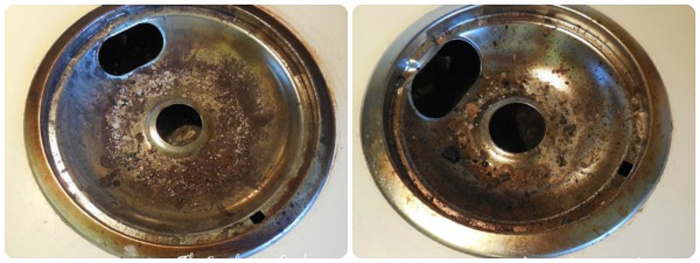
Photos of drip pans before cleaning
I have a four-burner electric stove, but use two burners most of the time. You can see how dirty they were when I started cleaning them.
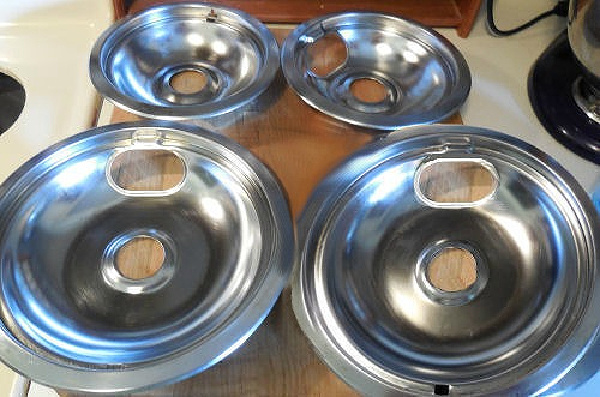
Photos of the drip pans after cleaning
And look at the difference after!
How to clean drip pans
Replacing dirty electric stove drip pans is expensive. Today, we’ll learn how to clean them so they look like new with just three ingredients and a bit of elbow grease for a fraction of the cost of new drip pans.
Ammonia soak
The trick with ammonia is to have the fumes work for you, not against you. We’ll use Ziploc bags to keep the fumes contained and near the burner pans.
- Pour ¼ cup of ammonia into each Ziploc bag.
- Place the bags in the drip-pan wells.
- Seal the bags and leave them for 24 hours.
The next day
- Remove the Ziploc bags from the drip pans.
- Throw away the ammonia and discard the bags.
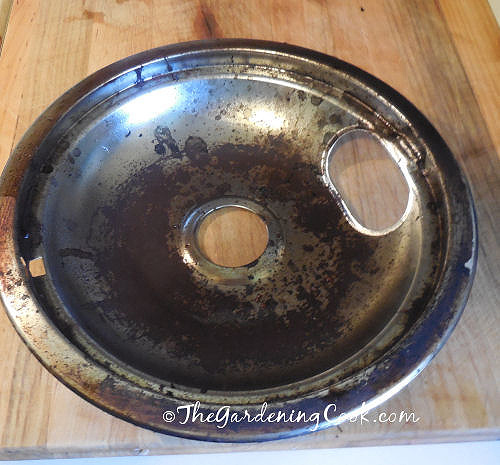
You will likely be disappointed at first. The burners will still look dirty. But don’t despair. This overnight magic requires one more step!
Finish the drip pan cleaning
- Use the Scotch-Brite pad to rub over the surface of the drip pans.
- On the dirtiest spots, you will need to scour a little with the rough surface of the pad, but not with any real elbow grease.
- On the lighter spots, wipe with the sponge, and it will remove the grime.
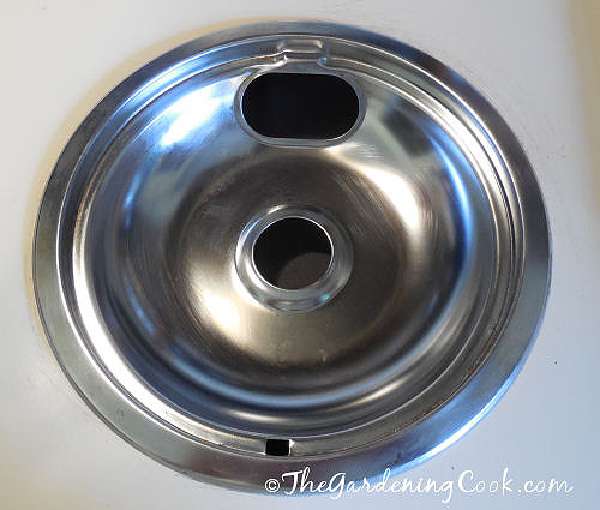
You will be amazed. Presto! The drip pans will look like new!
Note: This cleaning stove drip pans method works best with drip pans that have not been cleaned before. If you have cleaned the drip pans in the past with steel wool, the surface might be damaged, making cleaning more difficult. Also, the dirtier the pans are, the more you may need to scrub after the rubbing alcohol does it’s magic.
More cleaning tutorials
Why pay for expensive cleaning products? Here are more ideas to keep your home clean using common household ingredients.
Share this tutorial for cleaning stove top drip pans on X
If you enjoyed learning the best way to clean stove drip pans, why not share this post with a friend?
✨🧽 Make grimy stovetop drip pans easier to clean with this simple 3-Ingredient Drip Pan Cleaning Method! Let the pans soak overnight, then tackle the mess with very little scrubbing. No complicated cleaning routine or endless elbow… Share on X
Pin this post about stove drip pans cleaning
Would you like a reminder of this post about how to clean stovetop drip pans? Pin this image to one of your Pinterest Household boards so that you can easily find it later.
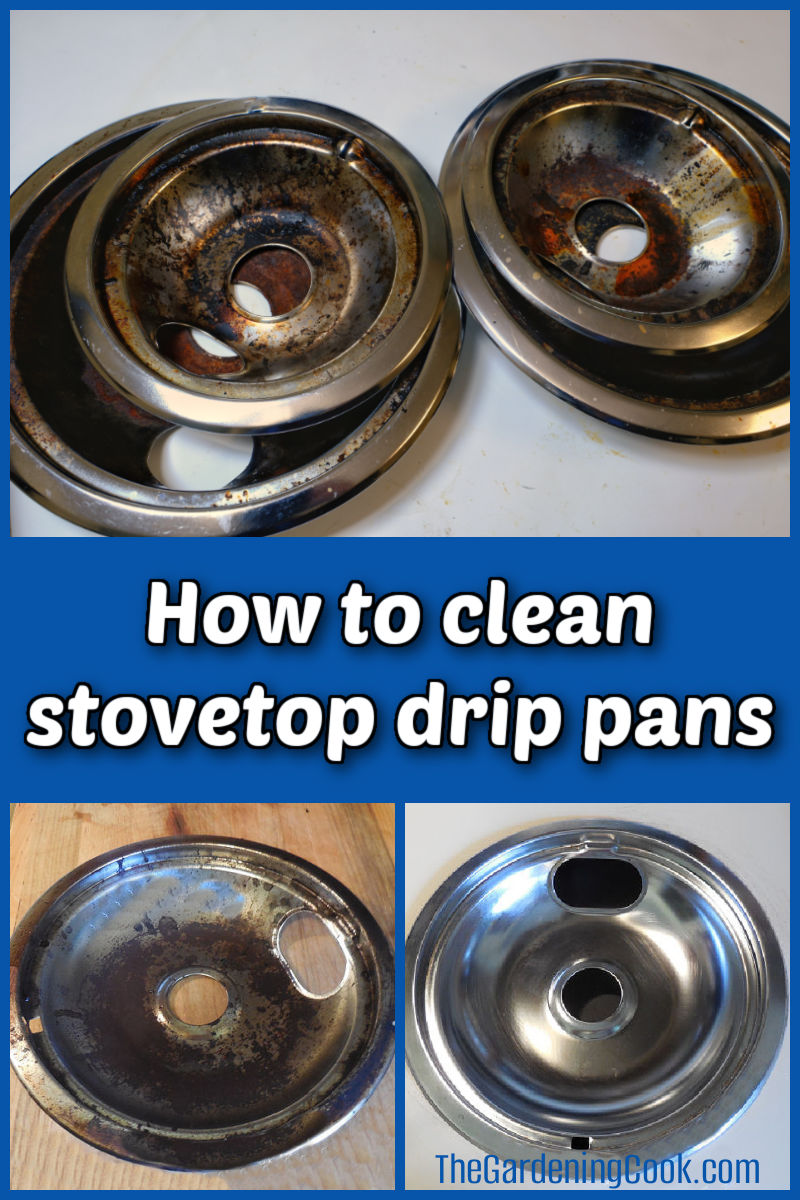
Admin note: This post on drip pan cleaning first appeared on the blog in July of 2014. I have updated the post to include new photos, a printable project card, and a slideshow video for you to enjoy.
How to Clean Drip Pans with Just 3 Ingredients

Clean your electric stove top drip pans easily with just three household ingredients and a little bit of time.
Materials
- ¼ cup household ammonia
- 4 Ziploc bags, gallon-size (1 for for each drip pan)
- 1 Scotch-Brite sponge with a non stick pad on the back
Tools
- A bit of elbow grease
Instructions
- Pour ¼ cup of ammonia into each Ziploc bag.
- Place the bags in the drip-pan wells.
- Seal the bags and leave them for 24 hours.
- Remove the Ziploc bags.
- Use the Scotch-Brite pad to rub over the surface of the drip pans.
- Presto! The drip pans will look like new!
Notes
This cleaning drip pans process works best with drip pans that have not been cleaned before. If you have used steel wool, grime will build up more, making it difficult to remove.
The dirtier the pans are, the more you may need to scrub, so I would recommend doing this often so they don't get too dirty.

Recommended Products
As an Amazon Associate and member of other affiliate programs, I earn from qualifying purchases.




I normally don’t like using toxic chemicals, but I’m with you… I’d rather give it a try than to pay money for new ones every few months!
Hi Becca. I am the same. I figure that the ammonia is contained in a zip lock bag, so it’s not so bad. Those things are expensive! Carol
Can u do this on black ones?
hi Mary, I have never tried this on the black enamel drip pans but I believe I have seen it used by others who have done so. I can’t guarantee that it won’t hurt the enamel though, since I have not tried it myself. It worked perfectly on stainless steel. Carol
Will definitely give this a try today and see if it really works.
This works on oven racks also. Put them in a black plastic garbage bag with ammonia, and place in the hot sun for a few hours. Gunk wipes right off! Just don’t let the rack pierce a hole in the bag. I usually put in on my driveway so when they’re done, I can open up the bag and rinse the ammonia away with a hose.
hi Jen. Thanks for the tip. Good to know that it works well. Carol
See that’s the problem, I dont want to have to scrub AT ALL. If you can cook in Teflon pans, why couldn’t the drip pans also be Teflon. I wouldn’t mind paying a little extra if they would last longer and clean up easier. Come on drip pan makers. Put your thinking caps on and come up with something, please.
Thanks for the info. I would love to know what the canisters with cats on them are used for! Very nice.
Hi. Those are called “Cats of distinction” and are made by Lennox. They hold spices. Very collectible now. I got mine in the 1970s. Carol
I tried this & it made the drip pans worse!! It actually etched into the metal & turned them almost completely black. They started out looking similar to what yours started out as, but 24 hrs later it looked like someone threw them in a campfire. I couldn’t get any of it off. My drip pans are ruined & I had to buy new ones :'(
HI Angi. Wow I am amazed that you had that experience. The photos in my article are ones that I took myself and show the results I had. I cleaned them quite a while ago and they are still looking like new. Carol
I wonder were her pans aluminum? aluminum might react differently with the ammonia?? just a thought.
If you only use 1/4 cup of ammonia then the pans are not submerged correct? Im wondering how it cleans them if there is barely any liquid in them?
HI April. I thought exactly the same thing, but I only used the 1/4 cup. I think it is the fumes that does the job, not the liquid. Carol
I had the same issue Angi! I had to buy new pans. I wonder if it was just the brand of pan?
That really is odd. This worked so easily for me. Were yours silver finish or enamel Crystal? Mine were the silver ones and I originally bought them at Target. Carol
Angi and Crystal had ALUMINUM drip pans.
Your tip is one I have used for over 30 years on chrome or stainless steel as I owned a professional cleaning service.
Thanks Donna. That explains it then. Aluminum is much thinner than stainless steel. Thanks for the comment. Carol
This is awesome! We’ll be featuring it in our Home Selling blog series this week as we help Chicago’s NW suburbs’ home sellers prepare their kitchens for showings. Feel free to drop in and say hi.
Thanks again,
The Rob Morrison Team
I too am frugal & don’t want to shell out $15 for a cheaply made aluminum drip pan. Typically I soak mine in highly consented soapy water then scrub like a mad woman. So I was super excited to try this new method.
Maybe I missed a crucial step but this didn’t seem to make a big difference. Very little crud came off even with tenacious scrubbing. And I let the pans soak over 24 hours. The instructions seemed simple enough. Any suggestions?
Hi Lisa. When I did mine, they worked just like the photos show. The drip pan liners were relatively new but fairly coated with junk. Yesterday I tried it on some old ones that were a real mess and they had been done before. It did not work as well. So my take on this was this:
1. This works best for a one use thing, (nevr been cleaned) even if really dirty
2. On second use, if the junk is caked on, it does not work as well.
3. On second use, it works if the junk is moderately on.
The inner drip area was the problem for me this time.
Carol
I have white enamel drip pans and this method worked great! I previously spent a lot of time scrubbing them. I have to soak one again but very little crust is left on it.
Hi Rochelle. Glad this worked well for you. Carol
Thanks for tips!
My pleasure Renee. Glad you liked them. Carol
I scrubbed mine with Barkeepers Friend and a scrubber. It is made of rhubarb powder and does not scratch. It is the only way I could get mine clean. I have been known to cover them with aluminum foil as my landlord only replaces them at most once a year.
Thanks Marj. I have not heard of that product. I’ll look for it. Carol
Hi, this sounds very easy I just want to know how much ammonia and can you put the actual burner and the drip pan in the bag?
Hi Haleigh. I put one half cup of ammonia in the bag and put it into the wells of the drip pans and sealed the bag and left it over night. I have NOT put the burners themselves into the bag to clean them so I don’t know about that. Carol
@Haleigh, I know this is old, but to get off stuff on the burner, the best way is to turn on the burner and let it burn off. The burners I don’t use get splashed with stuff, and I turn them on and they come right off, looks like I never touched them.
I’ve used amonia succeessfully in the past. My ques is, how do I get the pans out of the range? My old range had a slot on the back of the pan, so they lifted right out. The new pans don’t have that slot.
Hi Betty. I am not familiar with all types or ranges. Perhaps your owners manual will give you some help on this question.
Carol
I am currently cleaning up a vintage stove I just purchased and I am going to try this on the original drip pans cause they are baaaaad! Fingers crossed I will let ya know! 🙂 thanks for the tip!
Hi Lisa. I hope it works for you. I’ve had mixed results on older drip pans. It seems the more they have been cleaned, the harder it is to get the stuff off easily. Mine were a mess but not too old. Carol
I was also in problem when plates got black I wash it with jiff. The result was good but after a while I got tired and I arrange a new pair and got relief
I used it on my drip pans for the first time. Although they did not come out “sparkling
clean – like new”, they were a great deal easier to clean with the use of a Brillo pad,
than scrubbing till my fingertips hurt.
I had best luck getting them like new the first time I cleaned them. After that they still looked good but not like the first time. Carol
@jabeve, I agree. In my case, the burnt on food outlasted the brillo pad and scrubbing, not to mention my finger tips and knuckles. I have enamel drip pans and not stainless steel though. The enamel dad turn out as ‘good as new’. Success level likely depends on pan material. Following this post, it seems that if you have aluminum drip pans, this method of cleaning produces less than desirable results. The ammonia apparently causes the aluminum to oxidize, leaving it black.
I use windex to clean my refrigerator let set and wipe with paper towels or cloth and any kitchen appliances like toaster, top of stove, front of dishwasher and refrigerator
I have some cheap electric drip pans that are discolored and rusty. I am hoping this works on them.
I had best luck with drip pans that had not been previously scratched too much from use. Hope this works well for you.
I tried this on my dripped pans and it worked like a charm😊
I buy disposable aluminum burner liners at Walmart. They fit my large and small drip pans nicely. These liners are similar to disposable aluminum baking pans. They generally keep the chrome or steel drip pans stain-free. When the liners look bad, I simply throw them out and replace them with new liners.
Sadly, I just went to the store to buy said needed items and the cost here in Hawai’i to buy new drip pans is cheaper than buying the necessary products as I don’t normally have ammonia, gallon zip bags or scour sponges.
This is not to any particular person. But I saw a comment a while back about putting aluminum foil over drip pans. No, no and no. I highly recommend that nobody should do this method. It can create a fire hazard and actually damage the stove or heating element. Thanks. P.S. I have black drip pans and I use barkeeper’s friend. This stuff is magic. No fumes either. Stuff comes right off and keeps the black glossy.